Posts tagged olive oil
BALSAMIC ROASTED GREEN BEANS + MAPLE SAGE CASHEWS
green-beans-featured.jpg

THANKSGIVING MENU WEEK ONE: There is kind of a Thanksgiving code… a way most of us do Thanksgiving.

Eat whatever you want.

Eat as much as you want.

Take a nap.

Eat dessert.

We all know that we Americans go a little (or a lot) overboard when it comes to our food intake on this glorious holiday.

In fact, we even have articles and websites devoted to “stretching your stomach to accommodate more food” and “how to overcome the post-meal bloat”.

I am all for enjoying amazing food and eating to your hearts content on Thanksgiving day… but how many of us love the leftovers even more than the meal itself?

If you are anything like my family, the Thanksgiving meal is enjoyed for several consecutive days!

So, you do the math. If we make a bunch of not-so-great for you dishes for Thanksgiving, we will most likely be filling our bodies with those ingredients for several days to follow… not just one meal.

What if we could indulge in delicious food on Thanksgiving and use real and fresh ingredients that will fuel your body of the days to come instead of inducing a weeklong food coma?

I’m not talking about eating Tofurky and boiled carrots. I’m talking about mouthwatering, delicious, flavor-packed and nutrient rich foods.

For the next few weeks leading up to Thanksgiving, I will be sharing some recipes I’ve been working on for our Thanksgiving meal this year as well as some favorites from years past and from some of my favorite food blogs.

I’d love to hear what you have planned as well! Feel free to ask questions and share ideas with all of us!

ENJOY!

Elizabeth

PS: at the bottom of this post you will also find my mom's recipe she uses every year to brine her turkey. It is the best turkey there is!

BALSAMIC ROASTED GREEN BEANS + MAPLE SAGE CASHEWS

Serves 10-12

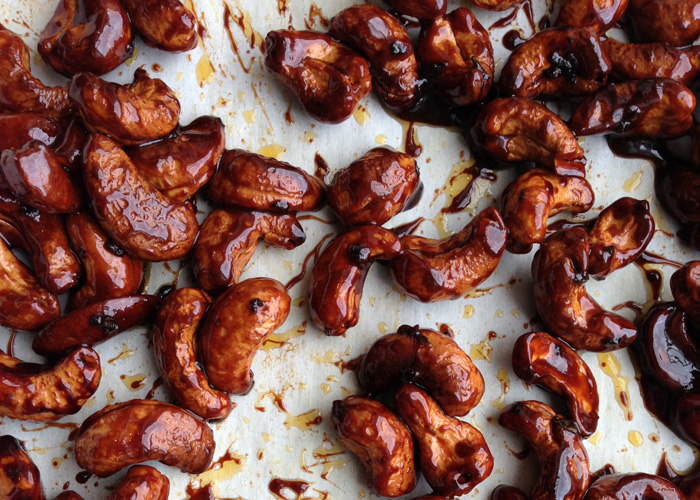
MAPLE SAGE CASHEWS:

INGREDIENTS:

¼ C maple syrup

1 T earth balance butter (or real butter)

2 tsp finely chopped sage (lightly packed)

½ t sea salt

1/8 t cayenne pepper (more if you want a little more kick)

1 ¼ C raw cashews

TO MAKE:

Preheat oven to 375F.

In a small saucepan, heat syrup and butter on low until the butter is melted. Add chopped sage, sea salt and cayenne pepper. Stir well.

Remove from heat and stir in cashews. Coat evenly.

*there will be a little bit of excess liquid but it will absorb into the cashews when baked.

Spread cashew mixture over parchment paper on a baking sheet.

Bake for 25 minutes, stirring every 5 minutes. Stirring is important so they don’t burn!

Let them cool completely before removing from the baking sheet.

*you may have to break them apart a little if they stick together after they cool.


BALSAMIC ROASTED GREEN BEANS:

INGREDIENTS:

8 C fresh or frozen green beans (about two pounds)

1 T olive oil

3 T  balsamic vinegar

1 T maple syrup

1 T minced garlic

3/4 t sea salt

1/3 C dried cranberries

TO MAKE:

Preheat oven to 400F

Stir together olive oil, balsamic vinegar, minced garlic and salt.

Cover two baking sheets with foil and spread the green beans each sheet evenly.

*I used the organic frozen green beans from Costco but I would try fresh green beans next time for a crisper texture. Either one works great though!

Drizzle the balsamic mixture over each baking tray and stir well until the beans are evenly coated.

Bake for about 20 minutes or until the edges of the green beans get a little brown.

TO SERVE:

Spread green beans on a large plate or tray and sprinkle the maple sage cashews and dried cranberries over the top.

ENJOY!

[print_this]

BALSAMIC ROASTED GREEN BEANS + MAPLE SAGE CASHEWS

Serves 8 - 10

MAPLE SAGE CASHEWS:

INGREDIENTS:

  • ¼ C maple syrup
  • 1 T earth balance butter (or real butter)
  • 2 tsp finely chopped sage (lightly packed)
  • ½ t sea salt
  • 1/8 t cayenne pepper (more if you want a little more kick)
  • 1 ¼ C raw cashews

TO MAKE:

  • Preheat oven to 375F.
  • In a small saucepan, heat syrup and butter on low until the butter is melted. Add chopped sage, sea salt and cayenne pepper. Stir well.
  • Remove from heat and stir in cashews. Coat evenly.
  • *there will be a little bit of excess liquid but it will absorb into the cashews when baked.
  • Spread cashew mixture over parchment paper on a baking sheet.
  • Bake for 25 minutes, stirring every 5 minutes. Stirring is important so they don’t burn!
  • Let them cool completely before removing from the baking sheet.
  • *you may have to break them apart a little if they stick together after they cool.

BALSAMIC ROASTED GREEN BEANS:

INGREDIENTS:

  • 8 C fresh or frozen green beans (about two pounds
  • 1 T olive oil
  • 3 T C balsamic vinegar
  • 1 T maple syrup
  • 1 T minced garlic
  • 3/4 t sea salt
  • 1/3 C dried cranberries

TO MAKE:

  • Preheat oven to 400F
  • Stir together olive oil, balsamic vinegar, minced garlic and salt.
  • Cover two baking sheets with foil and spread the green beans each sheet evenly.
  • *I used the organic frozen green beans but I would try fresh green beans next time for a crisper texture. Either one works great though!
  • Drizzle the balsamic mixture over each baking tray and stir well until the beans are evenly coated.
  • Bake for about 20 minutes or until the edges of the green beans get a little brown.

TO SERVE:

Spread green beans on a large plate or tray and sprinkle the maple sage cashews and dried cranberries over the top.

ENJOY!

[/print_this]


[print_this]

DIANE'S TURKEY BRINE:

  • 16 quarts water
  • 1 ½ c kosher salt
  • 1 ½ c pure maple syrup
  • 4 T black peppercorns
  • 16 garlic cloves, crushed
  • 2 lemons, thinly sliced

To prepare the brine, combine all ingredients in a large stockpot, stirring until the salt dissolves.

To prepare the turkey, remove giblets and neck from the turkey. Rinse turkey with cold water; pat dry, trim excess fat.

To brine the turkey, I place it in a plastic garbage sack, which I then put in a large ice chest. Then I carefully pour the brine over the turkey until it is well covered. Tie it up tight and the leakage is minimal. Surround the bag with ice and close it up.

If you have a large enough pot, it would be easier to put the whole thing in the fridge to brine. But who has a pot big enough for a 24-pound turkey?

Allow at least 24 hours for the turkey to soak in the brine.

On Thanksgiving morning, remove the turkey from the brine; pat dry. Starting at the neck cavity, loosen the skin from breast and drumsticks by inserting fingers, gently pushing between skin and meat. Rub thyme mixture under loosened skin, sprinkle inside body cavity.

At this point, I put some of my sausage stuffing into the cavities of the turkey. The stuffing will be somewhat sweet. Do not over fill the cavity. I put the rest of my stuffing into the crock-pot and add plenty of broth so it doesn’t dry out.

Roast the turkey as per directions on the wrapping. After about an hour, start to baste it with the cola/syrup mixture every so often.

I love to use the drippings to make gravy with- but its sweet, so I also usually buy good gravy at Trader Joe’s for those who prefer a more traditional gravy on their turkey and mashed potatoes.

That’s it! Hope you enjoy it as much as we do.

SPICE RUB:

  • 4 T minced fresh thyme
  • 2 T dried rubbed sage
  • 2 T poultry seasoning
  • 1 t black pepper
  • 8 garlic cloves, chopped
  • 4 onions, quartered (I use red onions mostly because they turn a burgundy color)

COLA SYRUP

  • 2 C cola (not sugar free! I use the stuff from Trader Joe’s, as it’s not so full of unpronounceable additives)
  • 1 C pure maple syrup

Boil cola and syrup in a small saucepan for one minute or so until it thickens up a bit.

[/print_this]

TERIYAKI SALMON BOWLS + GRILLED VEGGIES

  To me, Whole Foods is a little slice of heaven on earth.

Some women like to window shop and drool over beautiful clothes…

I prefer to peruse the isles of Whole Foods.

(Ok, I love clothes too but window-shopping is not really my thing… I like shopping to buy better)

Anyway… I love to stroll down the isles and dream of new meals to create and flavors to try.

Beyond just shopping there, they have some of the best lunch and dinner meals around. If you have not gone to their Marketplace for a meal, you really need to!

They have EVERYTHING. Mexican, Italian, Indian, Sushi… you name it, they have it and everything is delicious! I know that most of the store is pretty spendy (my husband calls it “Whole Paycheck”) but their meals are really quite reasonably priced.

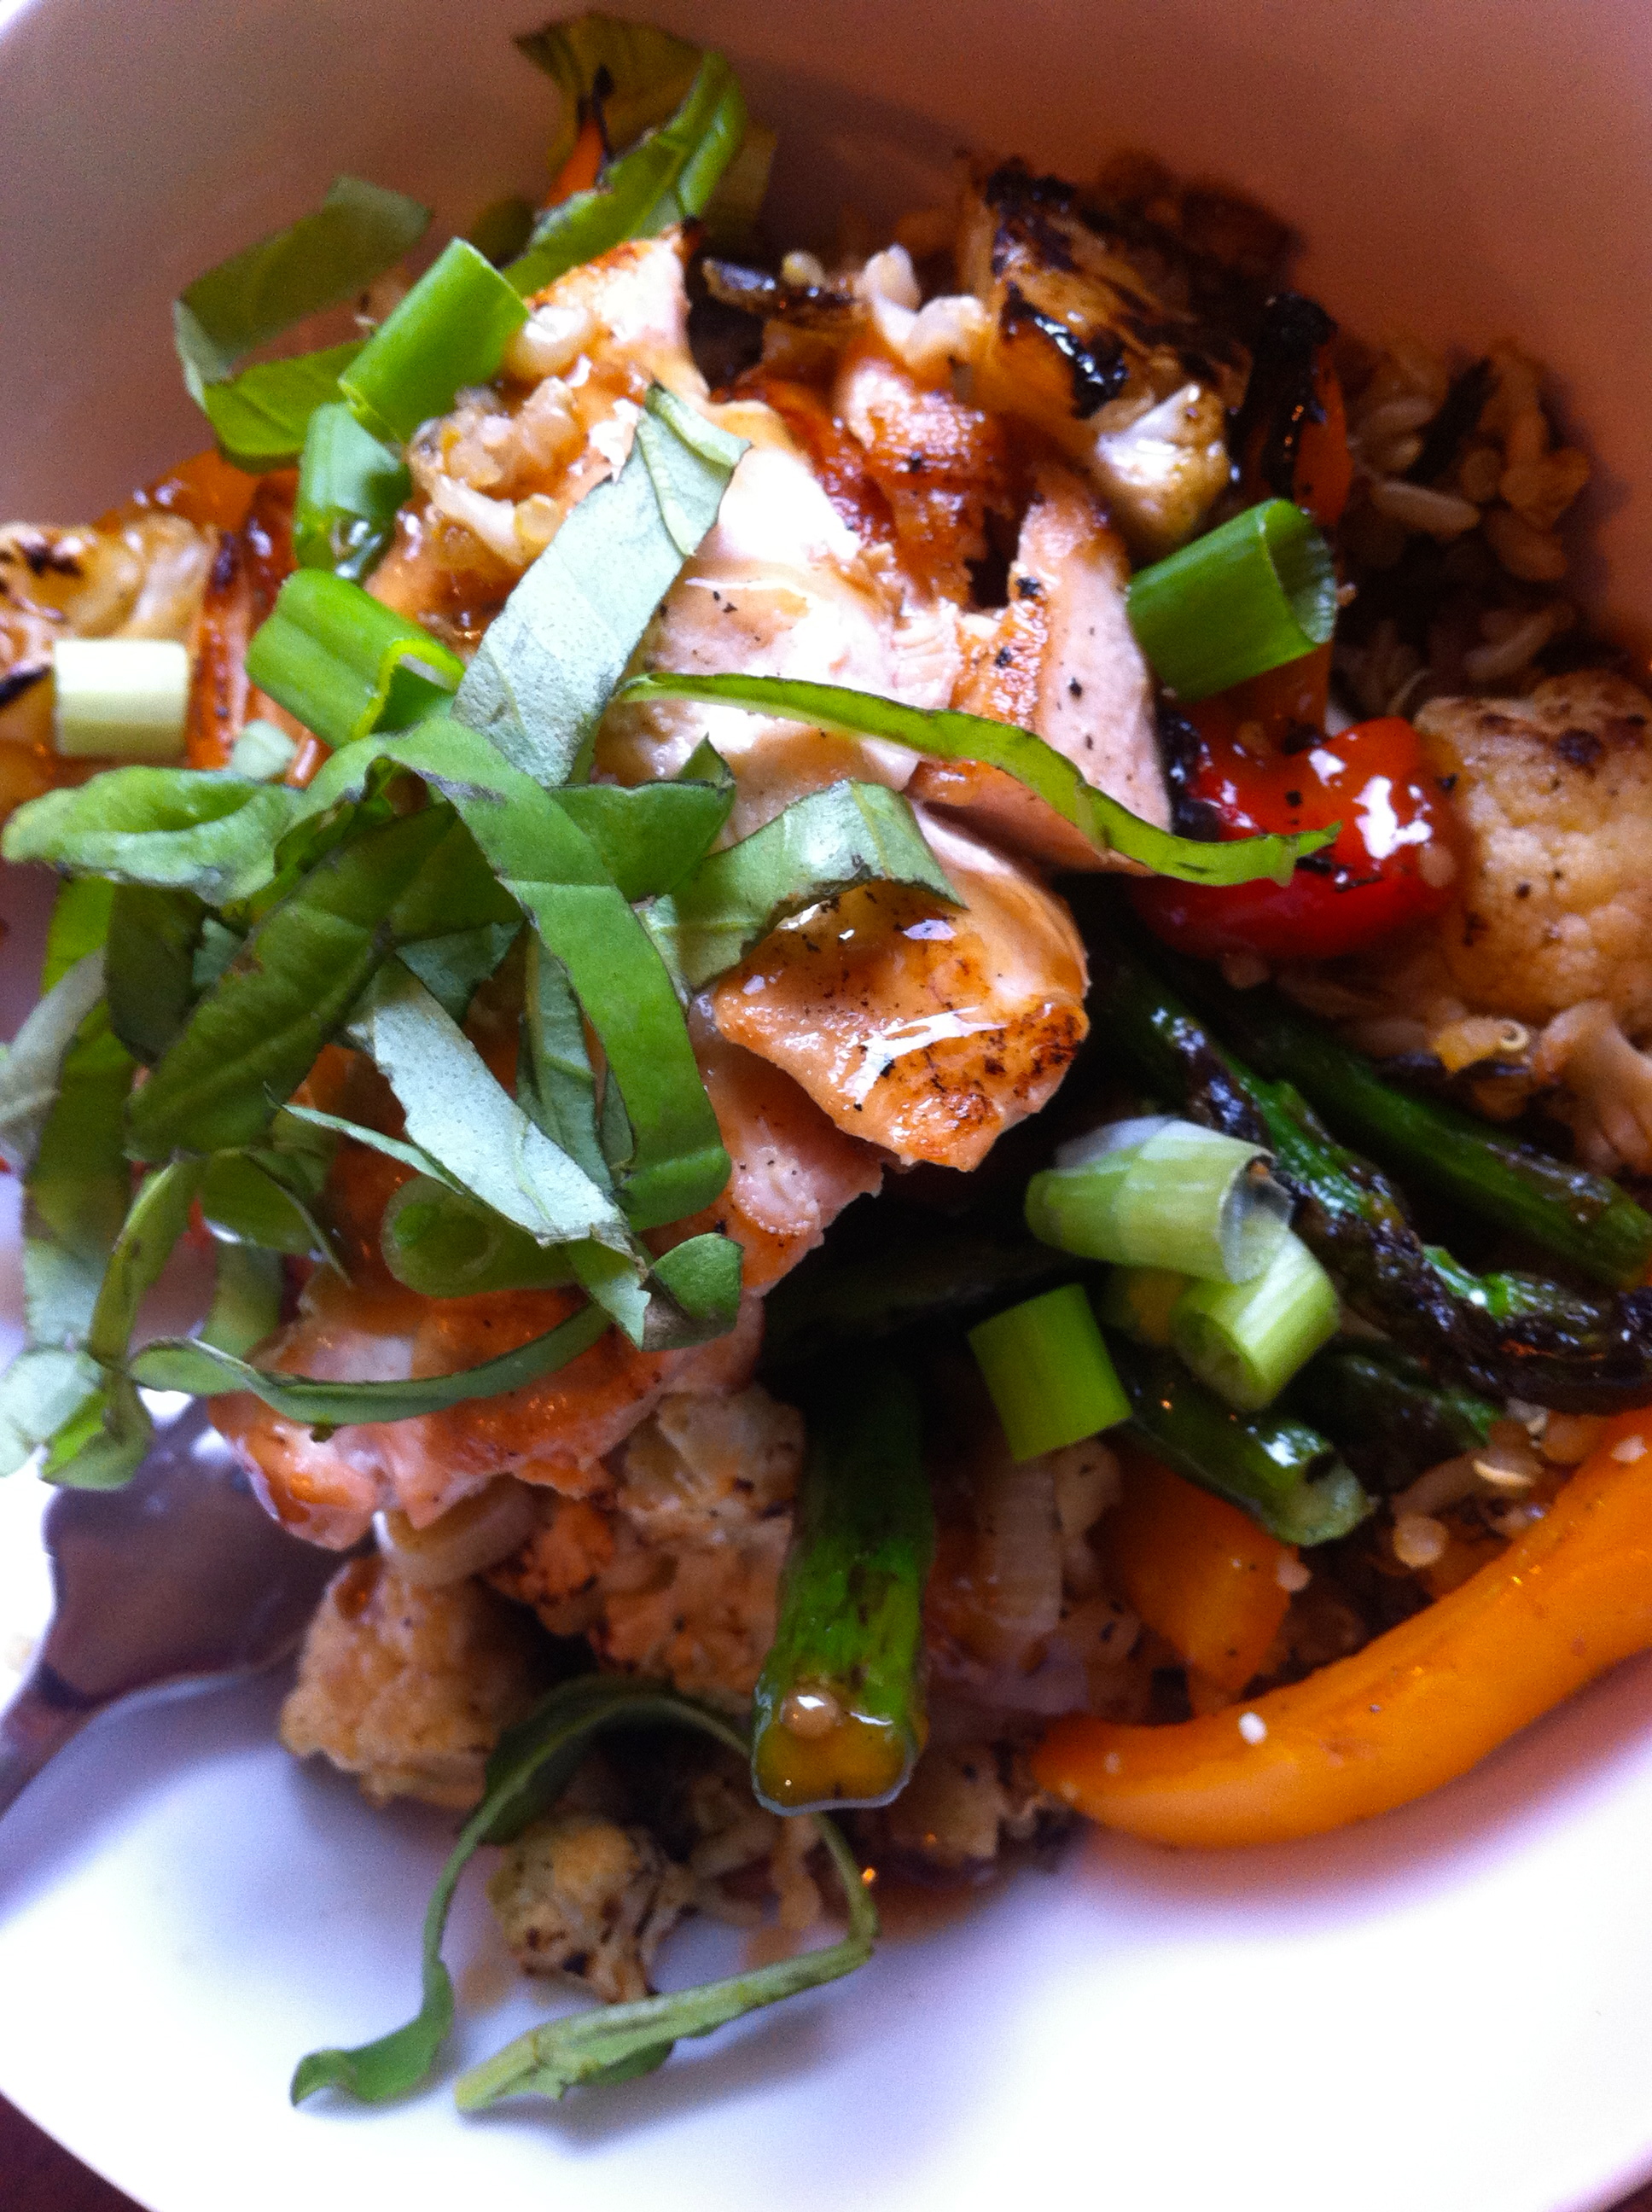
One of my favorite things to eat there lately is their Teriyaki Salmon Bowls. I pretty much want one all day, everyday so it was time to attempt to make them at home.

Now if I can just convince my husband that he wants these everyday too…

ENJOY!

Elizabeth

GLUTEN FREE TERIYAKI SAUCE

INGREDIENTS:

1/4 C Bragg’s amino acids

3/4 C water

1 tsp minced ginger

2 tsp minced garlic

2 T brown sugar

1 T cornstarch

Couple of dashes of cayenne pepper

TO MAKE:

Heat in a saucepan over medium heat until it boils. Then reduce to a simmer until it thickens. Stir frequently.


GRILLED SALMON AND VEGGIE BOWLS

Adjust quantities according to how many you are serving

INGREDIENTS:

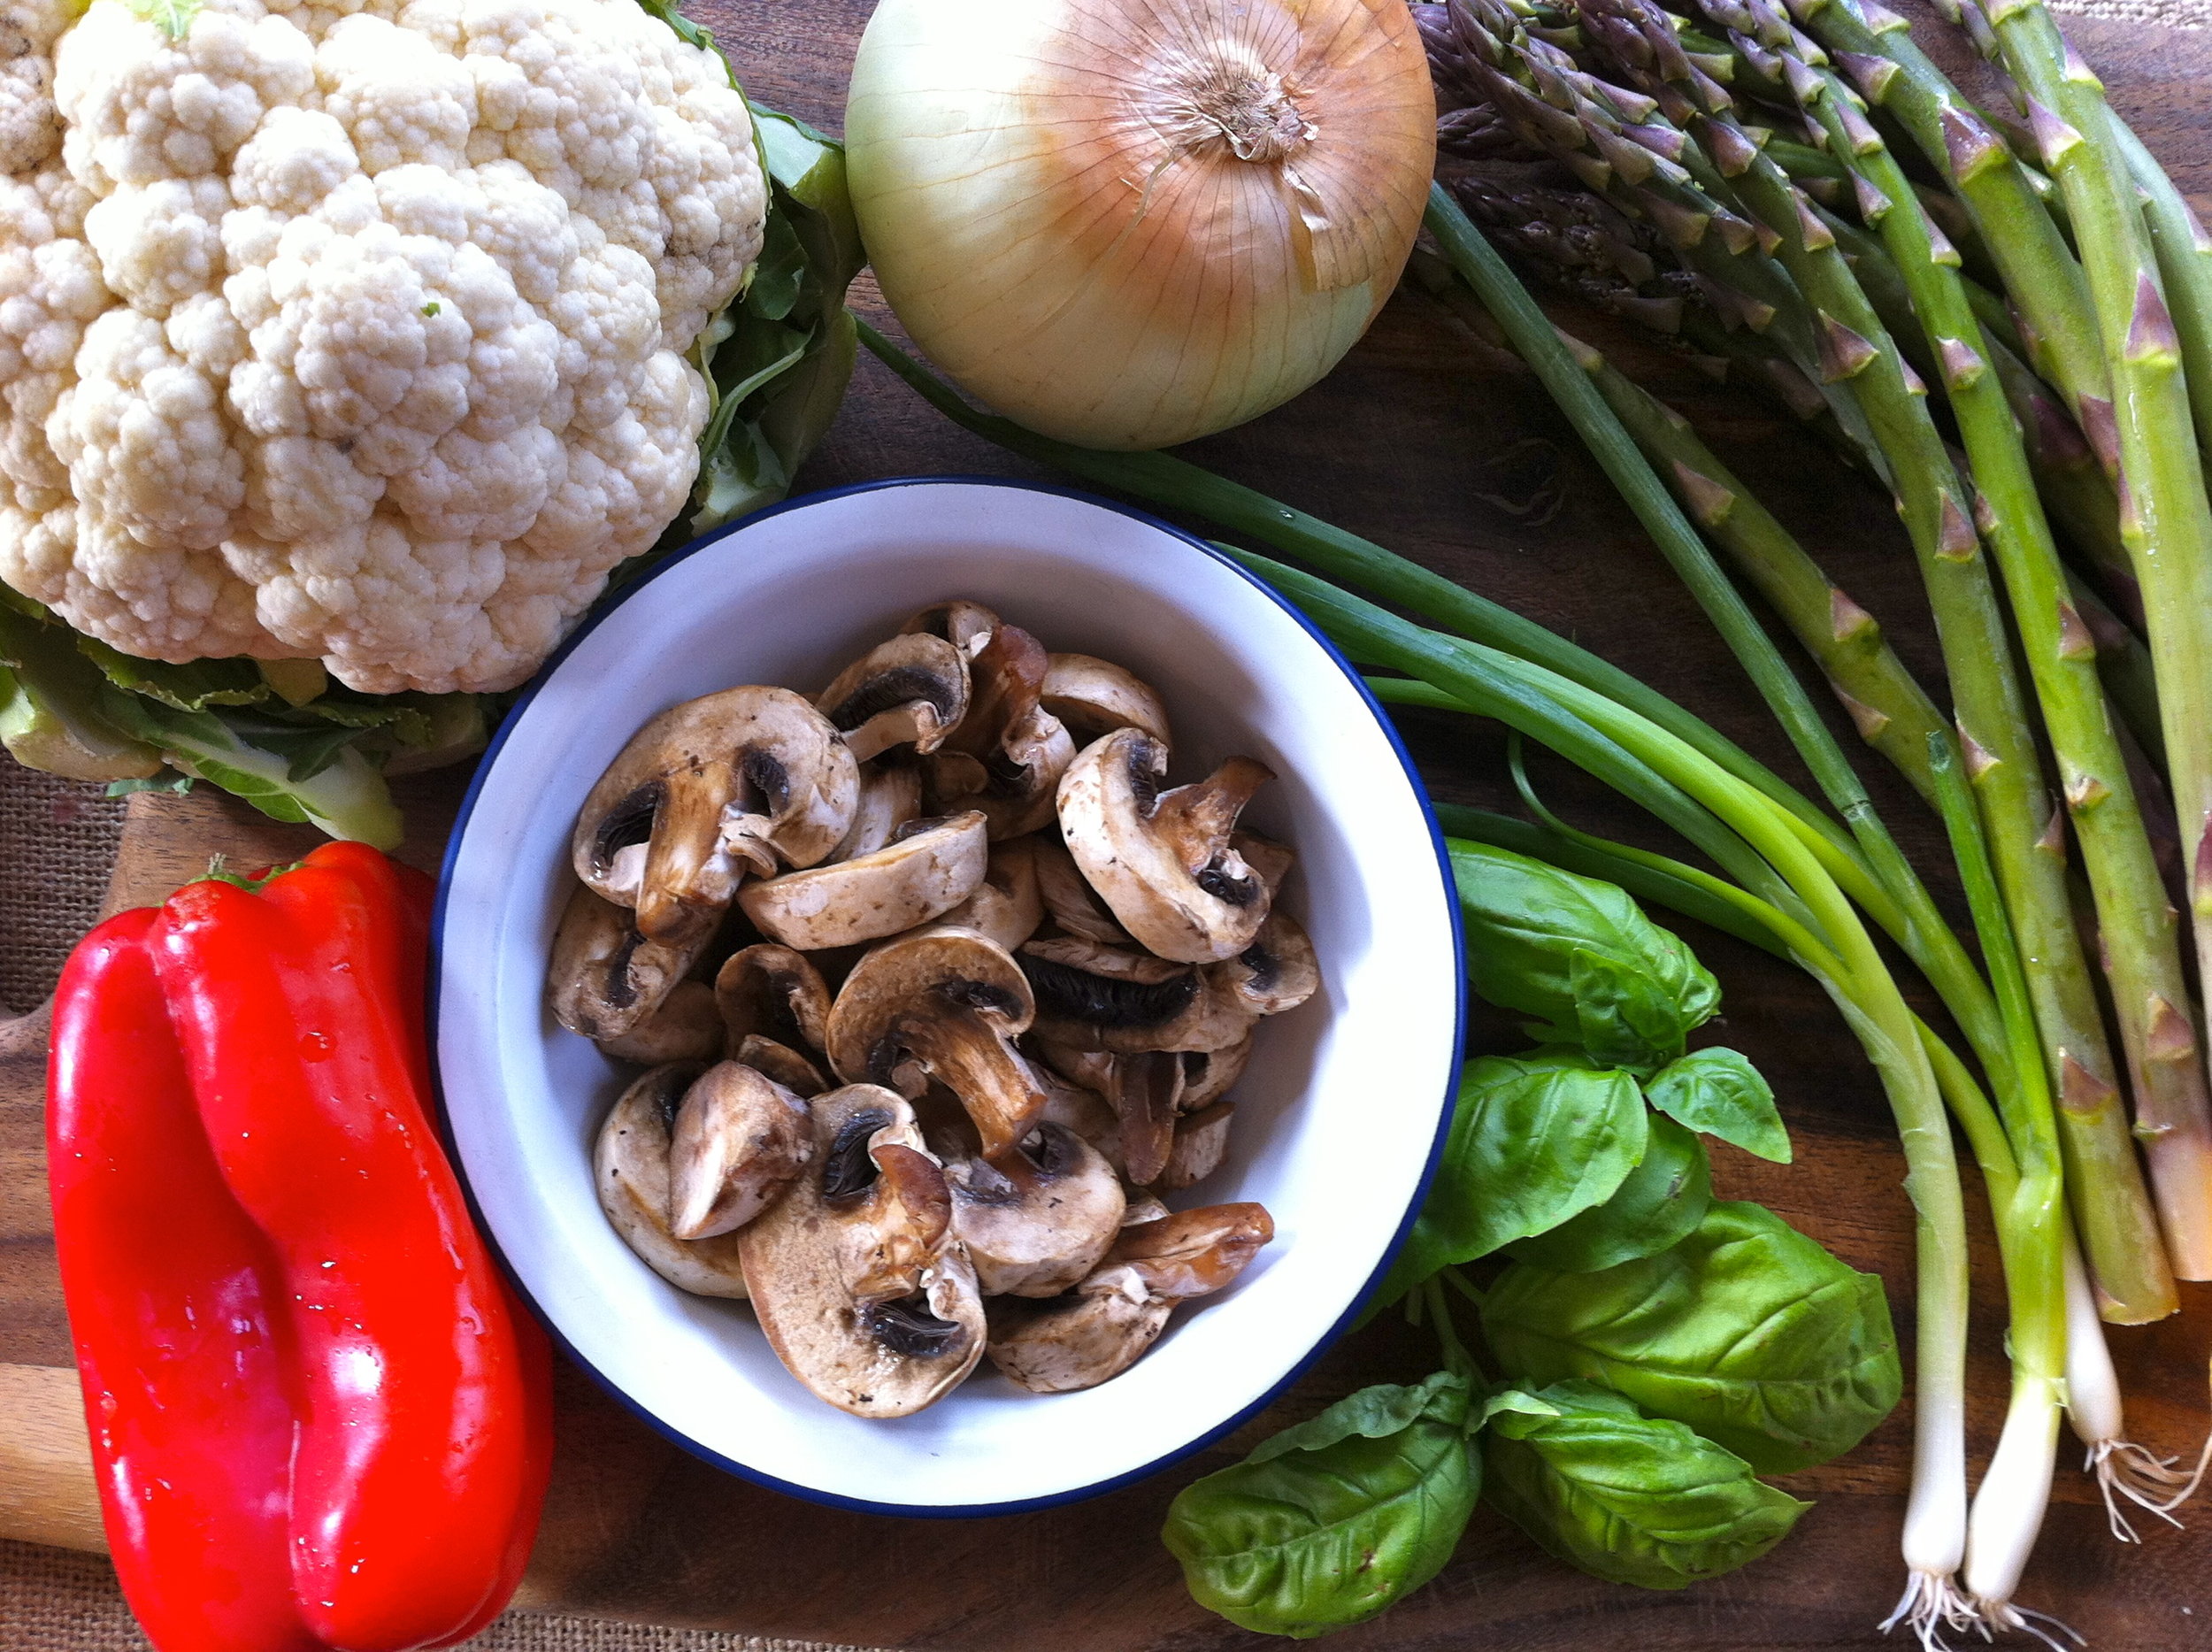
Chopped:

Bell Pepper

Cauliflower

Asparagus

Onion

Mushrooms

*any veggies work!


Thinly sliced salmon

Lemon juice

Olive oil

Minced garlic

Sea salt

Pepper


Cooked brown rice

TO MAKE:

Fire up the grill!

Place all chopped veggies in a large bowl and toss with olive oil, salt, pepper, and a scoop of minced garlic.

Cook them on the grill on a high heat until they brown up but still a bit crispy. We cook ours on a grill pan we got at Target and it works perfectly for any veggies

For the salmon, we usually buy the frozen Alaskan Salmon Fillets from Costco and those are really easy to slice in thin pieces. Toss them in a bowl with olive oil, lemon juice and dash of sea salt. Place them on the grill and watch them closely because they won’t take long to cook.

TO SERVE:

Layer brown rice, veggies, and salmon and drizzle the teriyaki sauce on top. Garnish with fresh basil and green onions for added flavor.

ENJOY!


LENTIL HUMMUS: by michele fordice

A few weeks ago, my dear friend Michele posted a photo on Facebook of some homemade hummus she was planning to make. Her pile of ingredients sounded so good that I asked her to share her creation with you all. She is delightful and fun and truly finding cooking to be a beautiful form of art... a women after my own heart!

ENJOY!

Elizabeth

PS: I will be back next week with a new recipe. All the ingredients are waiting in my fridge... I just need to figure out how to find time to take a shower with two little ones... then I will be back in the kitchen!

LENTIL HUMMUS: by michele fordice

For some families, cheese, bread, or meat may be a staple at the dinner table.

The staple in our home is hummus.

Some would even say it’s become an obsession around here.  With minimal complaints from my 4-year-old son, he eats just about anything you put in front of him. But my 2-year-old on the other hand, he lives and breathes because of his hummus consumption.  For the past two years we have consumed more hummus containers from Costco than one might think humanly possible and we’ve experimented with many hummus recipes.

We have discovered that Trader Joe’s has the best flavor, but because of the amount we consume, we had to switch over to Costco’s more economical version.  In an effort to switch things up now and then, I tried making it myself.

In the end…this recipe has proven to be one of our favorites.

Traditional Hummus is usually blended with a chick pea bean (aka garbanzo bean). For this recipe, I’ve chosen to use a sprouted bean trio of lentils, adzuki, and mung beans. Ok, I’ll be honest. The reason why I chose this group of beans was because of the color. They looked pretty in the store and I wanted to take them home!

Using this sprouted bean trio was a first for me, and despite the initial vanity in my purchase, we really liked the way the hummus turned out. It had a more earthy/hearty flavor.

Unbeknownst to me, sprouted beans are said to be easier to digest and loaded with micronutrients.  Who knew?  Allowing the beans to sprout (aka: germinate) has been used in food preparation for centuries, and for those who are sensitive to certain grains and beans, this might be a viable option.  Ezekiel bread (hyper link to this website:  www.foodforlife.com), is a commercial example of sprouted grain bread.  Most Trader Joe’s carry Ezekiel breads and tortillas.

If you are feeling adventuresome and have never made your own hummus recipe, try it!  It’s actually really easy, nutritious, and a fun recipe to do with kids!  And, if you are not up for cooking your own beans, grab a can of garbanzo beans.  Be sure to rinse the beans in a colander in order to remove the excess sodium that has been put in the can as a preservative.

Put away that Hidden Valley Ranch dressing and bust out a healthy alternative to eating raw veggies!

LENTIL HUMMUS

INGREDIENTS: 

  • 1 cup of dried lentils or any kind of bean of your choice
  • 3 cups of water (used to boil the beans)
  • 3 tbsp tahini (sesame paste)
  • ½ cup lemon juice
  • 2 gloves minced garlic
  • 1 tsp cumin
  • 1 tbsp Tamari soy sauce or Braggs Liquid Amino
  • ¼ cup olive oil
  • Salt to taste

TO MAKE:

  • Cook dried lentils or beans according to package directions.  If you have cooked canned beans, pour contents into a colander to drain juices and rinse beans of any excess sodium.
  • Pour the rest of the ingredients into your choice food processor and blend.  Depending on your food processor you may need to add a bit of water or olive oil to create a more creamy texture.
  • Serve with fresh vegetables, pita, and or as a sandwich spread.
  • Now enjoy!

This is just ONE of many renditions you can try.  Cook up some spinach and add it into the food processor for some extra micronutrients.  You can also add or delete the amount of lemon juice, garlic and tamari sauce to make it more or less flavorful.

Cooking has become an art form for me and food is the canvas.  I love throwing in a pinch of this or a dash of that and see how it changes the consistency or flavor of a dish.  As you get to know the flavors of the world you really get to see HIS creativity, not just the science behind the food.  He sure is creative!

Hope this inspires you too to get creative!

Love, Michele

SMOKED PAPRIKA RUB + SALMON

When Brook and I first met, he didn’t like fish. Of any kind. Ever. I loved fish… but was terrible at making it.

Needless to say, for the first few years of our marriage, there was no fish being bought, prepared or consumed in our household.

Until… one summer we were invited to a ranch that some friends of ours own and they had hired a fantastic chef to cook for us all. We happened to be having salmon for dinner and Brook LOVED it.

I don’t remember what the chef used on the fish (I was too distracted by Brook’s sounds effects as he ate it) but I do remember how excited Brook was about it.

This in turn inspired me to try a bit harder to incorporate fish into our diet on a regular basis and made me determined to find ways to prepare it that Brook would like.

With some time, lots of trial and error and a very patient husband… we now eat fish several times a week and we BOTH love it.

May I encourage you to keep an “open pallet” when it comes to food? Even foods you or your family may not love initially? Just like we individually grow and change… so do our taste buds!

I am not saying make yourself eat things you hate.

There are just some things you may never like.

I want to say that I like beets. They are SO good for you and pretty! The reality is I have tried them in every shape and form and I still think they taste like dirt. Some say they have an “earthy” flavor. I beg to differ.

What I am saying is try new things every once and while and be creative with how you prepare foods.

Especially with your children! Keep trying to find ways to help them eat whole, nutrition filled foods.

I have a 2.5 year old myself and I know how hard this can be! Yet, I already see his tastes changing and as we “strongly encourage” him to at least try a bit of everything.

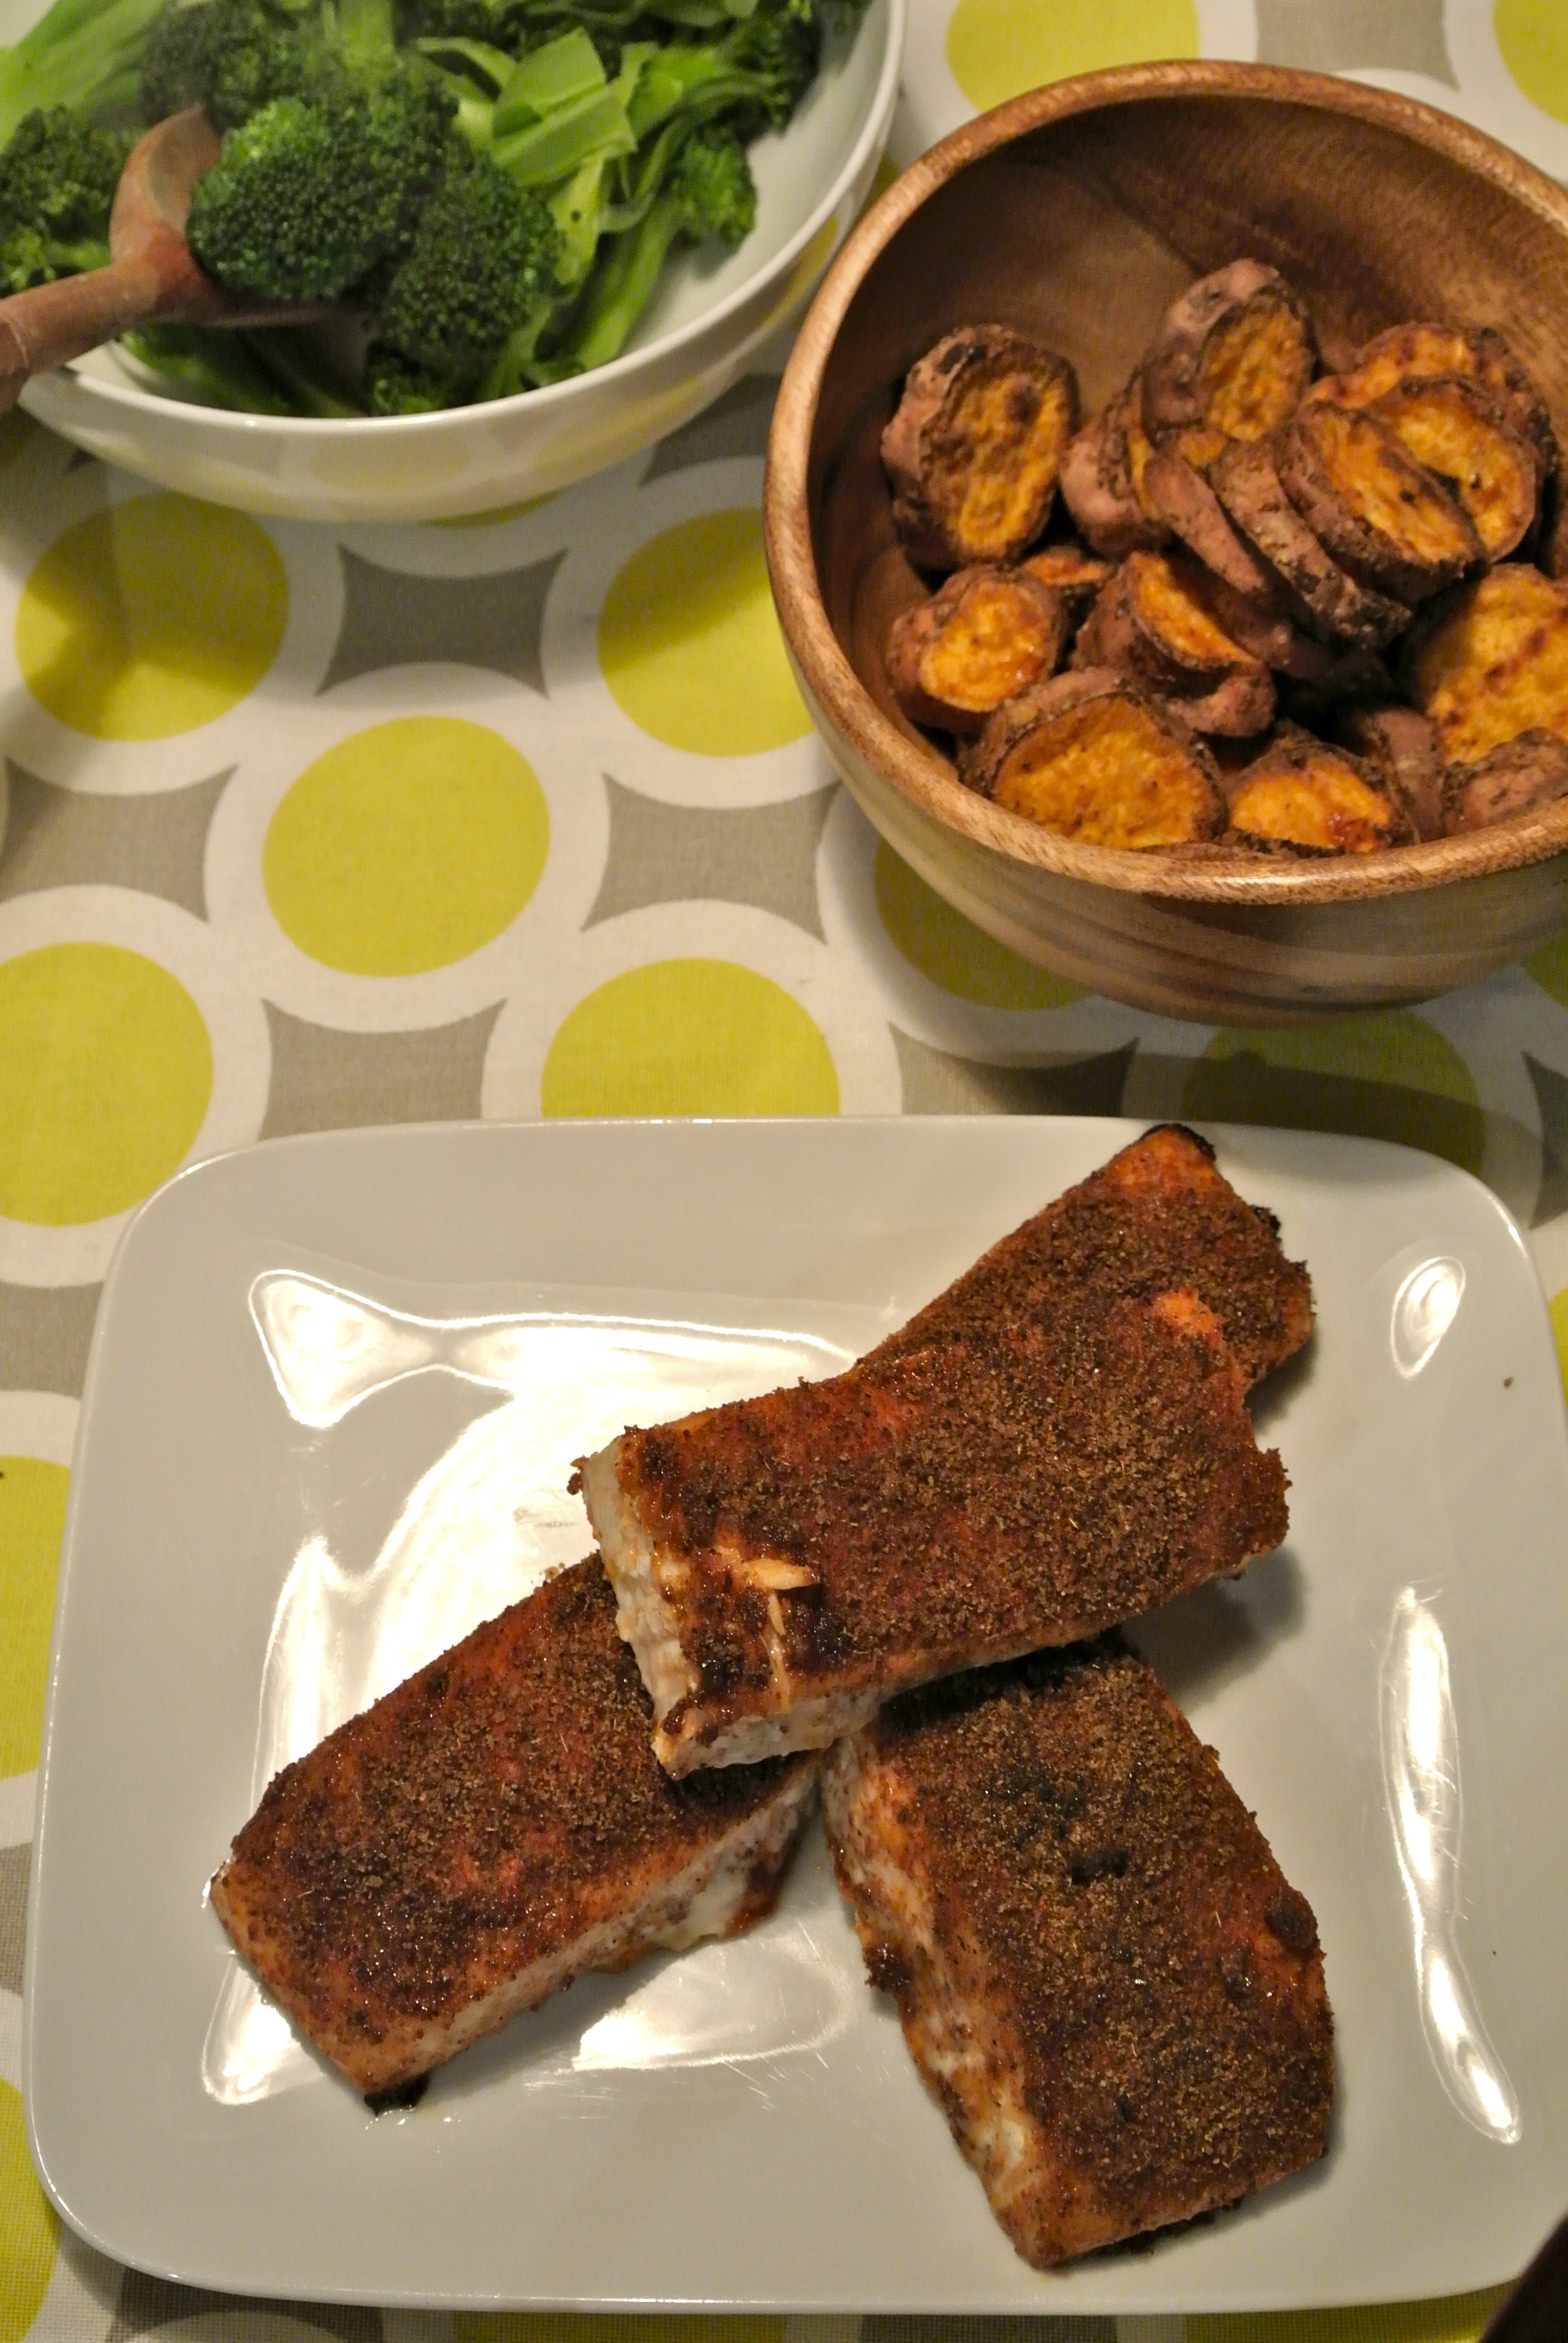
Today’s recipe is one way we love to eat fish. We usually use it on salmon but it would work on any kind of fish and maybe even on chicken.

ENJOY!

PS: if you like beets, maybe you can send me new recipes to help change how I feel about them! Until then… I will steer clear.

Elizabeth

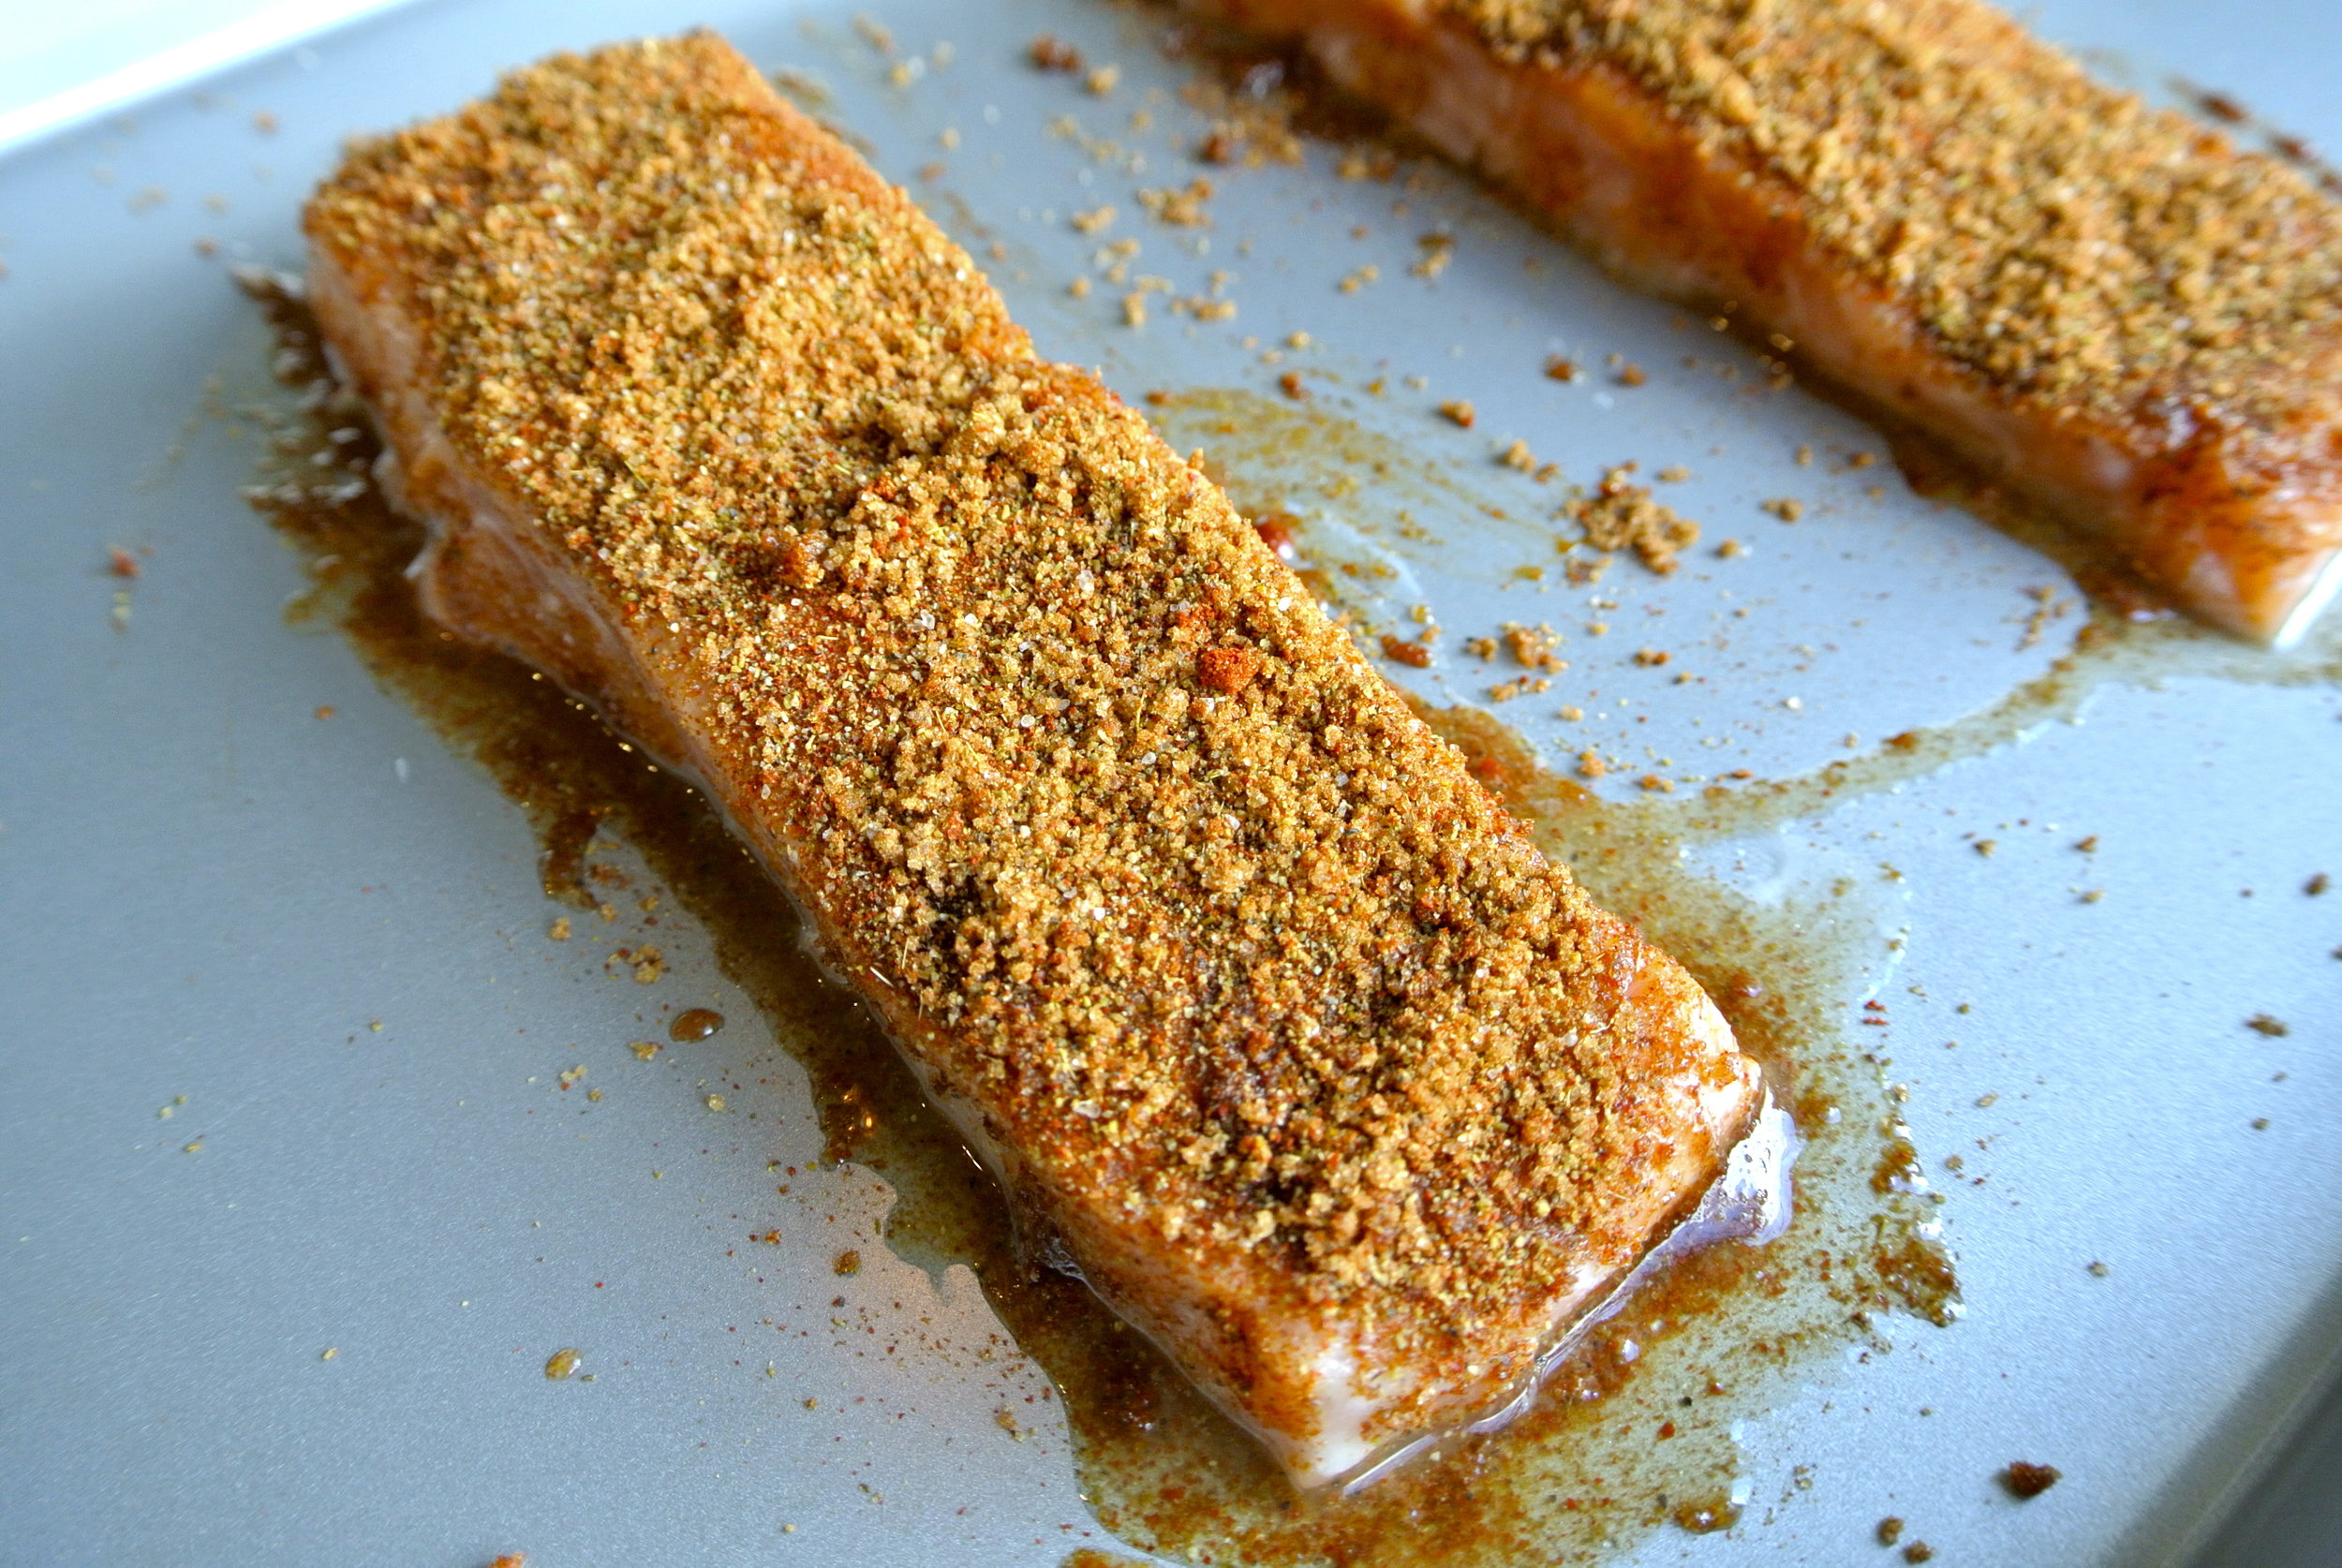
SMOKED PAPRIKA RUB


Serves 2 – 3 (if you are feeding more, simply double or triple the recipe)


THE RUB:

1 T brown sugar

1 T cumin

1 ½ tsp smoked paprika

A few dashes of cayenne pepper

Salt and pepper

Lemon Juice

Olive oil

Salmon/Tilapia – as much as you need to fill the bellies of whom you are feeding.  Adjust quantities of the rub according to how much salmon you use. I used about 10oz of salmon to feed Brook, Duke and myself and this was the perfect amount of rub for that.

Preheat oven to 400F

In a small mixing bowl, combine brown sugar, cumin, smoked paprika, cayenne pepper, salt and pepper. Give it a good stir.

Arrange fish on a baking sheet and squeeze or drizzle lemon juice on each piece. Drizzle just a bit of olive on each piece as well. Use your hands to rub it in a bit.

Scoop the rub onto the fish and use your hands to evenly coat the top and sides of the fish.

Place baking sheet in the oven and bake until it flakes with a fork. The baking times will differ depending on what kind of fish you use.

TO SERVE:

It goes great with rice, potatoes, pasta, salad… just about anything. And a side of veggies of course!

We ate ours tonight with sweet potato fries and steamed broccoli.