Posts tagged Whole Foods
CUMIN TILAPIA + PINEAPPLE + JALAPENO SALSA
cover.jpg

All or nothing. That tends to me my approach to… well… everything.

It’s no surprise that my approach to food can be this way as well.

About two years ago I watched the documentary Forks Over Knives and quickly began to adopt a plant based diet. If you haven’t seen it yet (it is available on Netflix), I can’t recommend it enough. Every American needs to watch it and educated themselves on the food we eat! (That’s the all or nothing side of me talking… can you tell?)

We spent the past year and a half or so eating a mostly plant - based diet and we loved it. I, who am not much of a reader, poured over books and blogs learned everything there was to know about eating a plant-based (vegan) diet. I even told myself “I will do this forever!”

My much more balanced husband encouraged me away from putting a label on how we eat and to still have freedom to enjoy other foods ever so often. Wise man I’ve got!

At first I felt pretty good and was loving a whole new world of plants and grains and tastes I had never experienced before. God is such a creative God and has created so much to be enjoyed!

However for about a year I have just felt “off”. I thought it was the addition of a new baby and the lack of sleep that comes along with that but the older she got the worse I felt so I finally went to the doctor to get the bottom of it.

Several doctors and tests later, I have been diagnosed with something called SIBO which is an overgrowth of bacteria in my small intestines which is giving me all sorts of crazy symptoms and making me sick. It is totally treatable and could potentionally clear up years and years of stomach issues and food sensitivities.

Halleluiah!

However… it requires a crazy restrictive diet for an extended period of time. Let’s just say it makes the Paleo diet look like a cakewalk.

(I’m 10 days in… cake sounds really good right now)

Why am I telling you all of this?

A couple of reasons…

#1: There will be a few changes around The Kitchen when it comes to the new recipes that are posted.  Mostly because they will be based of what I am currently cooking in my home on this crazy SIBO diet!

I will be posting more recipes that contain meat, fish and eggs and lots of veggies. I have some friends who will continue to contribute to The Kitchen with plant-based recipes as well so there will be a wider range of recipes coming your way!

#2: I am learning the importance of educating ourselves about the food we eat AND avoiding too many all or nothing extremes when it comes to food.

Once my treatment is over I’m not sure where I will land with the whole world of food but I do know this; God created all foods for our nourishment and for our pleasure. He is a creative God and I want to enjoy His creations this side of Heaven. If we stick to the foods He created (not the man made stuff we have altered quite a bit), we really can’t go wrong.

I am on this journey of learning with you all and I have so much more to learn. My heart and my goal is to inspire you to love real, whole foods and to learn a bit about what you eat in the process.

Today’s recipe was inspired by my sister-in-law, Tammy, who created the tilapia rub and I added the salsa for an extra kick of flavor.

ENJOY!

Elizabeth

PS: I always love to hear what you are enjoying making and what you are learning! I’m inspired by your comments and love it when we start conversations about food!

What have you been cooking lately? Anything you’d like to see posted here on the The Kitchen?

CUMIN TILAPIA + PINEAPPLE + JALAPENO SALSA

Serves 4

Gluten, dairy, grain free

INGREDIENTS:

Cumin Tilapia:

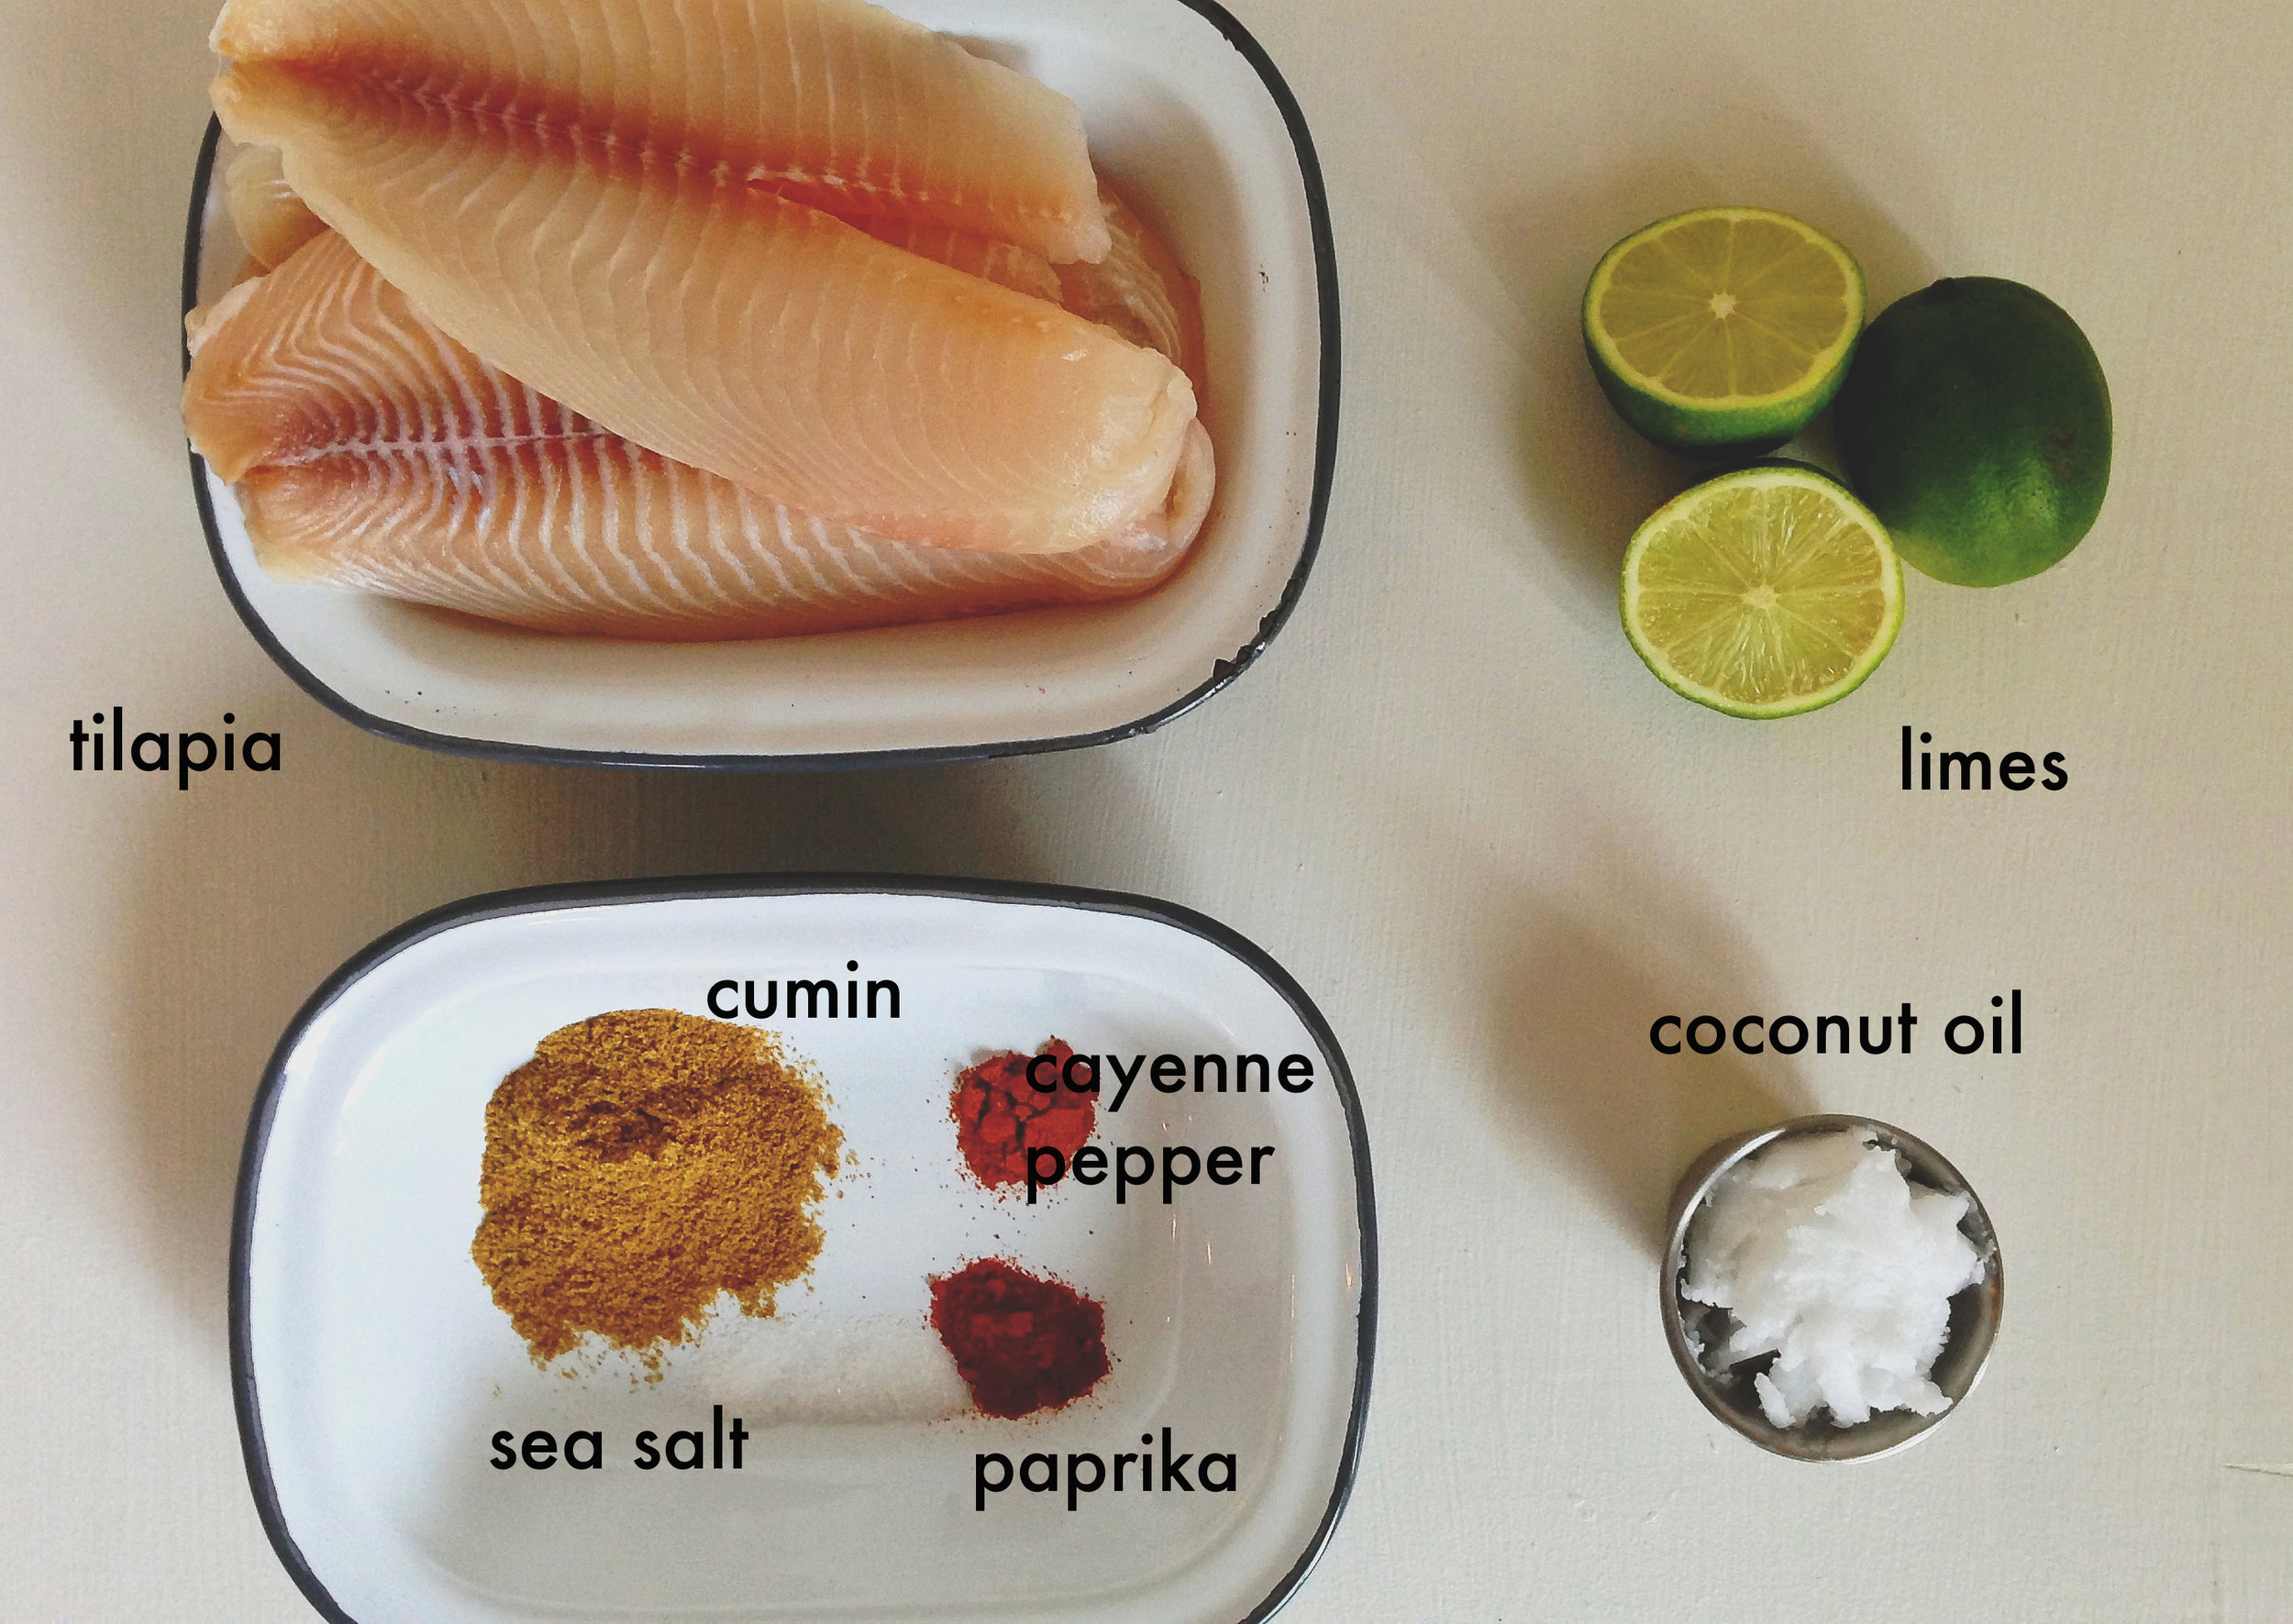
4 tilapia fillets  (5-6 oz each)

4 T cumin

1 t smoked paprika (or regular)

¼ t cayenne pepper

¾ t sea salt

Juice from two limes

2 T coconut oil for cooking

Pineapple Salsa:

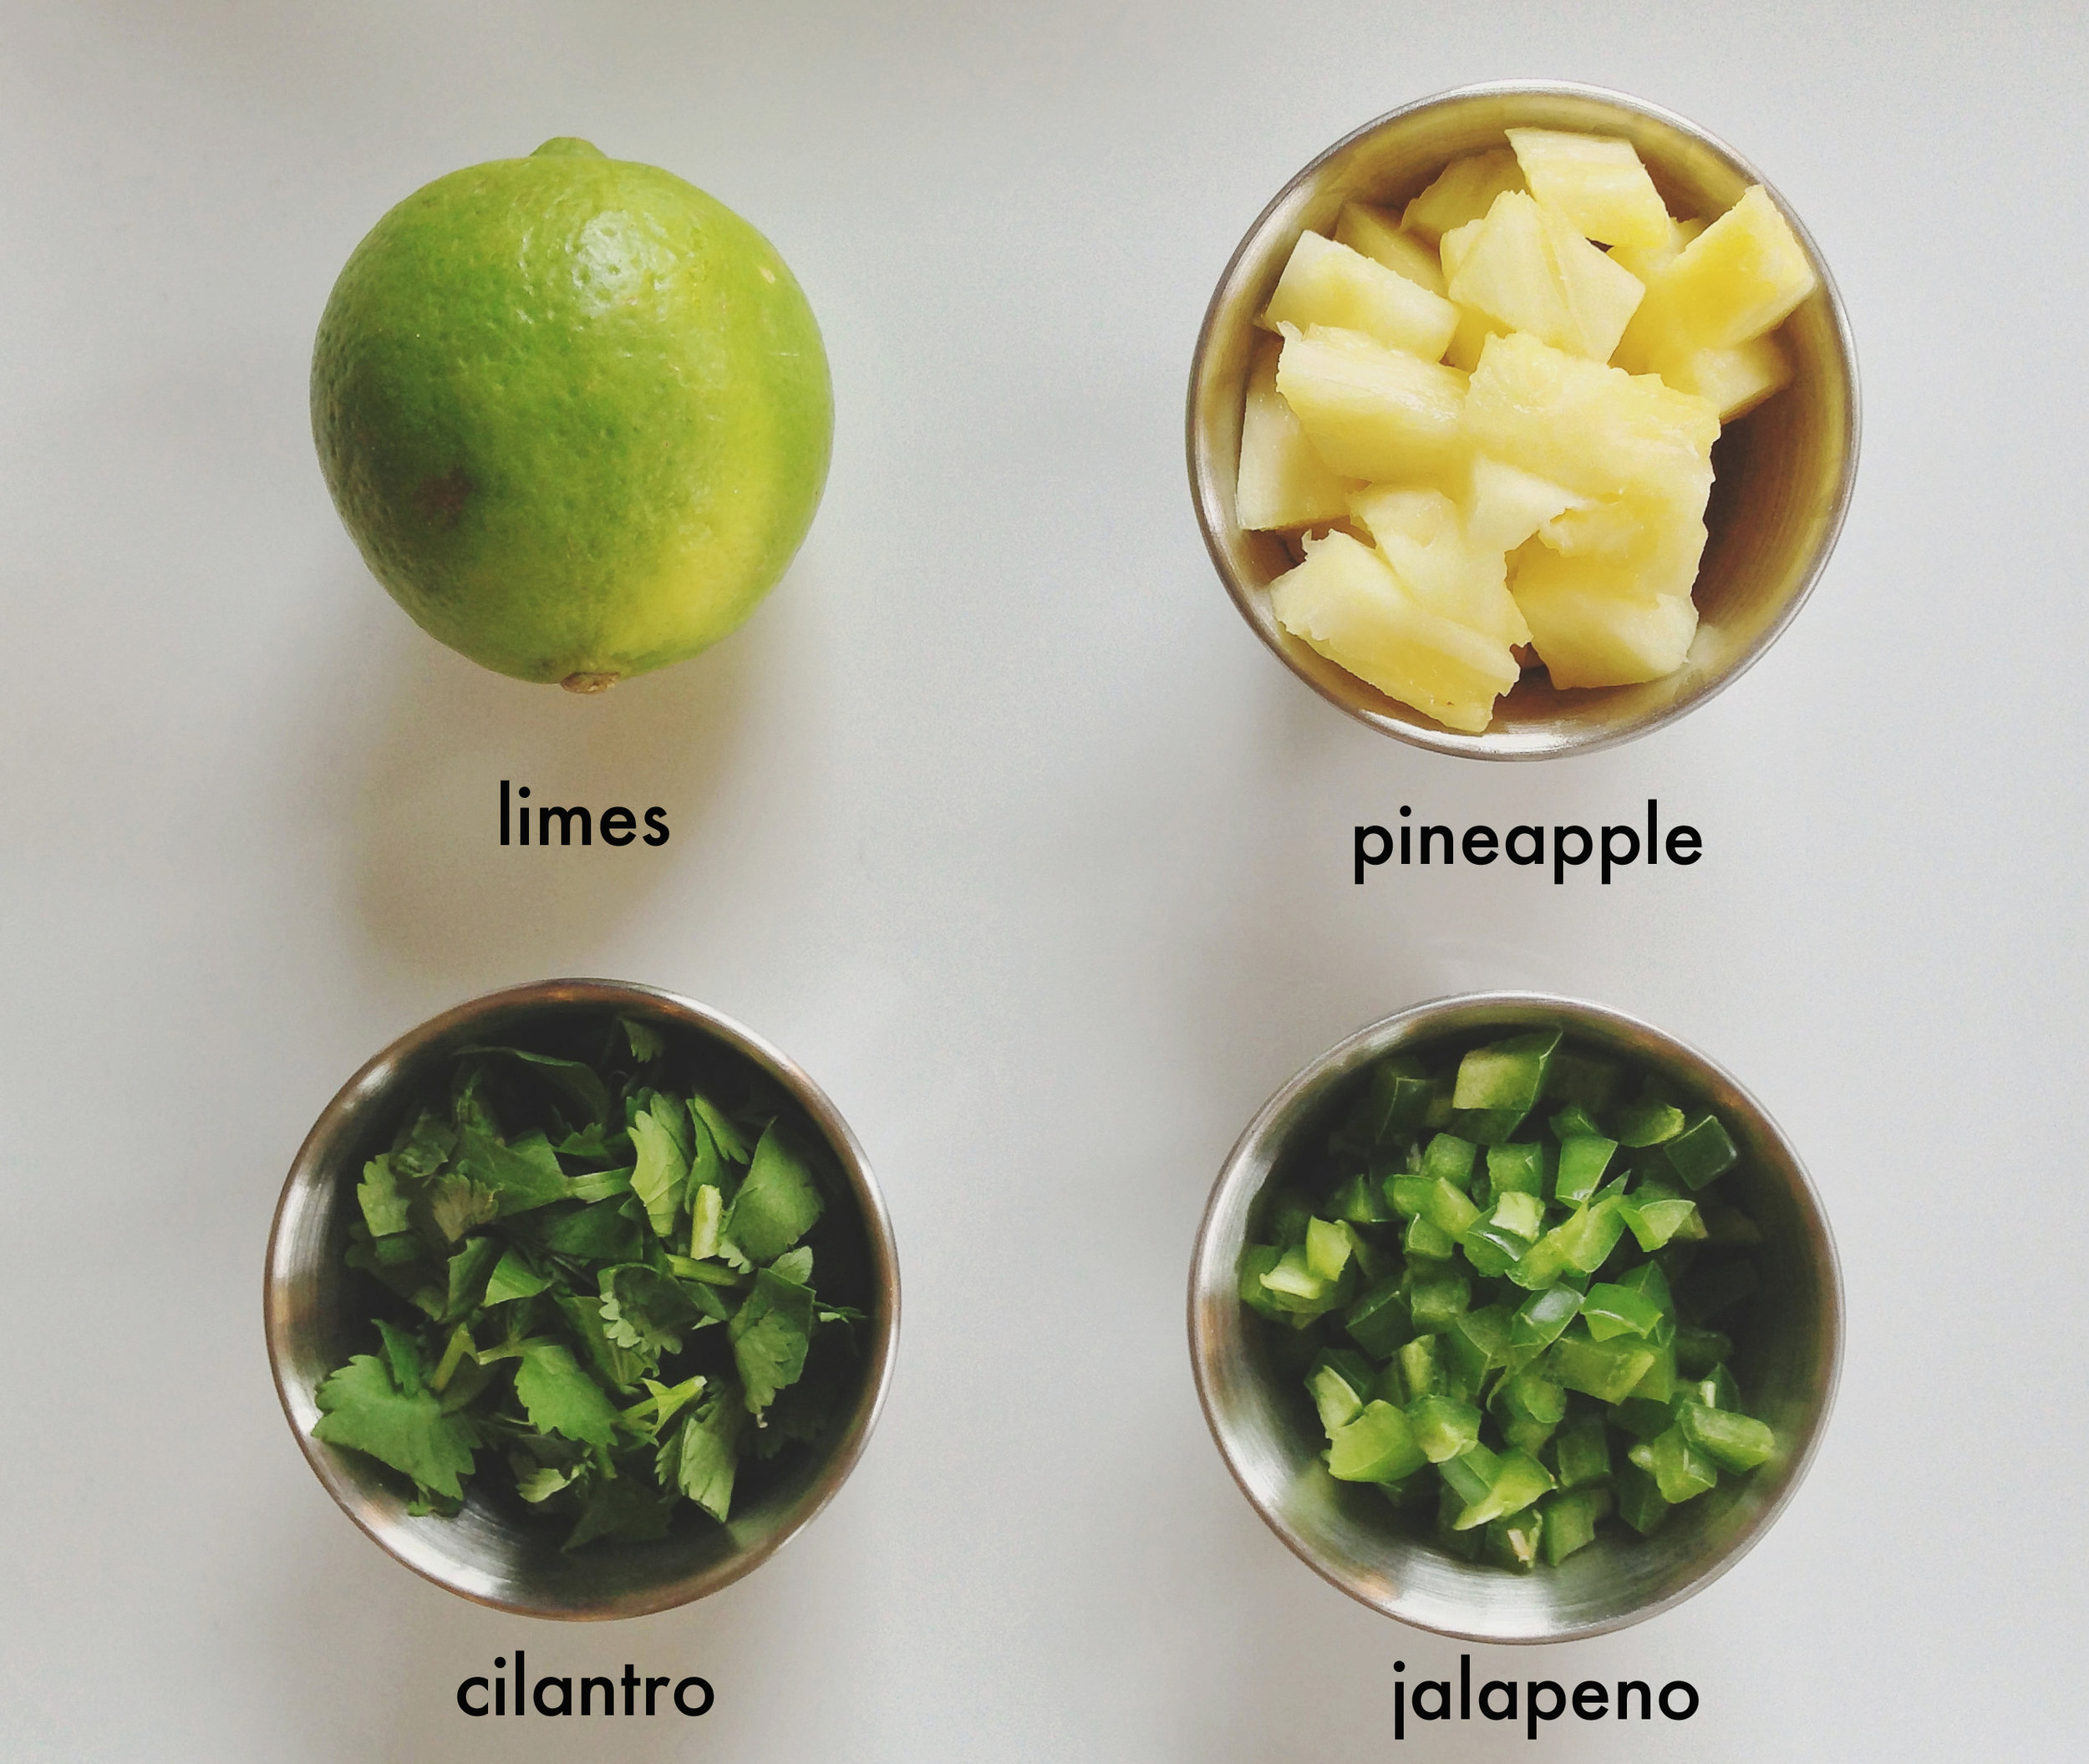
1 ½ C fresh pineapple

1 jalapeño

¼ C chopped cilantro

Juice from two limes

Sea salt

*If you can, make the salsa a few hours before you plan to eat so the juices can combine and create more flavor.

TO MAKE:

Salsa:

Chop the pineapple into small, bit-sized chunks. Here is a quick tutorial on how to cut a pineapple.

Cut jalapeño long ways and remove the seeds and insides. Finely chop.

Finley chop cilantro.

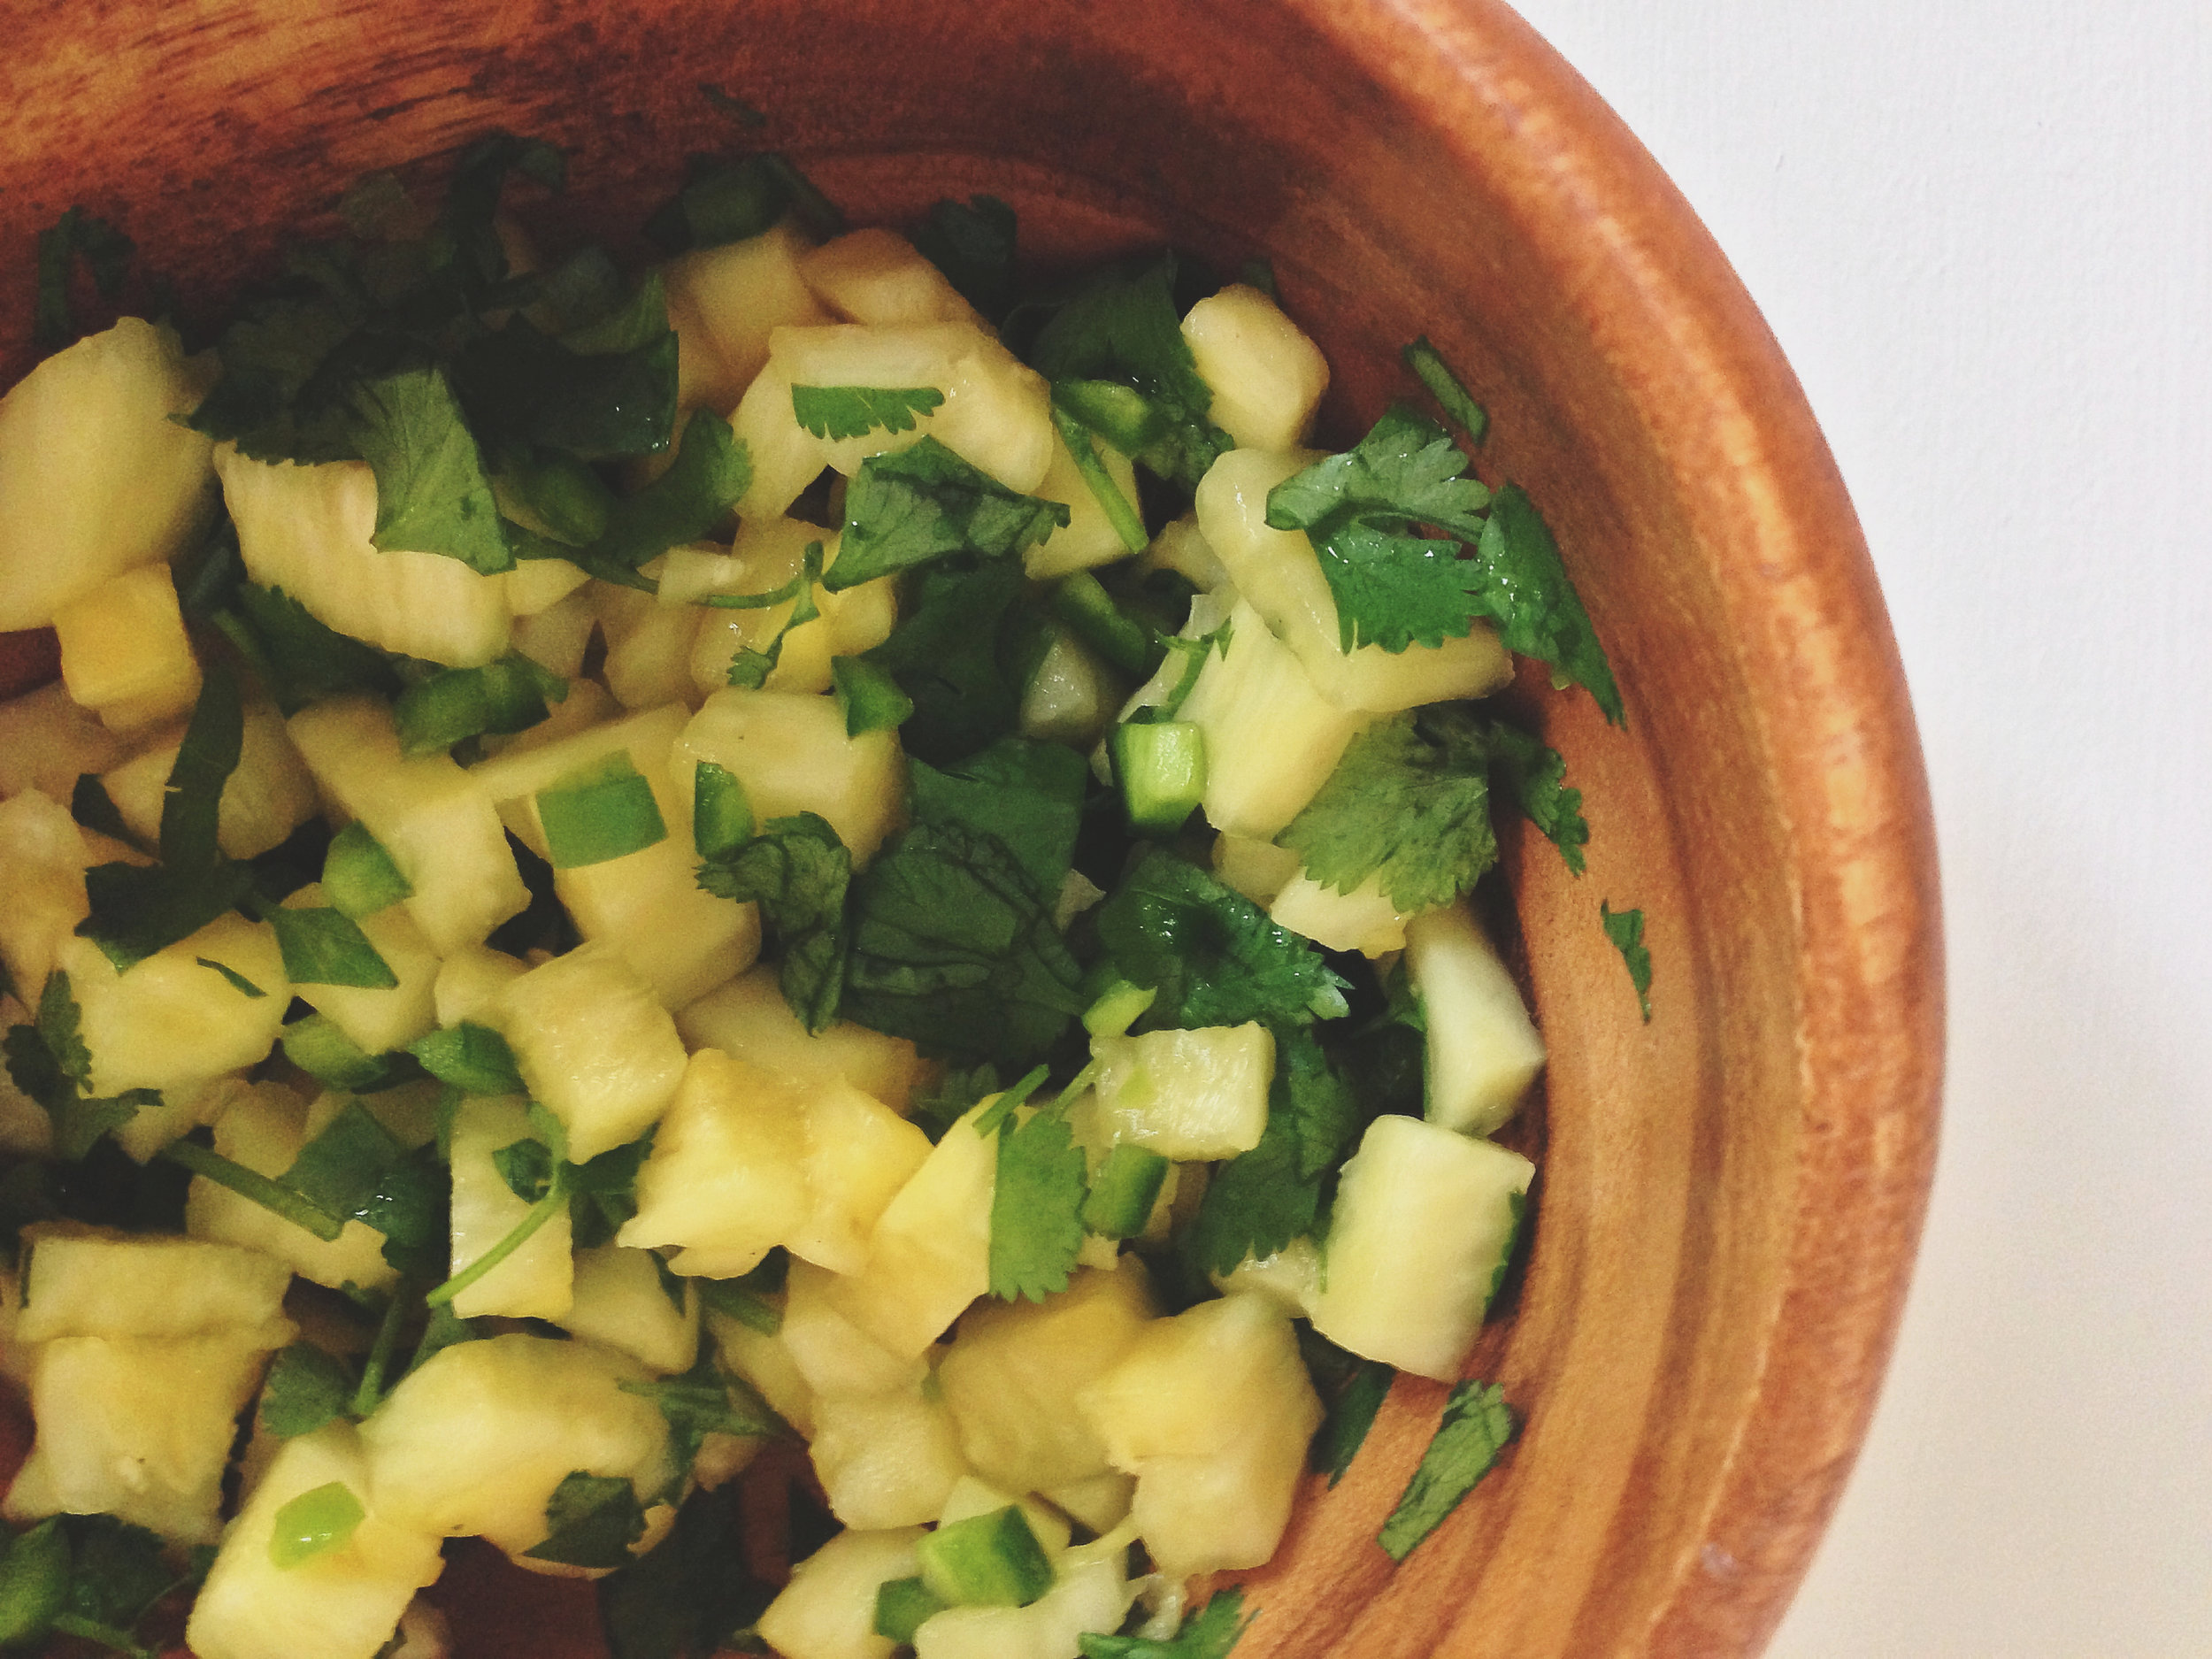
Combine pineapple, jalapeño and cilantro in a bowl and squeeze the juice from the two limes into the bowl.

Add a pinch of salt and refrigerate for a few hours. You can serve it immediately as well if you don’t have time to prep it early.

Fish:

Combine cumin, paprika, cayenne pepper and salt in a bowl and stir well.

Cut the limes in half and squeeze the juice on both sides of each fillet. ½ a lime for each fillet of tilapia.

Use your hands to rub the cumin mixture on each side of the fillets. Make sure each side is completely coated.

In a cast iron or non-stick skillet, heat the coconut oil.

Add fillets to the hot oil and cook on medium heat for about 6-7 minutes on each side.

When it is finished, it should have a nice brown, crispy layer on each side.

TO SERVE:

Spread a few spoonfuls of the pineapple salsa over the top and enjoy!

You could also add the fish and salsa to a good corn tortilla, top with avocado and turn it into fish tacos!

ENJOY!

[print_this]

CUMIN TILAPIA + PINEAPPLE + JALAPENO SALSA

Serves 4

Gluten, dairy, grain free

INGREDIENTS:

Cumin Tilapia:

4 tilapia fillets  (5-6 oz each)

4 T cumin

1 t smoked paprika (or regular)

¼ t cayenne pepper

¾ t sea salt

Juice from two limes

2 T coconut oil for cooking

Pineapple Salsa:

1 ½ C fresh pineapple

1 jalapeño

¼ C chopped cilantro

Juice from two limes

Sea salt

*If you can, make the salsa a few hours before you plan to eat so the juices can combine and create more flavor.

TO MAKE:

Salsa:

Chop the pineapple into small, bit-sized chunks. Here is a quick tutorial on how to cut a pineapple.

Cut jalapeño long ways and remove the seeds and insides. Finely chop.

Finley chop cilantro.

Combine pineapple, jalapeño and cilantro in a bowl and squeeze the juice from the two limes into the bowl.

Add a pinch of salt and refrigerate for a few hours. You can serve it immediately as well if you don’t have time to prep it early.

Fish:

Combine cumin, paprika, cayenne pepper and salt in a bowl and stir well.

Cut the limes in half and squeeze the juice on both sides of each fillet. ½ a lime for each fillet of tilapia.

Use your hands to rub the cumin mixture on each side of the fillets. Make sure each side is completely coated.

In a cast iron or non-stick skillet, heat the coconut oil.

Add fillets to the hot oil and cook on medium heat for about 6-7 minutes on each side.

When it is finished, it should have a nice brown, crispy layer on each side.

TO SERVE:

Spread a few spoonfuls of the pineapple salsa over the top and enjoy!

You could also add the fish and salsa to a good corn tortilla, top with avocado and turn it into fish tacos!

[/print_this]

FOOD FOR LITTLE PALLETS: Better than Larabar Balls
cover.jpg

When I was pregnant I knew it all. I vowed I would have children who would eat eat everything, love every fruit and vegetable and snack on raw broccoli and tomatoes.

Then I had children.

And suddenly I didn't know everything anymore.

If you've been following The Kitchen for any length of time you know I am passionate about feeding my kids with real, whole foods... but that does not mean that my kids always love to eat everything.

For Duke's first year of life, I made most of his food from scratch and he would eat just about anything. However, that slowly began to change as he got older and discovered food outside of pureed veggies. He has always been a big eater and it is hard to keep his little belly full. Yet his ferocious appetite combined with a very selective pallet (aka: pickiness) has presented itself with all sorts of challenges in the kitchen and quickly threw some of my "ideals" out the window.

All mama's know that when you have a hungry, cranky child... you will do whatever it takes to feed them. Now!

And you also know that if you try to force a child to eat something they don't like, you will lose. Every time.

Duke's response to something he doesn't like? "Mom, this is NOT delicious."

Enough said.

These past few years have been a challenge for me to find creative ways to feed my children with nutritious meals and snacks they will actually eat and that fuel their growing, active bodies with good stuff.

Often times the "kid friendly" meals and snacks at the grocery store are not so friendly for their little bodies. (This is were reading labels is super important! Get to know the ingredient list of the food you buy!)

With an active 3 1/2 year old and a wanting to walk so badly 1 year old, we are a big fan of snacks at our house.

Call it low blood sugar or just being a boy but Duke eats every two-three hours or so. The "Mom! I'm STARVING!" is usually my cue it's time for another snack. 

With my own kids as the inspiration, I'm going to start a little mini series and pop in from time to time with some snack ideas and recipes for both kids and grown ups alike. Some super quick and simple and some you can make in large batches and keep in the freezer.

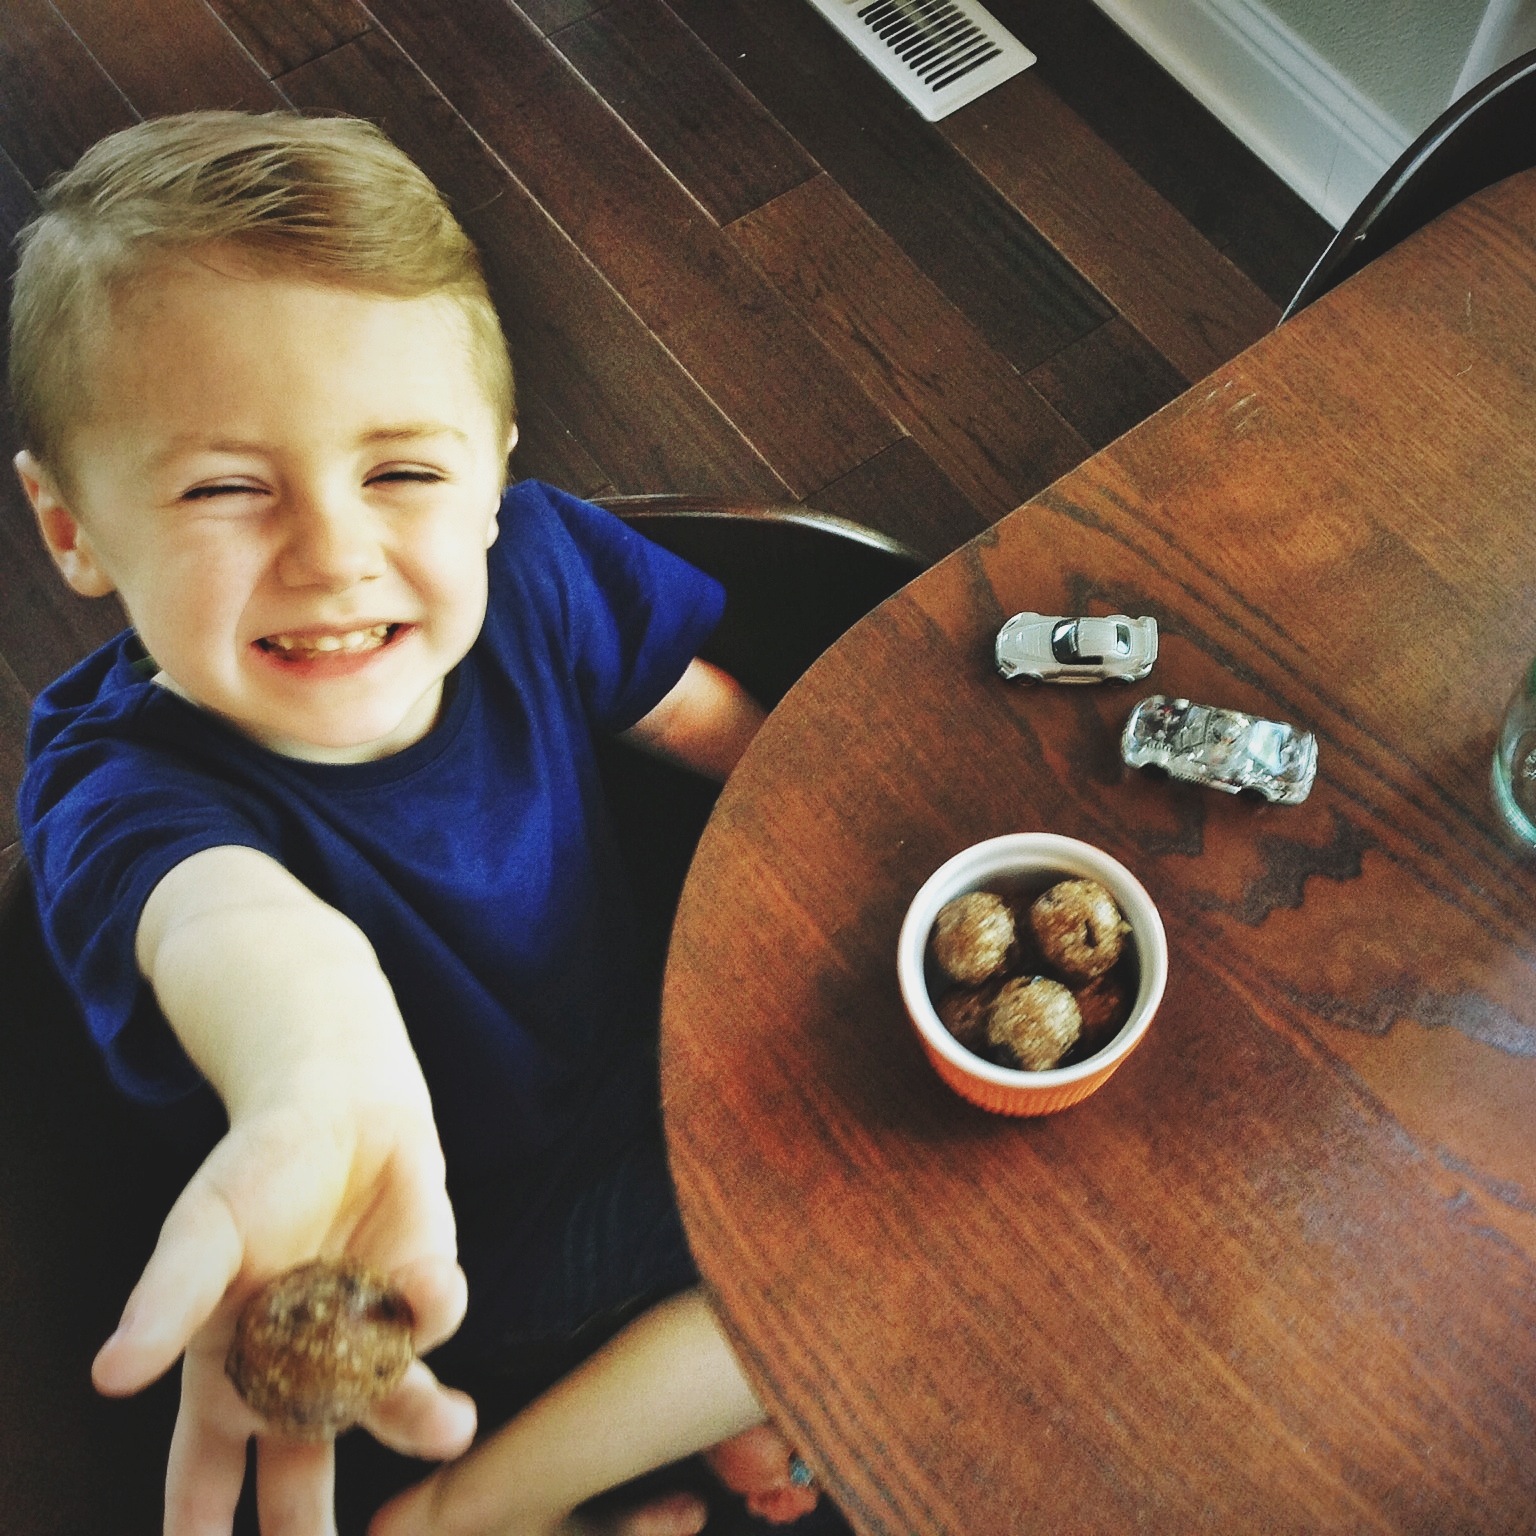
Today's recipe is one of our favorites and a staple in our freezer. They are similar to LaraBars in their ingredients but we think they taste a whole lot better. Duke thinks they are cookies and I eat them for dessert. Win. Win.

A few words of wisdom to you mama's trying to feed picky eaters:

1. Start small. If you find a smoothie recipe you can hide some spinach in, celebrate! Most children won't love kale salad and raw veggies overnight.

2. Make it fun. Kid's love to learn and the kitchen is a great place to teach. If they are involved in the process of making something, often times they are more likely to want to try what they have created. Don't be afraid to get a little silly and excited about explaining why different foods are good for them. We call them "go" foods and "slow" foods at our house. Go foods fuel your body and give you energy to play and learn. Slow foods slow you down a bit and hard for your body to digest.

3. Don't give up. Don't be discouraged if you make something and your kids don't like it. Have a good laugh (or cry) and try something new tomorrow. Eventually you will find a handful of things they like and you can stick to those and keep it simple for a while. We have the privilege and responsibility to steward our children's bodies emotionally, spiritually and physically until they grow up. I want to give them a good foundation and I know you do too!

ENJOY!

Elizabeth

PS: I'd love to hear about your favorite snacks... kid friendly or not! Are there any favorites you would like a healthier version of? I'd love to hear what works and what doesn't in your house.

Join me on Instagram (@emosser) and tag your food photos with #hespeaksthekitchen or leave a comment if you want to share your favorites!

BETTER THEN LARABAR BALLS

makes 20 balls

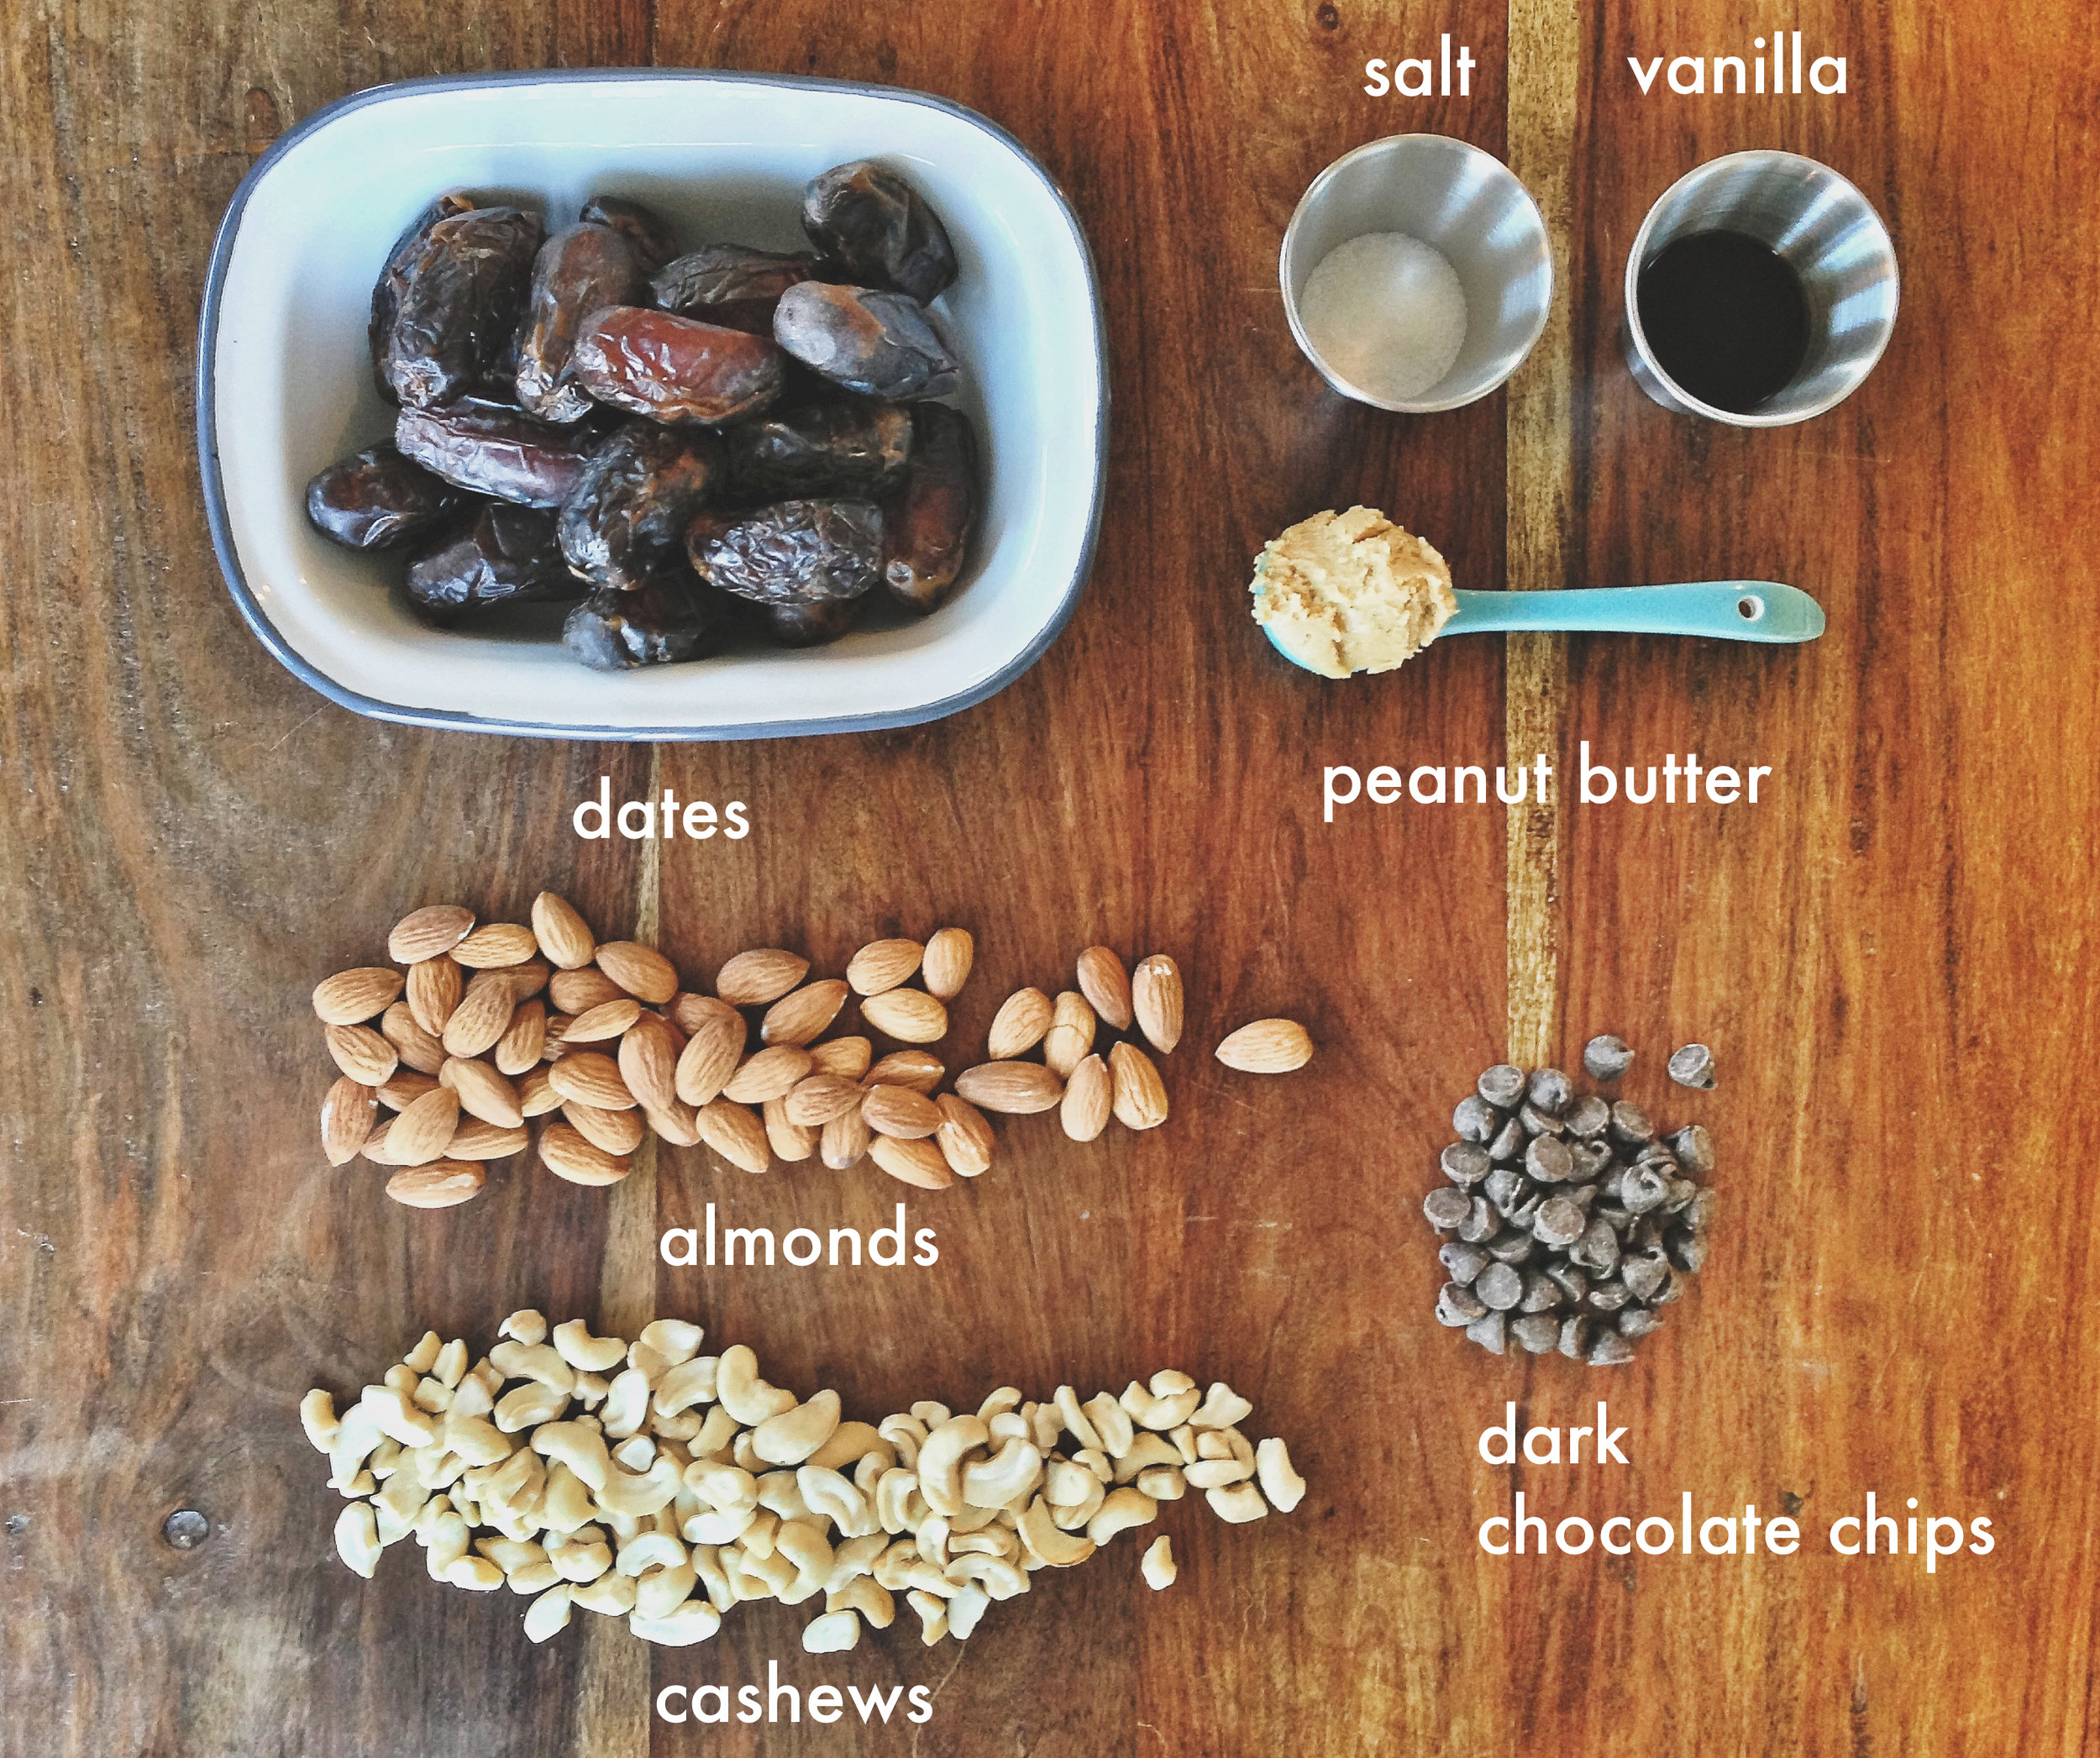
INGREDIENTS:

1 C raw almonds

1 C raw cashews

14 pitted medjool dates*

2 T natural peanut butter (optional)

1 T vanilla

1 t sea salt

1/4 C dark chocolate chips or carob chips

*Trader Joe's has a large package of dates for under $5 and Costco has them as well

TO MAKE:

*I suggest using a food processor to make these. A blender does work but can be a bit tricky to blend the dates.

Coarsely chop the dark chocolate chips with a knife or food processor and set aside.

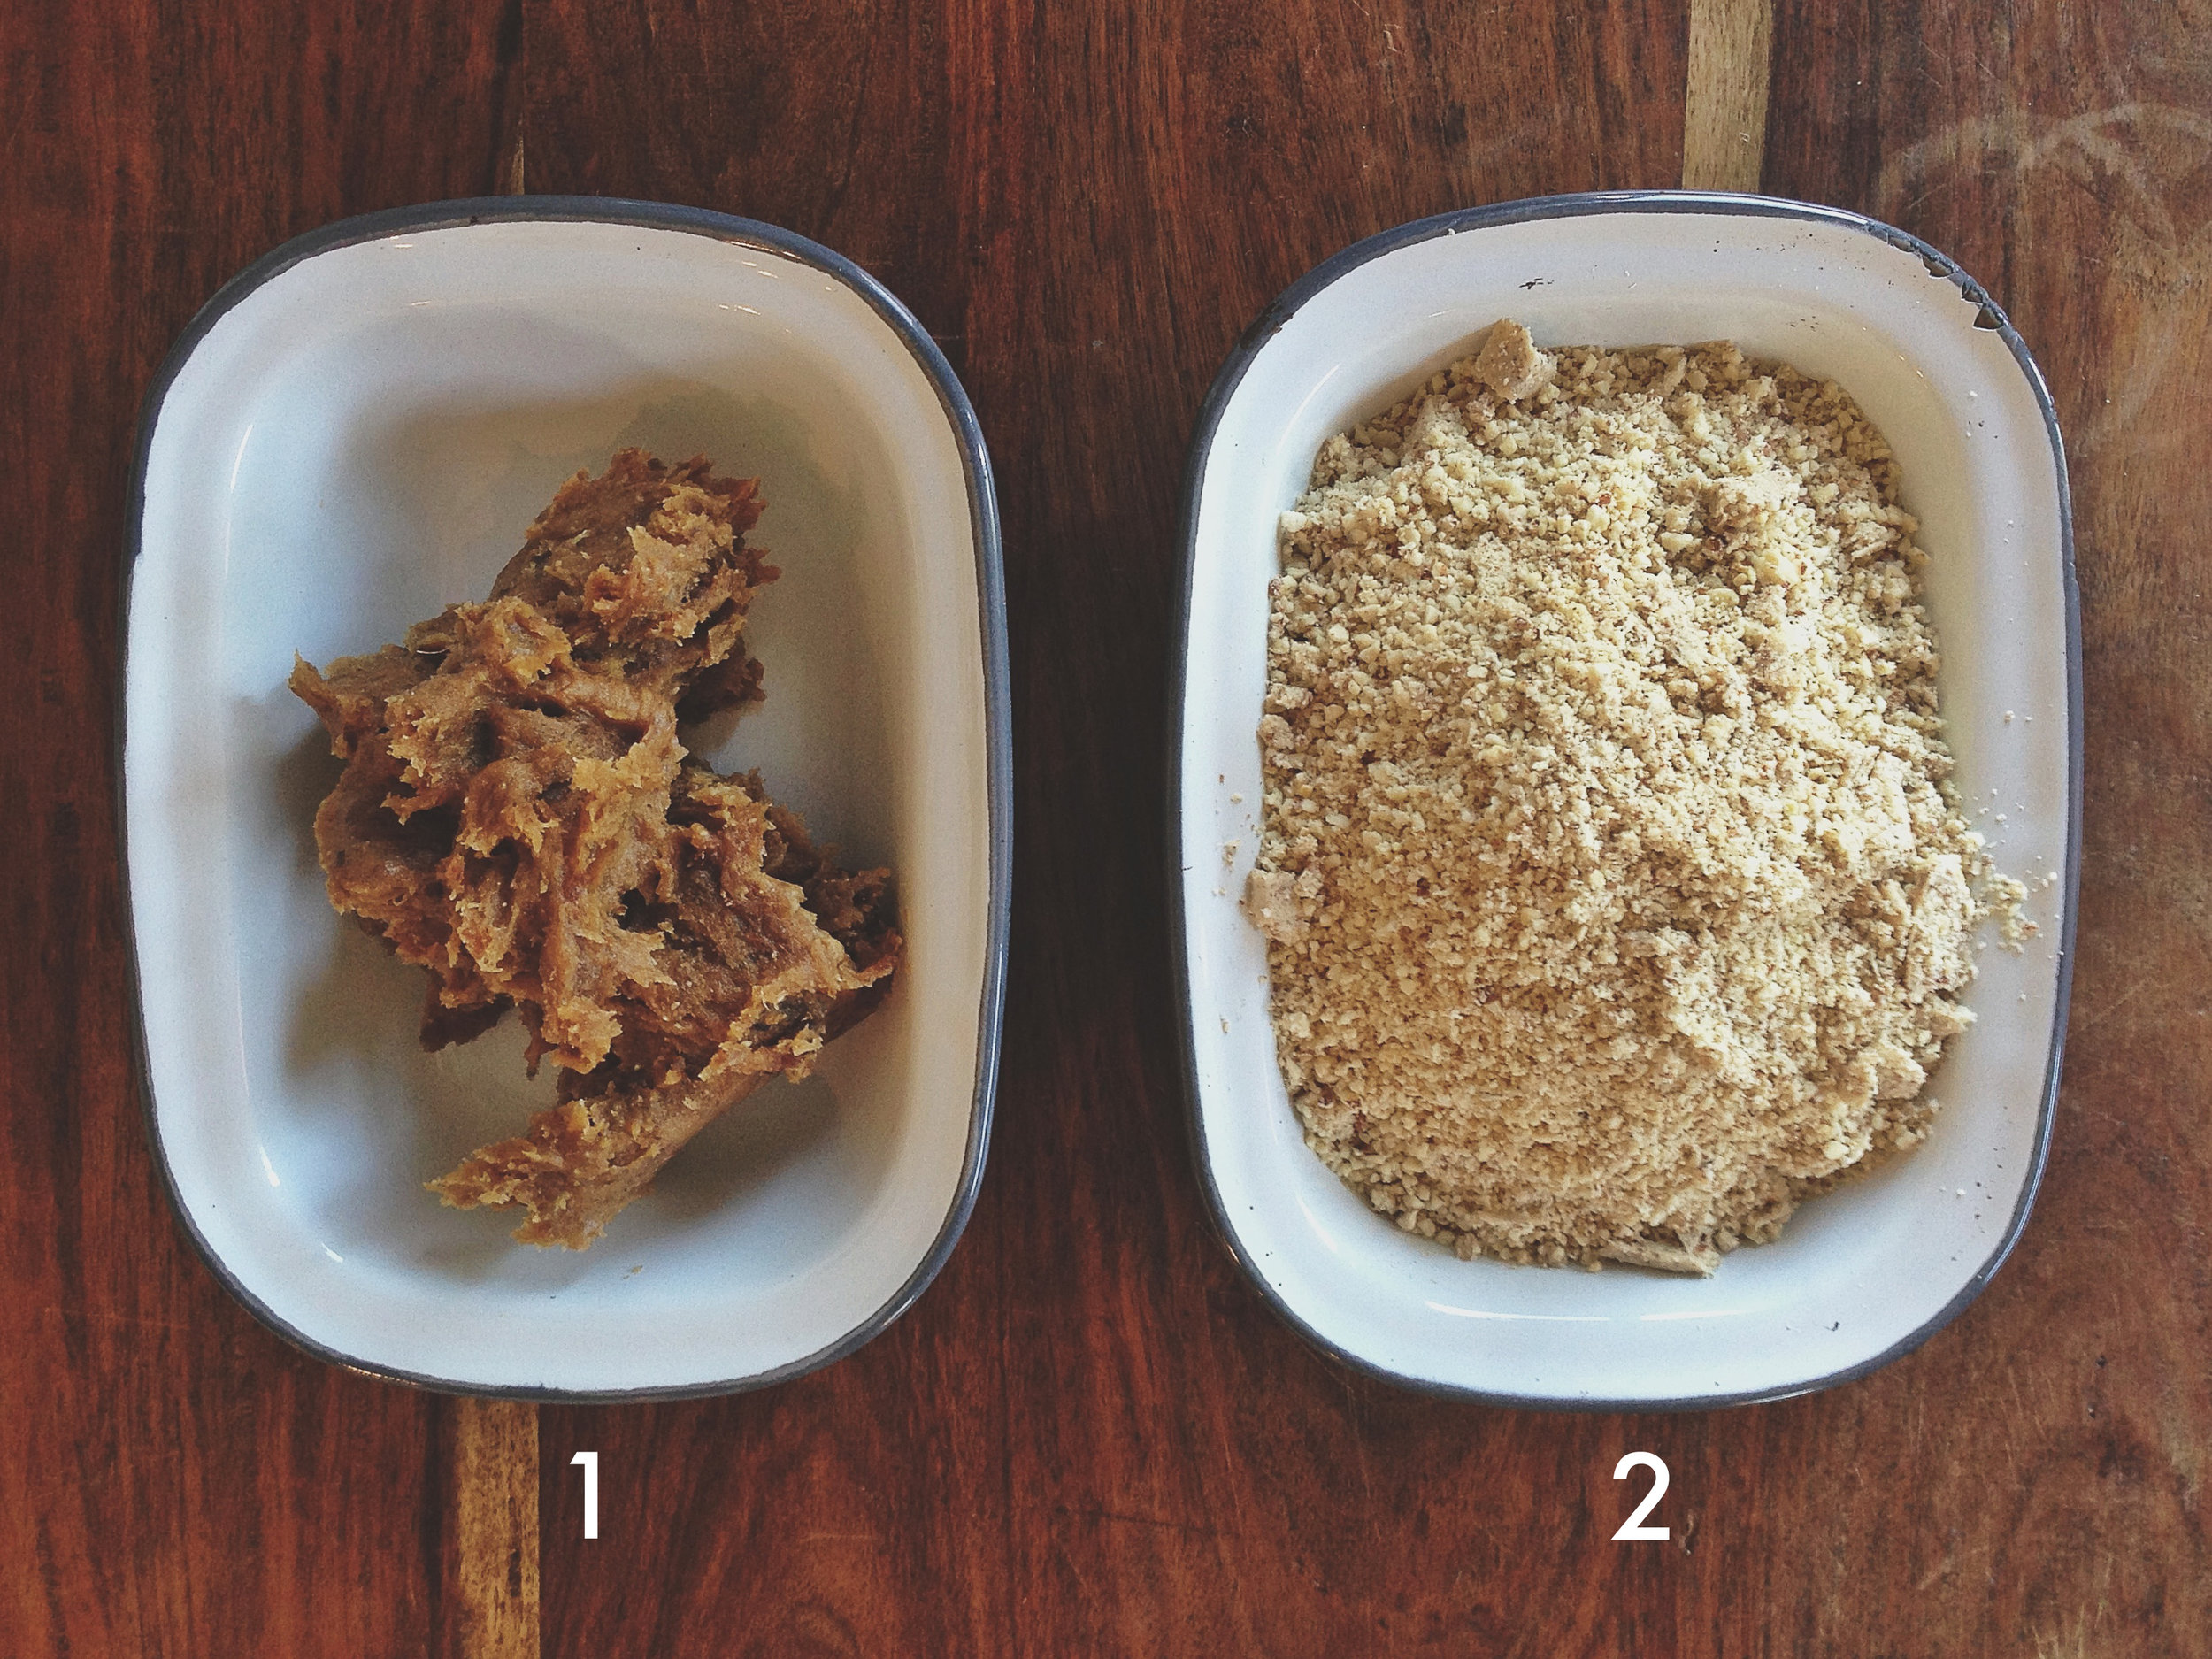
Combine almonds, cashews and sea salt in a food processor and grind until it turns into a course powder. Pour it into a bowl and set aside.

Combine dates, peanut butter and vanilla in a food processor until it becomes a thick paste.

Add the nut mixture to the date mixture and blend until combined. It should be pretty crumbly at this point and that's ok. You will mix it more in a bit.

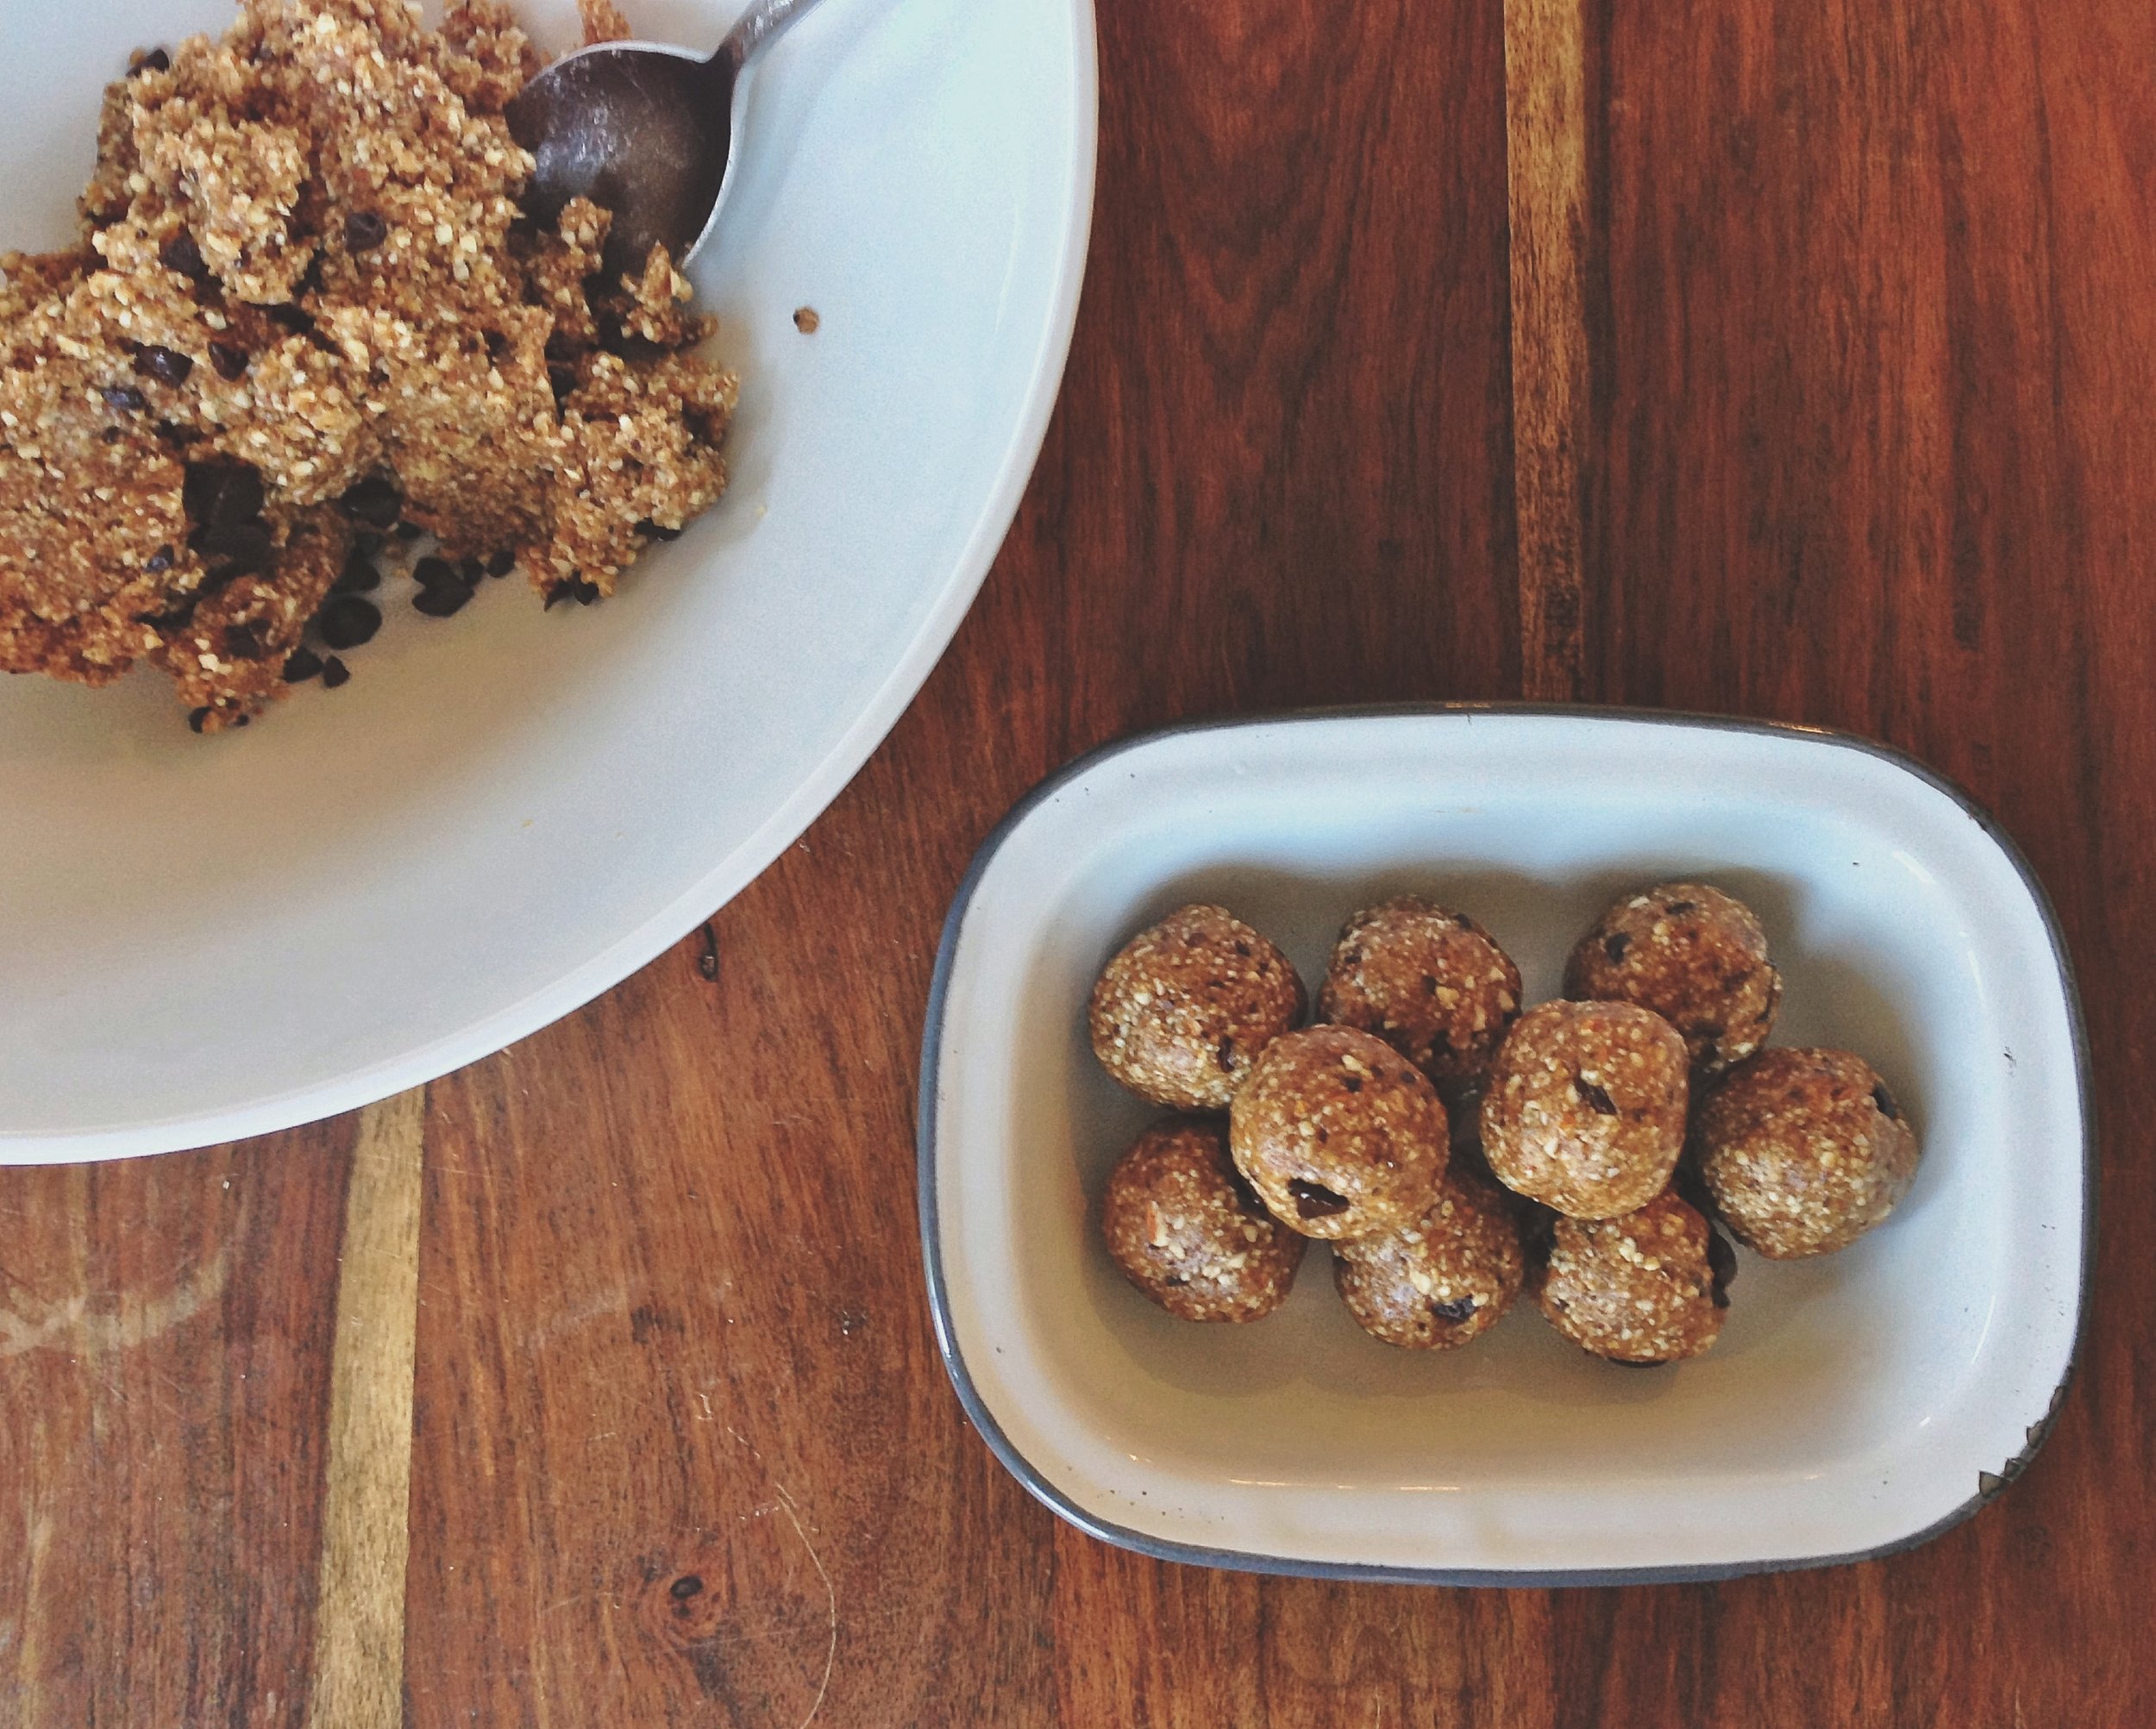
In a large bowl, combine the date and nut mixture with the chocolate chips and stir well. I suggest using your hands to get it mixed well. (while I was up to my elbows mixing up the dough for this recipe I had one child on the toilet calling for a wiper and one child destroying the indoor plants. Might be a good idea to do this during nap time!)

Once dough is combined, take about a tablespoon at a time and roll into a ball. Depending on how big you make them, you should be able to make 18-20. Store them in the fridge or freezer. I make a big batch like this and we keep them in the freezer. You can always half the recipe if you are making them for the first time or don't know how many will get eaten.

ENJOY!

[print_this]

BETTER THEN LARABAR BALLS

makes 20 balls

INGREDIENTS:

1 C raw almonds

1 C raw cashews

14 pitted medjool dates*

2 T natural peanut butter (optional)

1 T vanilla

1 t sea salt

1/4 C dark chocolate chips or carob chips

*Trader Joe's has a large package of dates for under $5 and Costco has them as well

TO MAKE:

*I suggest using a food processor to make these. A blender does work but can be a bit tricky to blend the dates.

1. Coarsely chop the dark chocolate chips with a knife or food processor and set aside.

2. Combine almonds, cashews and sea salt in a food processor and grind until it turns into a course powder. Pour it into a bowl and set aside.

3. Combine dates, peanut butter and vanilla in a food processor until it becomes a thick paste.

4. Add the nut mixture to the date mixture and blend until combined. It should be pretty crumbly at this point and that's ok. You will mix it more in a bit.

5. In a large bowl, combine the date and nut mixture with the chocolate chips and stir well. I suggest using your hands to get it mixed well. (while I was up to my elbows mixing up the dough for this recipe I had one child on the toilet calling for a wiper and one child destroying the indoor plants. Might be a good idea to do this during nap time!)

6. Once dough is combined, take about a tablespoon at a time and roll into a ball. Depending on how big you make them, you should be able to make 18-20. Store them in the fridge or freezer. I make a big batch like this and we keep them in the freezer. You can always half the recipe if you are making them for the first time or don't know how many will get eaten.

ENJOY!

[/print_this]
APPLE + CINNAMON + OVEN PANCAKE
FF.jpg

It’s funny how food is connected to memories. I remember sitting on my grandpa Comer’s lap, leaning against is big grandpa belly and eating a pralines and cream ice cream cone as a little girl.

I remember summer’s spent at my grandparent’s cabin and starting every morning with my grandma’s banana bread.

I remember family movie nights and my mom’s warm tapioca pudding.

Nostalgia is kind of how today’s recipe came about.

For a number of my growing up years my dad traveled quite a bit and the routine changed a little when he was gone.

Without the whole family home to eat dinner every night, my mom would often rent us girls a good chick flick and make a big oven pancake for dinner.

Somehow good food and cheesy chick flicks create lasting memories… deep I know.

Now, I know that most of our comfort foods we know and love are foods we limit our intake of because we know they aren’t good everyday menu items.

But what if we began creating and building memories around meals and foods that nourish our bodies and fuel our active children? What if those comfort foods could actually be good for us?

I’m not talking about eating raw carrots and celery and telling yourself they taste like candy. They don’t and never will.

Healthy, whole foods can be just as (I argue way more) delicious as the comfort foods we try to avoid!

Today’s recipe is a new take on one of my favorite meals and fun memory growing up.

ENJOY!

APPLE + CINNAMON + OVEN PANCAKE

serves 4-5

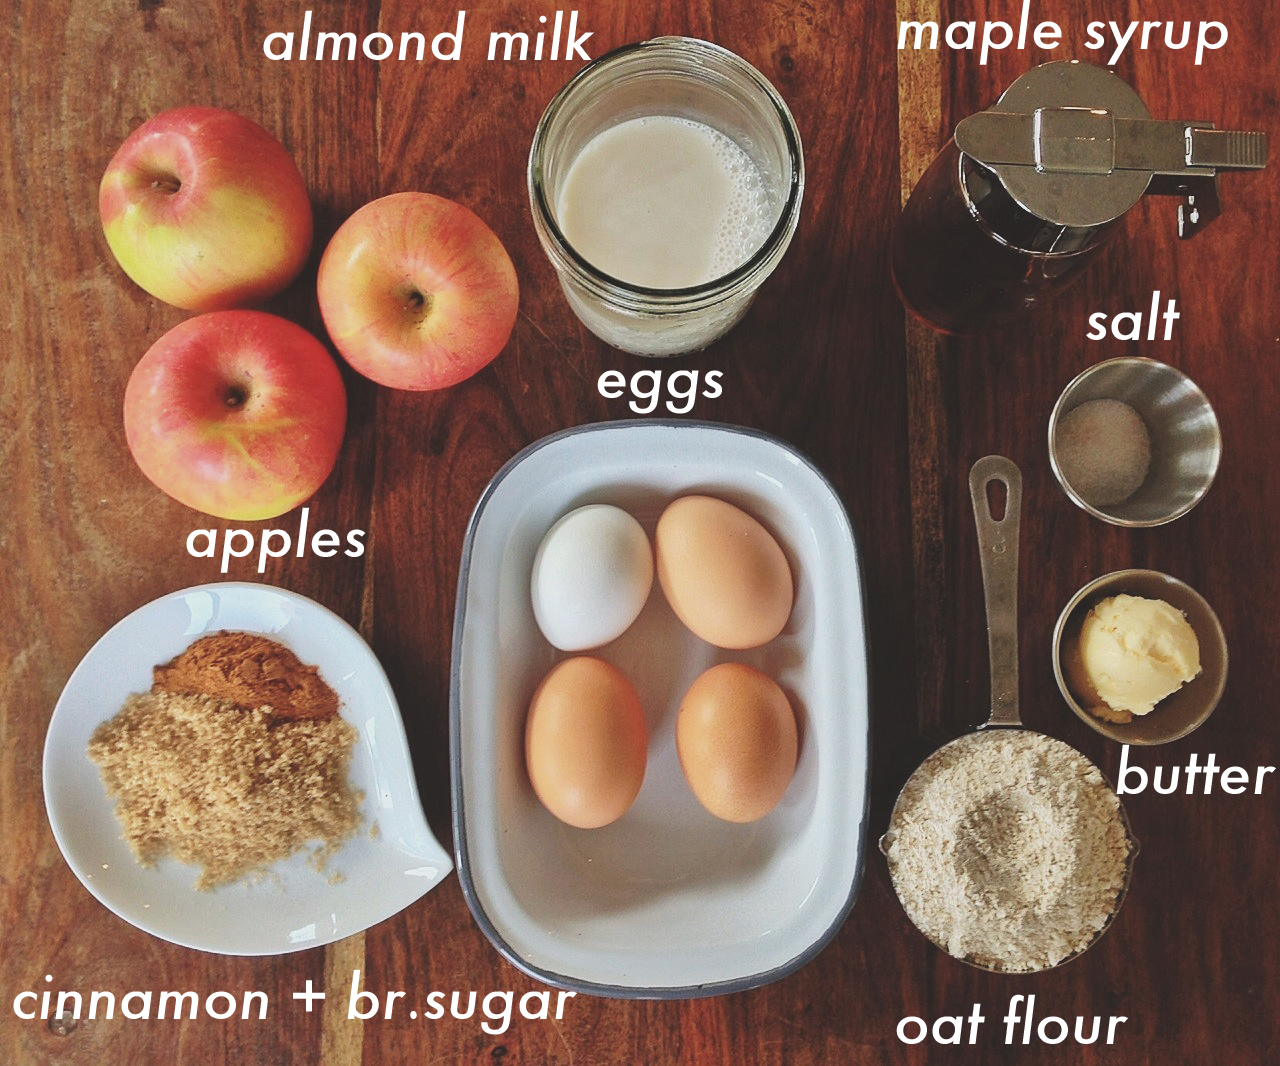
(vanilla not pictured)

INGREDIENTS:

1 C almond milk or organic whole milk

4 eggs

1 T maple syrup

¾ C oat flour or whole-wheat flour*

¾ tsp salt

2 tsp vanilla

2 T earth balance butter or coconut oil (or organic butter)

3 apples

1/8 C brown sugar

1 tsp cinnamon

*If you use oat flour, it won’t puff up as much as a traditional oven pancake. But I promise it still tastes great!

TO MAKE:

Preheat oven to 500F.

Melt the butter or coconut oil in a cast iron skillet or or 8x8 baking pan.

While the butter it melting in the oven, peal and slice the apples.

Add the sliced apples, cinnamon and sugar to the pan and stir until they are well coated.

Bake for 10 – 15 min or until the apples soften and begin to brown.

While the apples are baking, stir together the flour and salt. Set aside.

Wisk together the milk, eggs, vanilla and maple syrup.

Add the dry ingredients to the wet ingredients and stir well or blend.

Once the apples are done, pour the batter over the apples and then reduce the oven temperature to 425F.

Bake for about 10 min. You just want to check and make sure it has cooked through in the middle but remove it before the edges get too crispy. 10-12 minutes should do the trick.

TO SERVE:

Let it cool for a few minutes and then lightly dust with powdered sugar for some extra pizzazz.

You can eat it as is or drizzle with a little maple syrup.

[print_this]

APPLE + CINNAMON + OVEN PANCAKE

serves 4-5

INGREDIENTS:

1 C almond milk or organic whole milk

4 eggs

1 T maple syrup

¾ C oat flour or whole-wheat flour*

¾ tsp salt

2 tsp vanilla

2 T earth balance butter or coconut oil (or organic butter)

3 apples

1/8 C brown sugar

1 tsp cinnamon

*If you use oat flour, it won’t puff up as much as a traditional oven pancake. But I promise it still tastes great!

TO MAKE:

Preheat oven to 500F.

Melt the butter or coconut oil in a cast iron skillet or 8x8 baking pan.

While the butter it melting in the oven, peal and slice the apples.

Add the sliced apples, cinnamon and sugar to the pan and stir until they are well coated.

Bake for 10 – 15 min or until the apples soften and begin to brown.

While the apples are baking, stir together the flour, baking powder and salt. Set aside.

Wisk together the eggs, vanilla and maple syrup.

Add the dry ingredients to the wet ingredients and stir well or blend.

Once the apples are done, pour the batter over the apples and then reduce the oven temperature to 425F.

Bake for about 10 min. You just want to check and make sure it has cooked through in the middle but remove it before the edges get too crispy. 10-12 minutes should do the trick.

TO SERVE:

Let it cool for a few minutes and then lightly dust with powdered sugar for some extra pizzazz.

You can eat it as is or drizzle with a little maple syrup.

[/print_this]

WELCOME TO THE KITCHEN

When my daughter Elizabeth was a little girl she loved to play beside me in the kitchen. Wrapped in a too-large apron, standing on a chair, my little Beth stirred and created and chattered joy beside me.

As she grew older she ignored my closely followed recipes and experimented with ideas of her own. Beetza’s Pizzas were a favorite of her brother’s friends who crowded into our kitchen for more.

Overtime, Elizabeth began to discover both the benefits and the beauty of pure, whole foods. She developed a passion for feeding her own family delicious meals, searching for recipes and inventing her own.

What fun we’ve all had tasting her creations-in-process!

Elizabeth has led the way in our family towards a more God-honoring way of feeding our bodies. She’s helped us to see, in that hope-filled way of hers, the importance of choosing to cook and gather and eat the way we were meant to.

I am proud to learn from my daughter. And I’m thrilled that she’s taking time from her busy life as a wife and mom and ministry leader to share her research and recipes with all of us.

Every Friday Elizabeth will bring us something new. A meal, a treat, a fresh way of preparing what’s in season. She’ll add to our ideas and motivate us to love in the Kitchen.

Now it is my turn to learn at my daughter’s side. Join us, will you?

From my heart,

Diane

TERIYAKI SALMON BOWLS + GRILLED VEGGIES

  To me, Whole Foods is a little slice of heaven on earth.

Some women like to window shop and drool over beautiful clothes…

I prefer to peruse the isles of Whole Foods.

(Ok, I love clothes too but window-shopping is not really my thing… I like shopping to buy better)

Anyway… I love to stroll down the isles and dream of new meals to create and flavors to try.

Beyond just shopping there, they have some of the best lunch and dinner meals around. If you have not gone to their Marketplace for a meal, you really need to!

They have EVERYTHING. Mexican, Italian, Indian, Sushi… you name it, they have it and everything is delicious! I know that most of the store is pretty spendy (my husband calls it “Whole Paycheck”) but their meals are really quite reasonably priced.

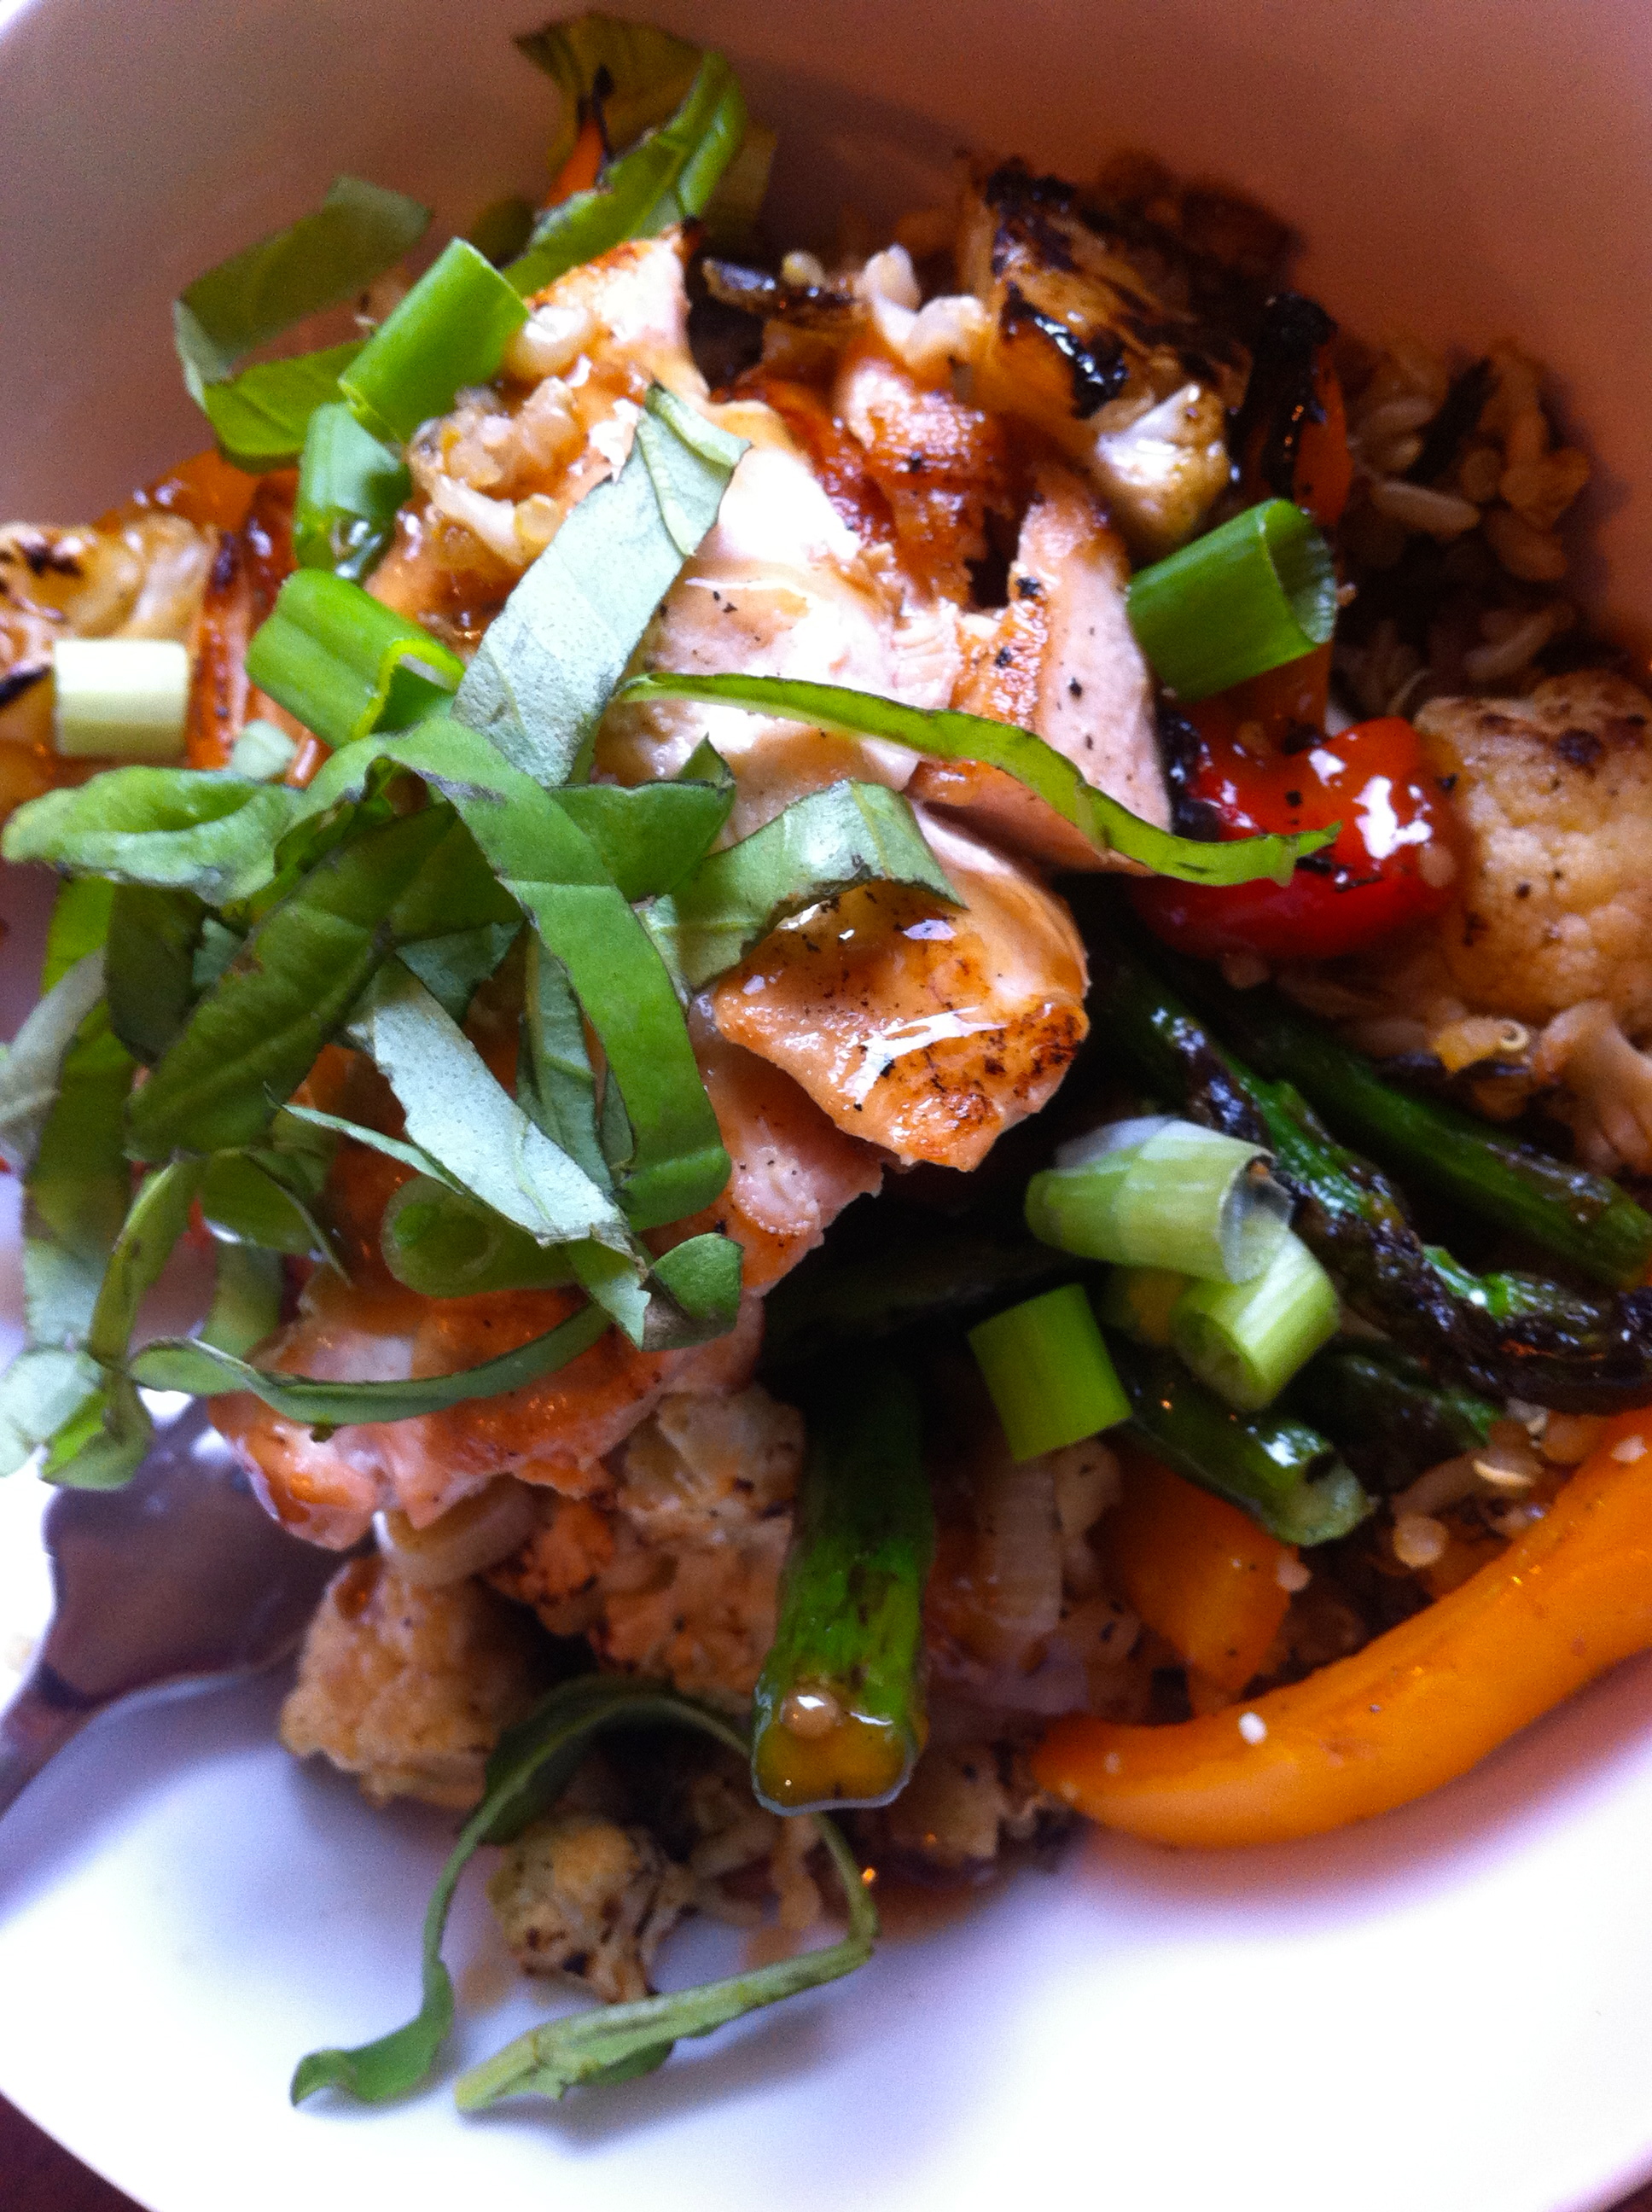
One of my favorite things to eat there lately is their Teriyaki Salmon Bowls. I pretty much want one all day, everyday so it was time to attempt to make them at home.

Now if I can just convince my husband that he wants these everyday too…

ENJOY!

Elizabeth

GLUTEN FREE TERIYAKI SAUCE

INGREDIENTS:

1/4 C Bragg’s amino acids

3/4 C water

1 tsp minced ginger

2 tsp minced garlic

2 T brown sugar

1 T cornstarch

Couple of dashes of cayenne pepper

TO MAKE:

Heat in a saucepan over medium heat until it boils. Then reduce to a simmer until it thickens. Stir frequently.


GRILLED SALMON AND VEGGIE BOWLS

Adjust quantities according to how many you are serving

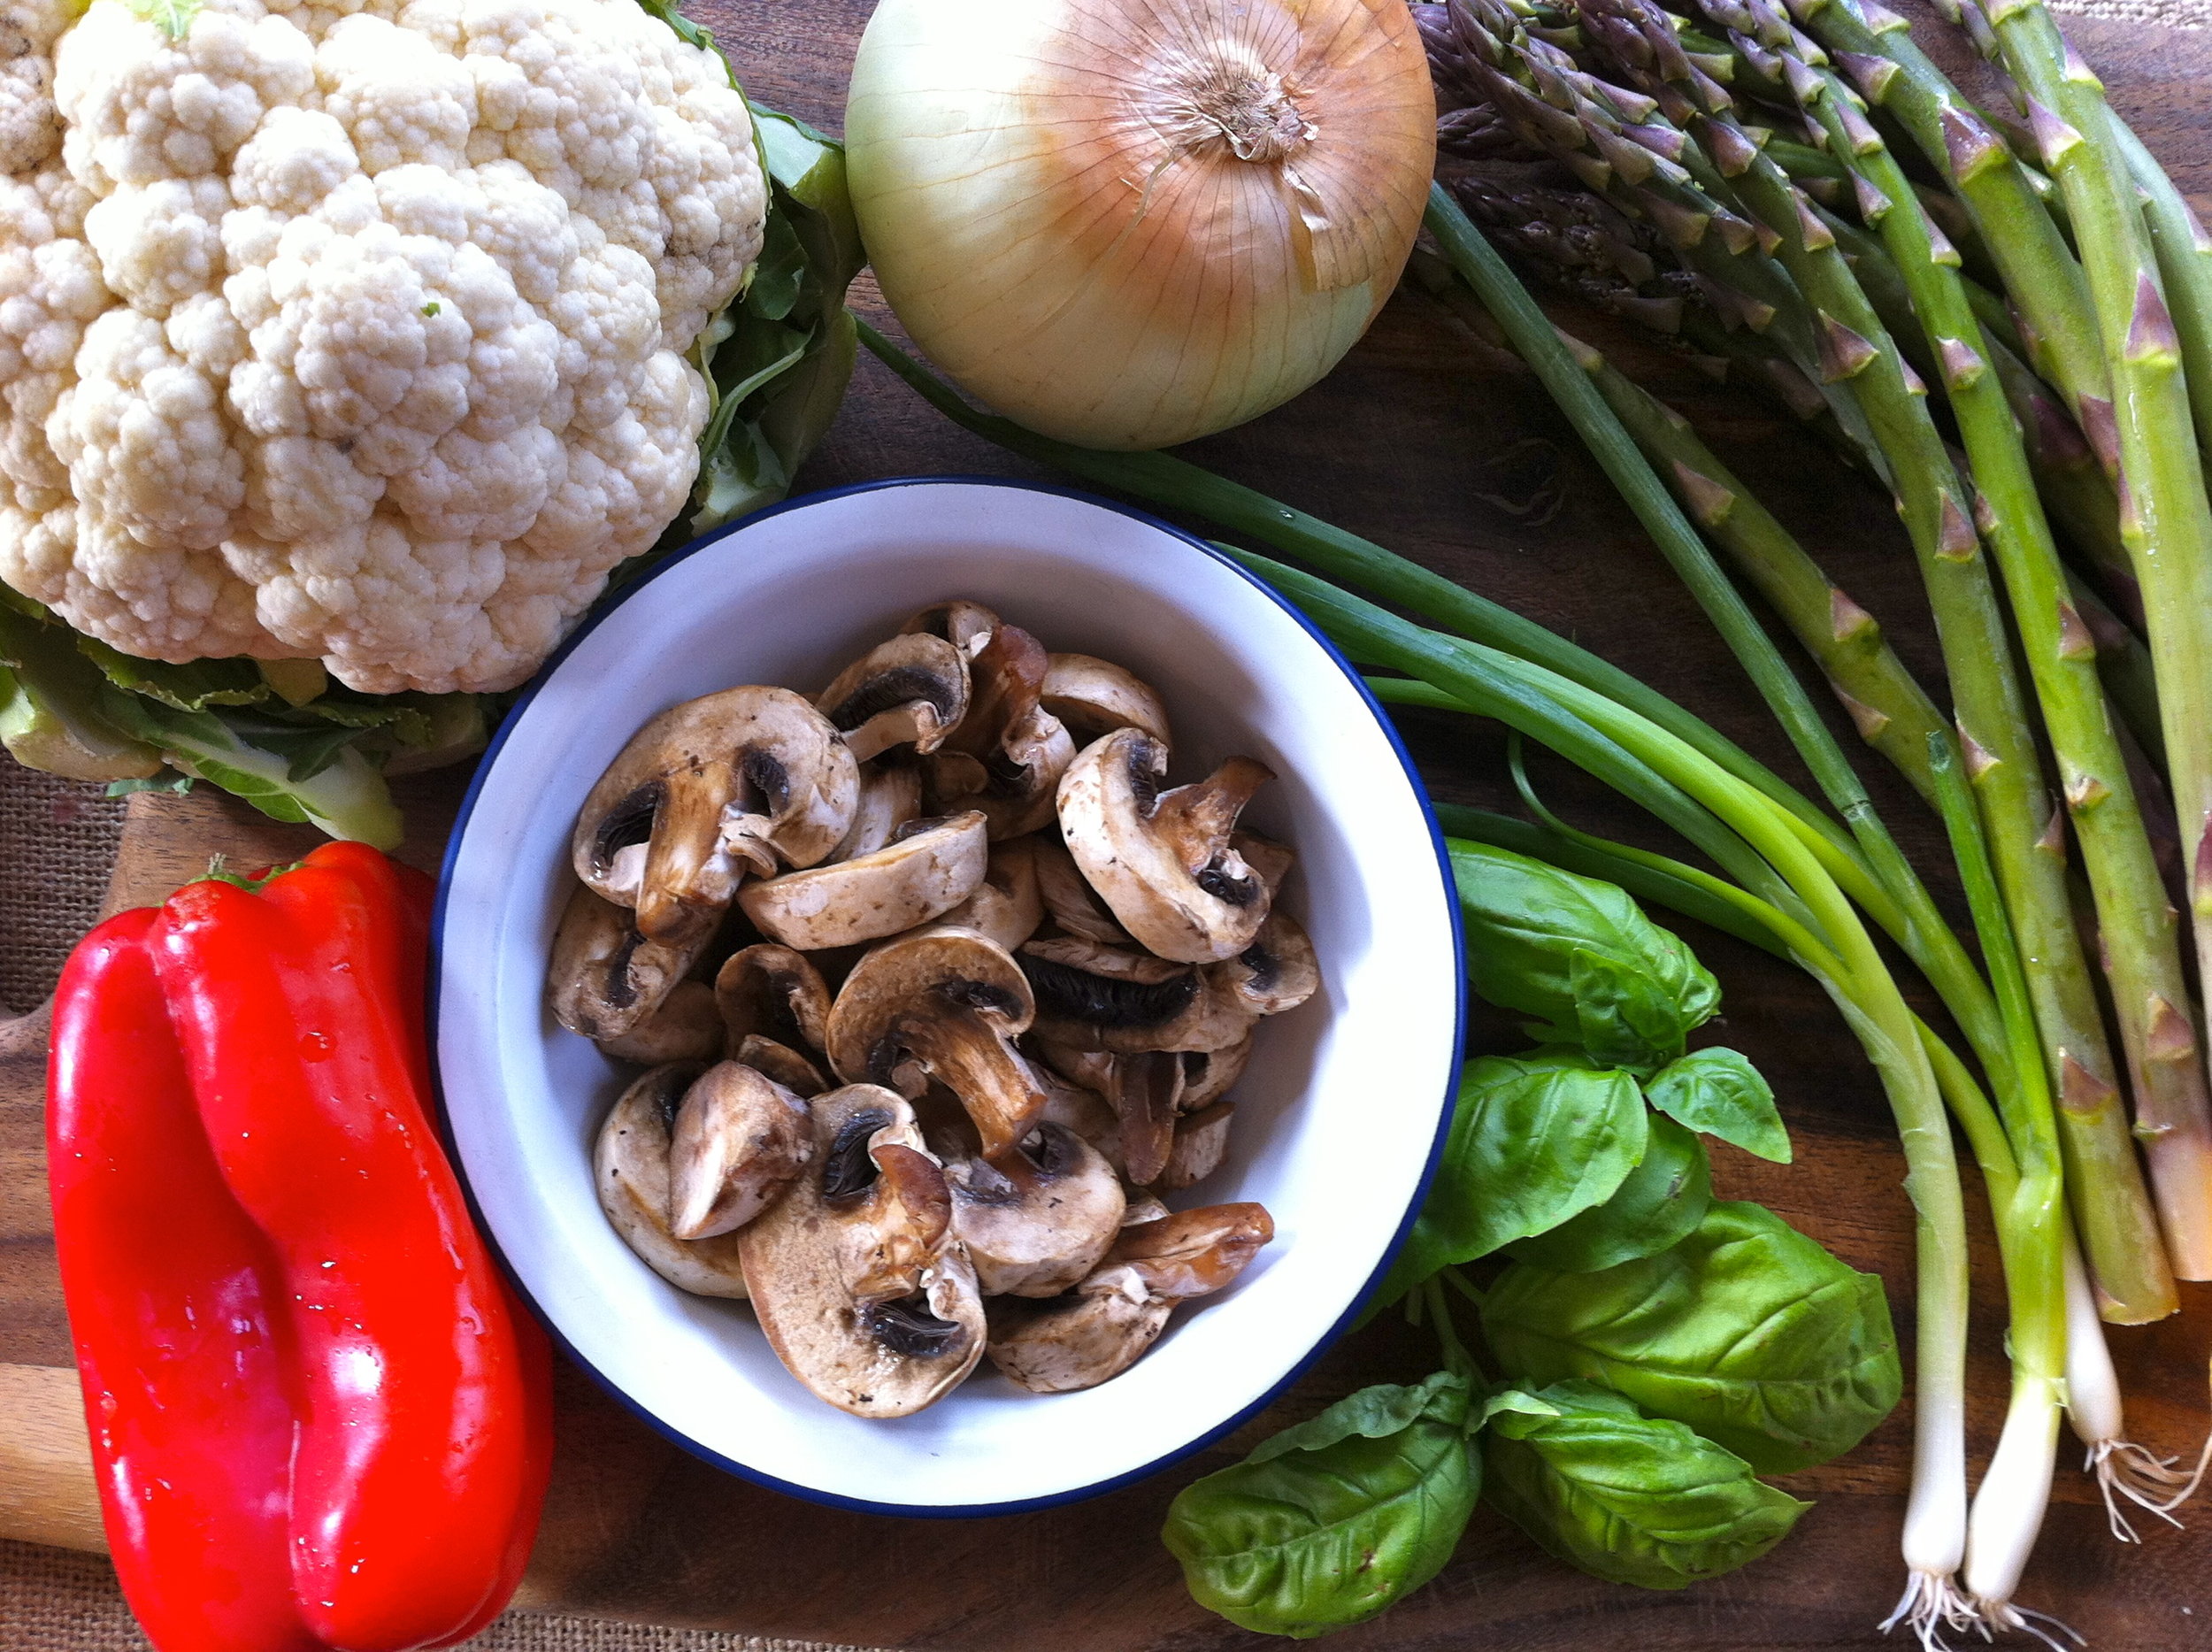
INGREDIENTS:

Chopped:

Bell Pepper

Cauliflower

Asparagus

Onion

Mushrooms

*any veggies work!


Thinly sliced salmon

Lemon juice

Olive oil

Minced garlic

Sea salt

Pepper


Cooked brown rice

TO MAKE:

Fire up the grill!

Place all chopped veggies in a large bowl and toss with olive oil, salt, pepper, and a scoop of minced garlic.

Cook them on the grill on a high heat until they brown up but still a bit crispy. We cook ours on a grill pan we got at Target and it works perfectly for any veggies

For the salmon, we usually buy the frozen Alaskan Salmon Fillets from Costco and those are really easy to slice in thin pieces. Toss them in a bowl with olive oil, lemon juice and dash of sea salt. Place them on the grill and watch them closely because they won’t take long to cook.

TO SERVE:

Layer brown rice, veggies, and salmon and drizzle the teriyaki sauce on top. Garnish with fresh basil and green onions for added flavor.

ENJOY!


CASHEW "CHEESE"

When I use to think of almonds, cashews, peanuts, etc; words like trail mix, high fat, and severe allergic reactions came to mind.

Never did I imagine the endless possibilities they contain or the nutritional benefits they hold.

Sauces, creams, crusts, desserts, flours, bars... the list goes on and on and on again.

Cashews are currently my favorite to use for creams and sauces and I shared my favorite Cashew Pesto with you a few weeks ago.

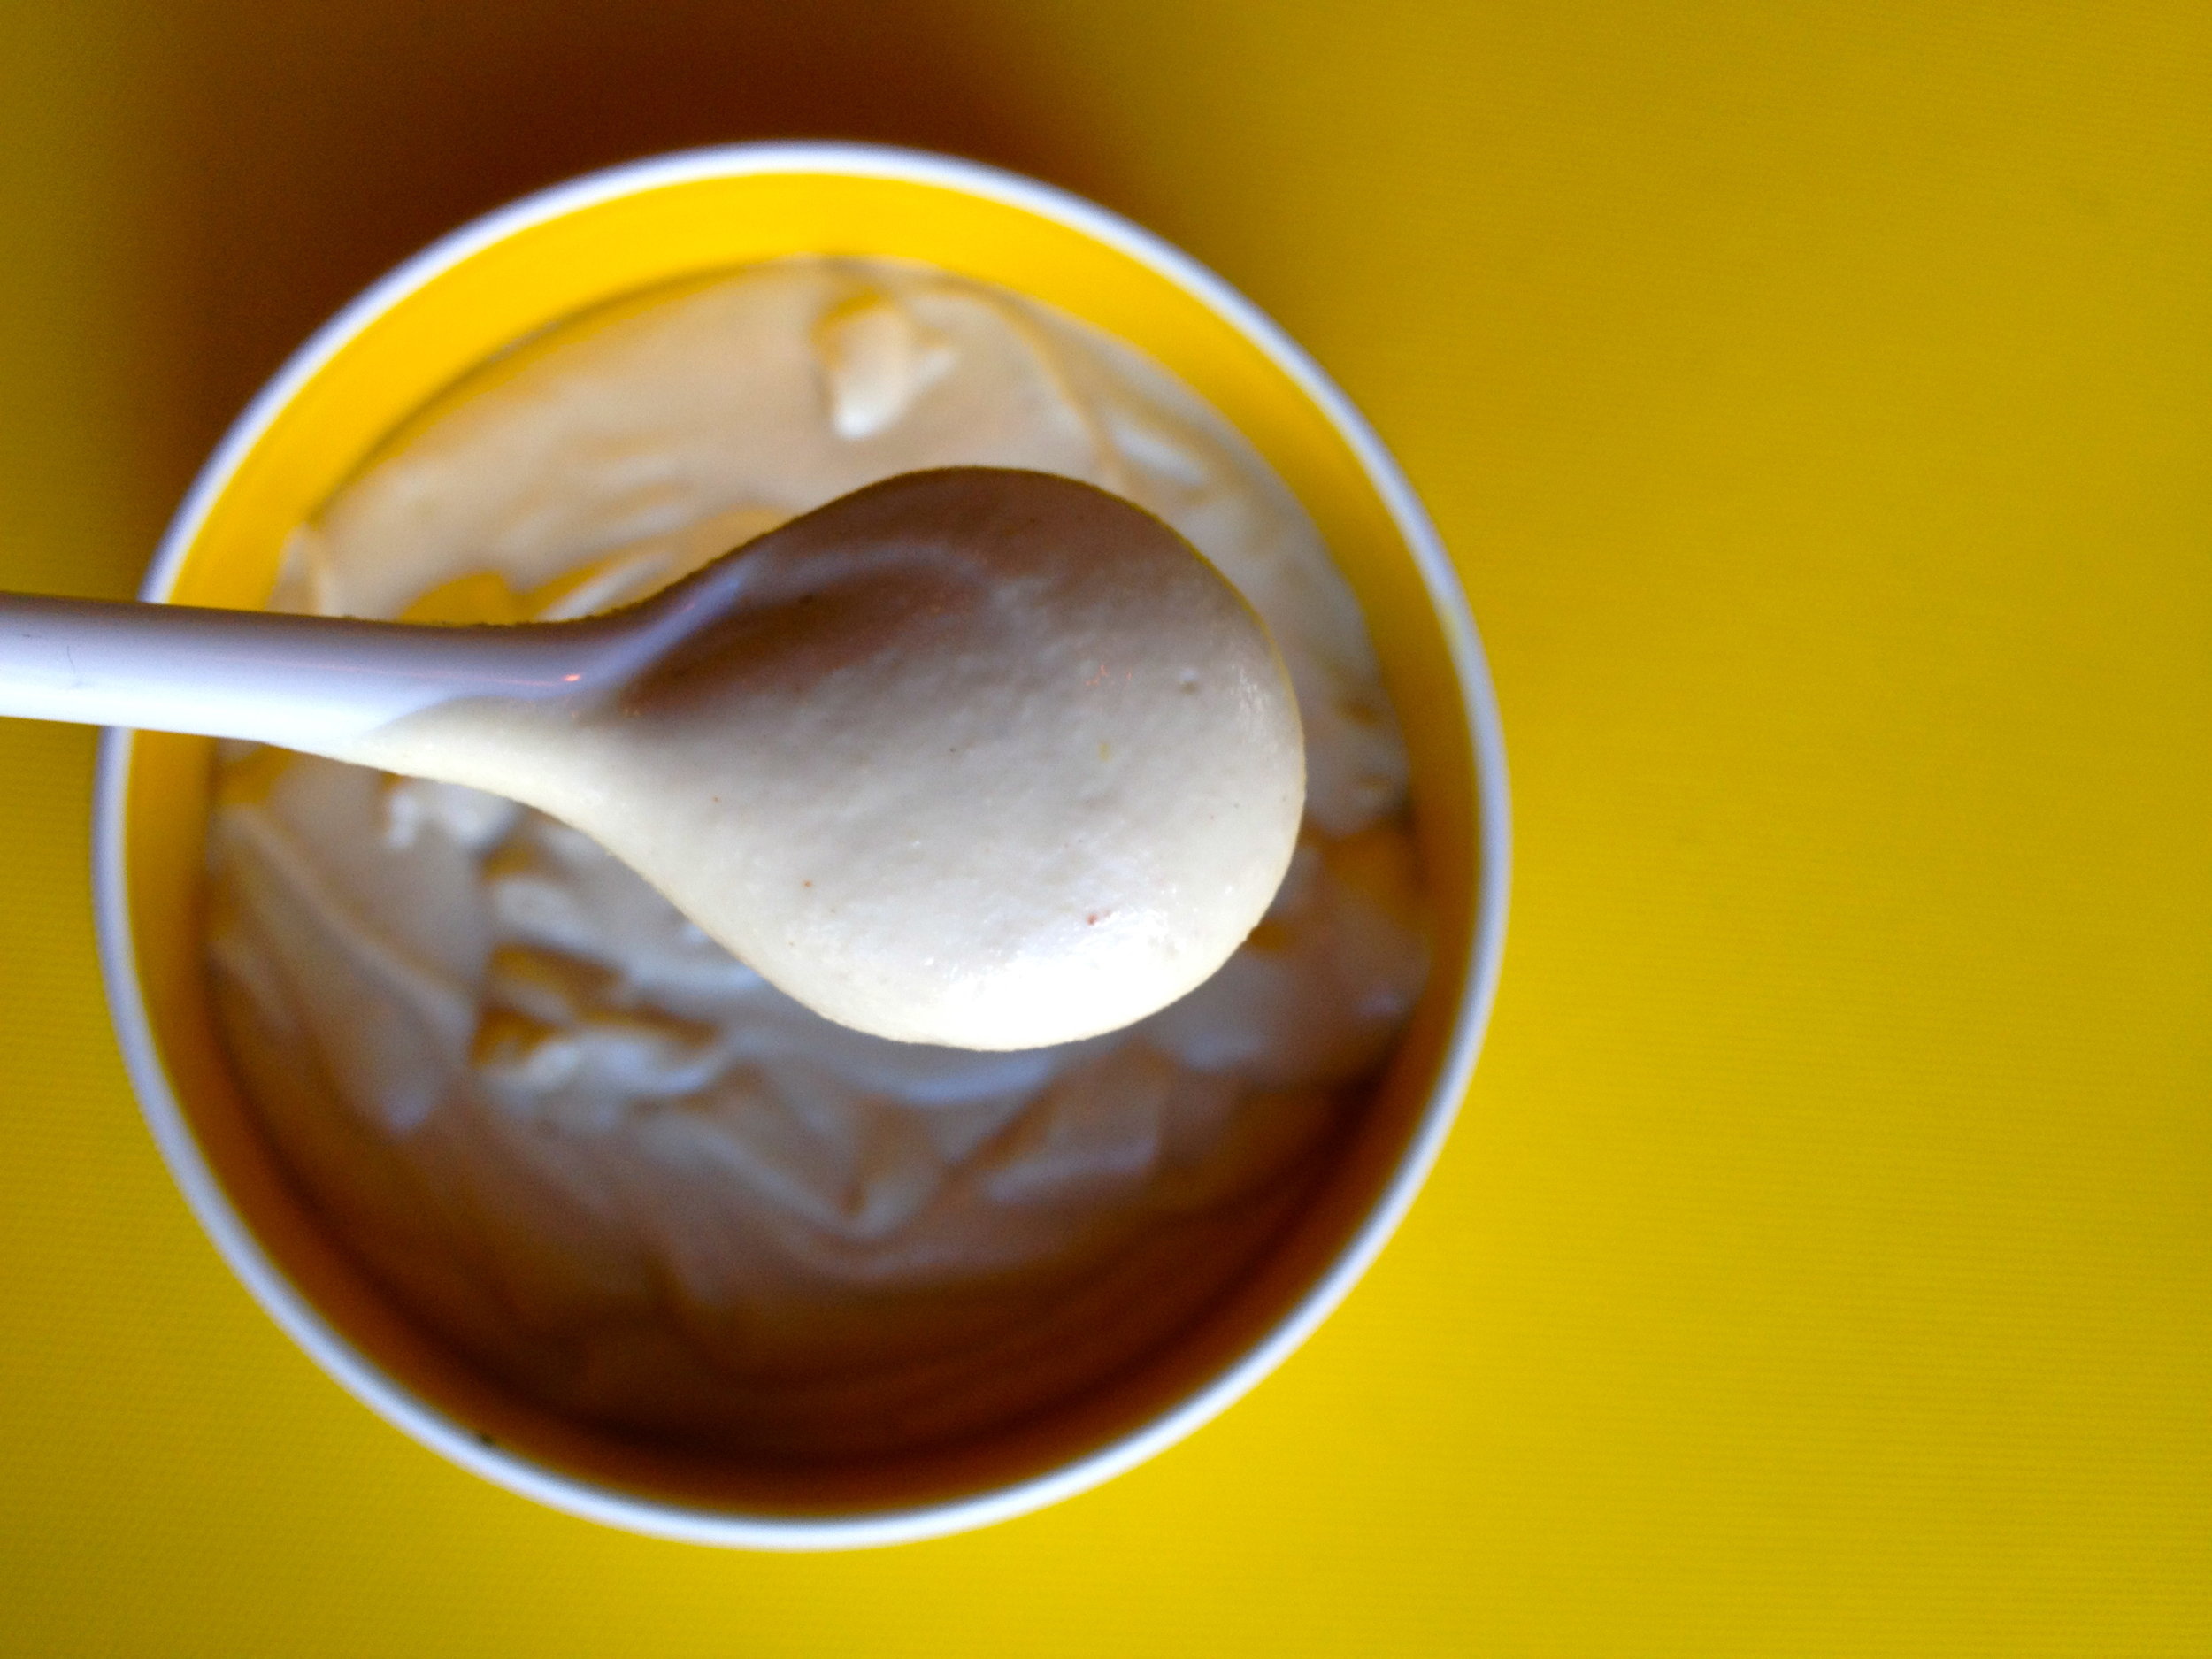
Today's recipe is a basic cashew cream that can be used in place of cheese in just about anything. I actually prefer it to cheese any day!

Here are a few ideas:

  • on pizza instead of cheese (see recipe below)
  • in tacos
  • drizzled over veggies
  • in enchiladas instead of cheese
  • as a dipping sauce for veggies
  • as a sauce for pasta
  • whatever else sounds good!

You can also add whatever you like to this recipe to fit your tastes and what you are serving it with.

Add ins:

  • For tacos: add some cilantro and lime juice
  • For pizza: add fresh basil
  • For pasta: add garlic cloves or garlic powder
  • For something spicy: add a few dashes of cayenne pepper

ENJOY!

Elizabeth

BASIC CASHEW CREAM

INGREDIENTS:

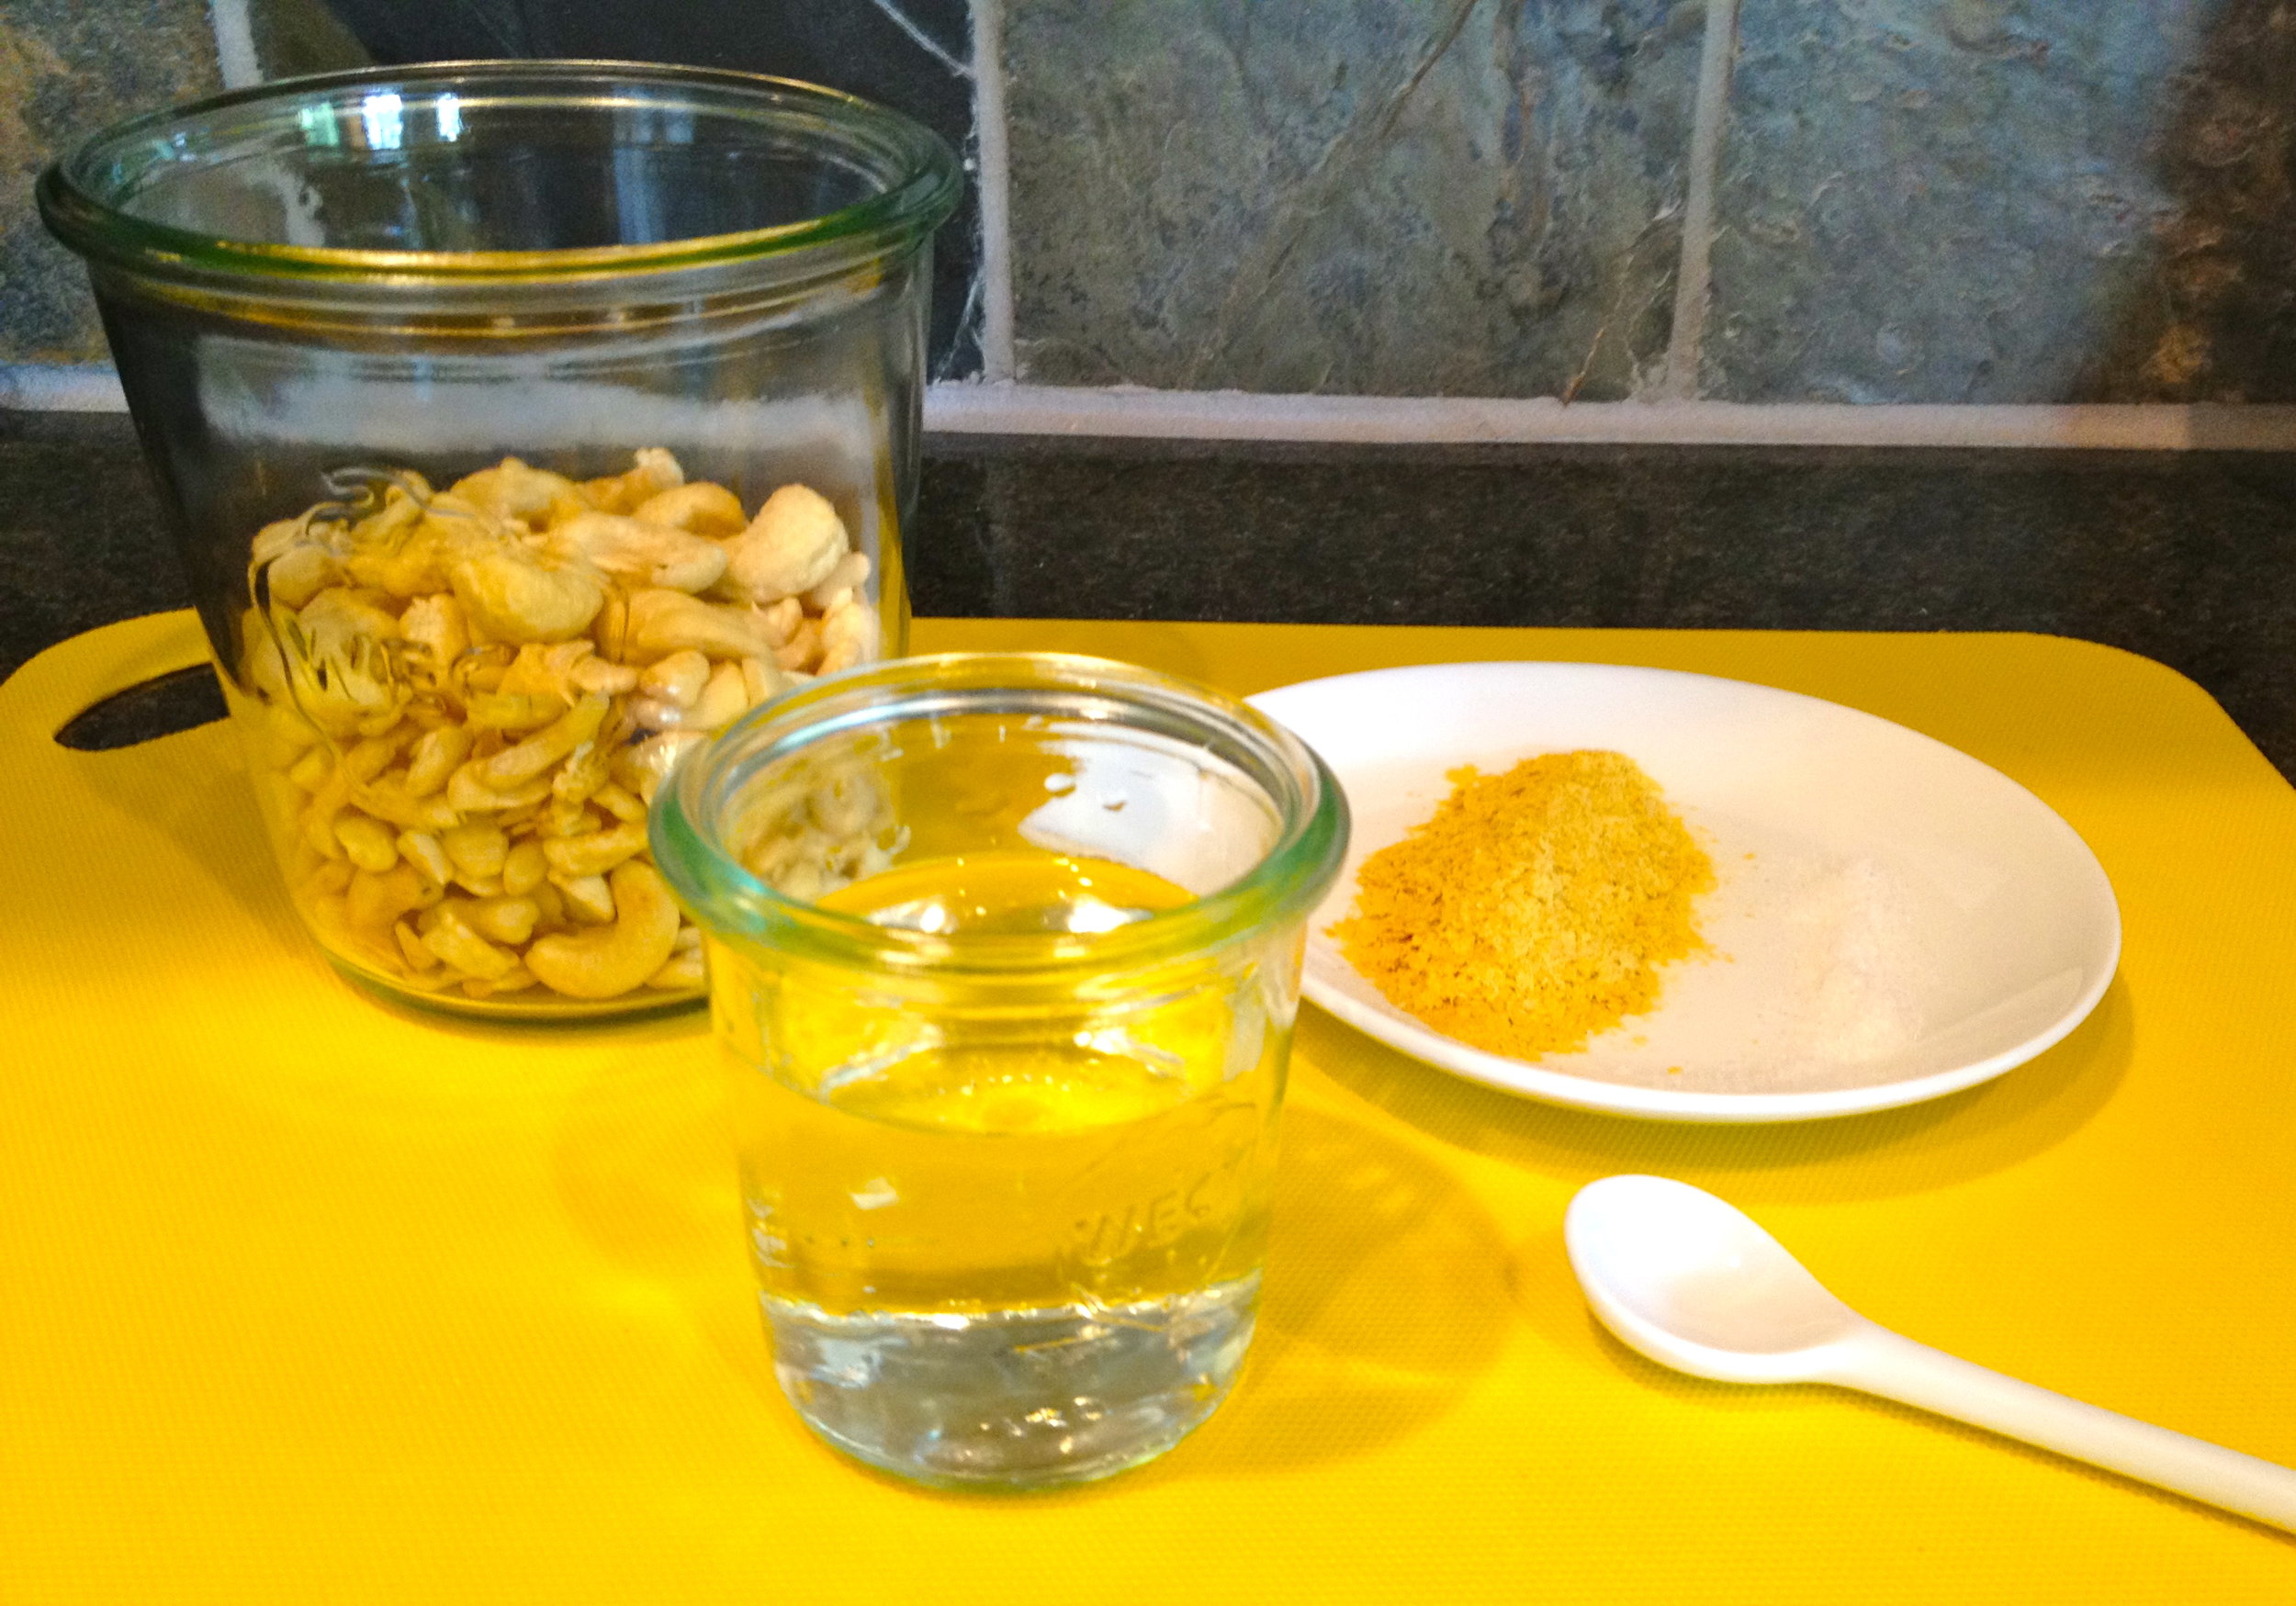
1 C raw cashews

1/2 C + 1 T water

1 T nutritional yeast (if you have never used this before, it can be found in the bulk section at Winco, Whole Foods and New Seasons. It has a cheese like flavor and even smells like cheese!)

1/4 t sea salt

dash or two of nutmeg (I know it sounds weird but it really does add a nice nutty flavor without overpowering it)

TO MAKE:

Simply put everything in a high speed blender or food proccesor and blend until smooth.

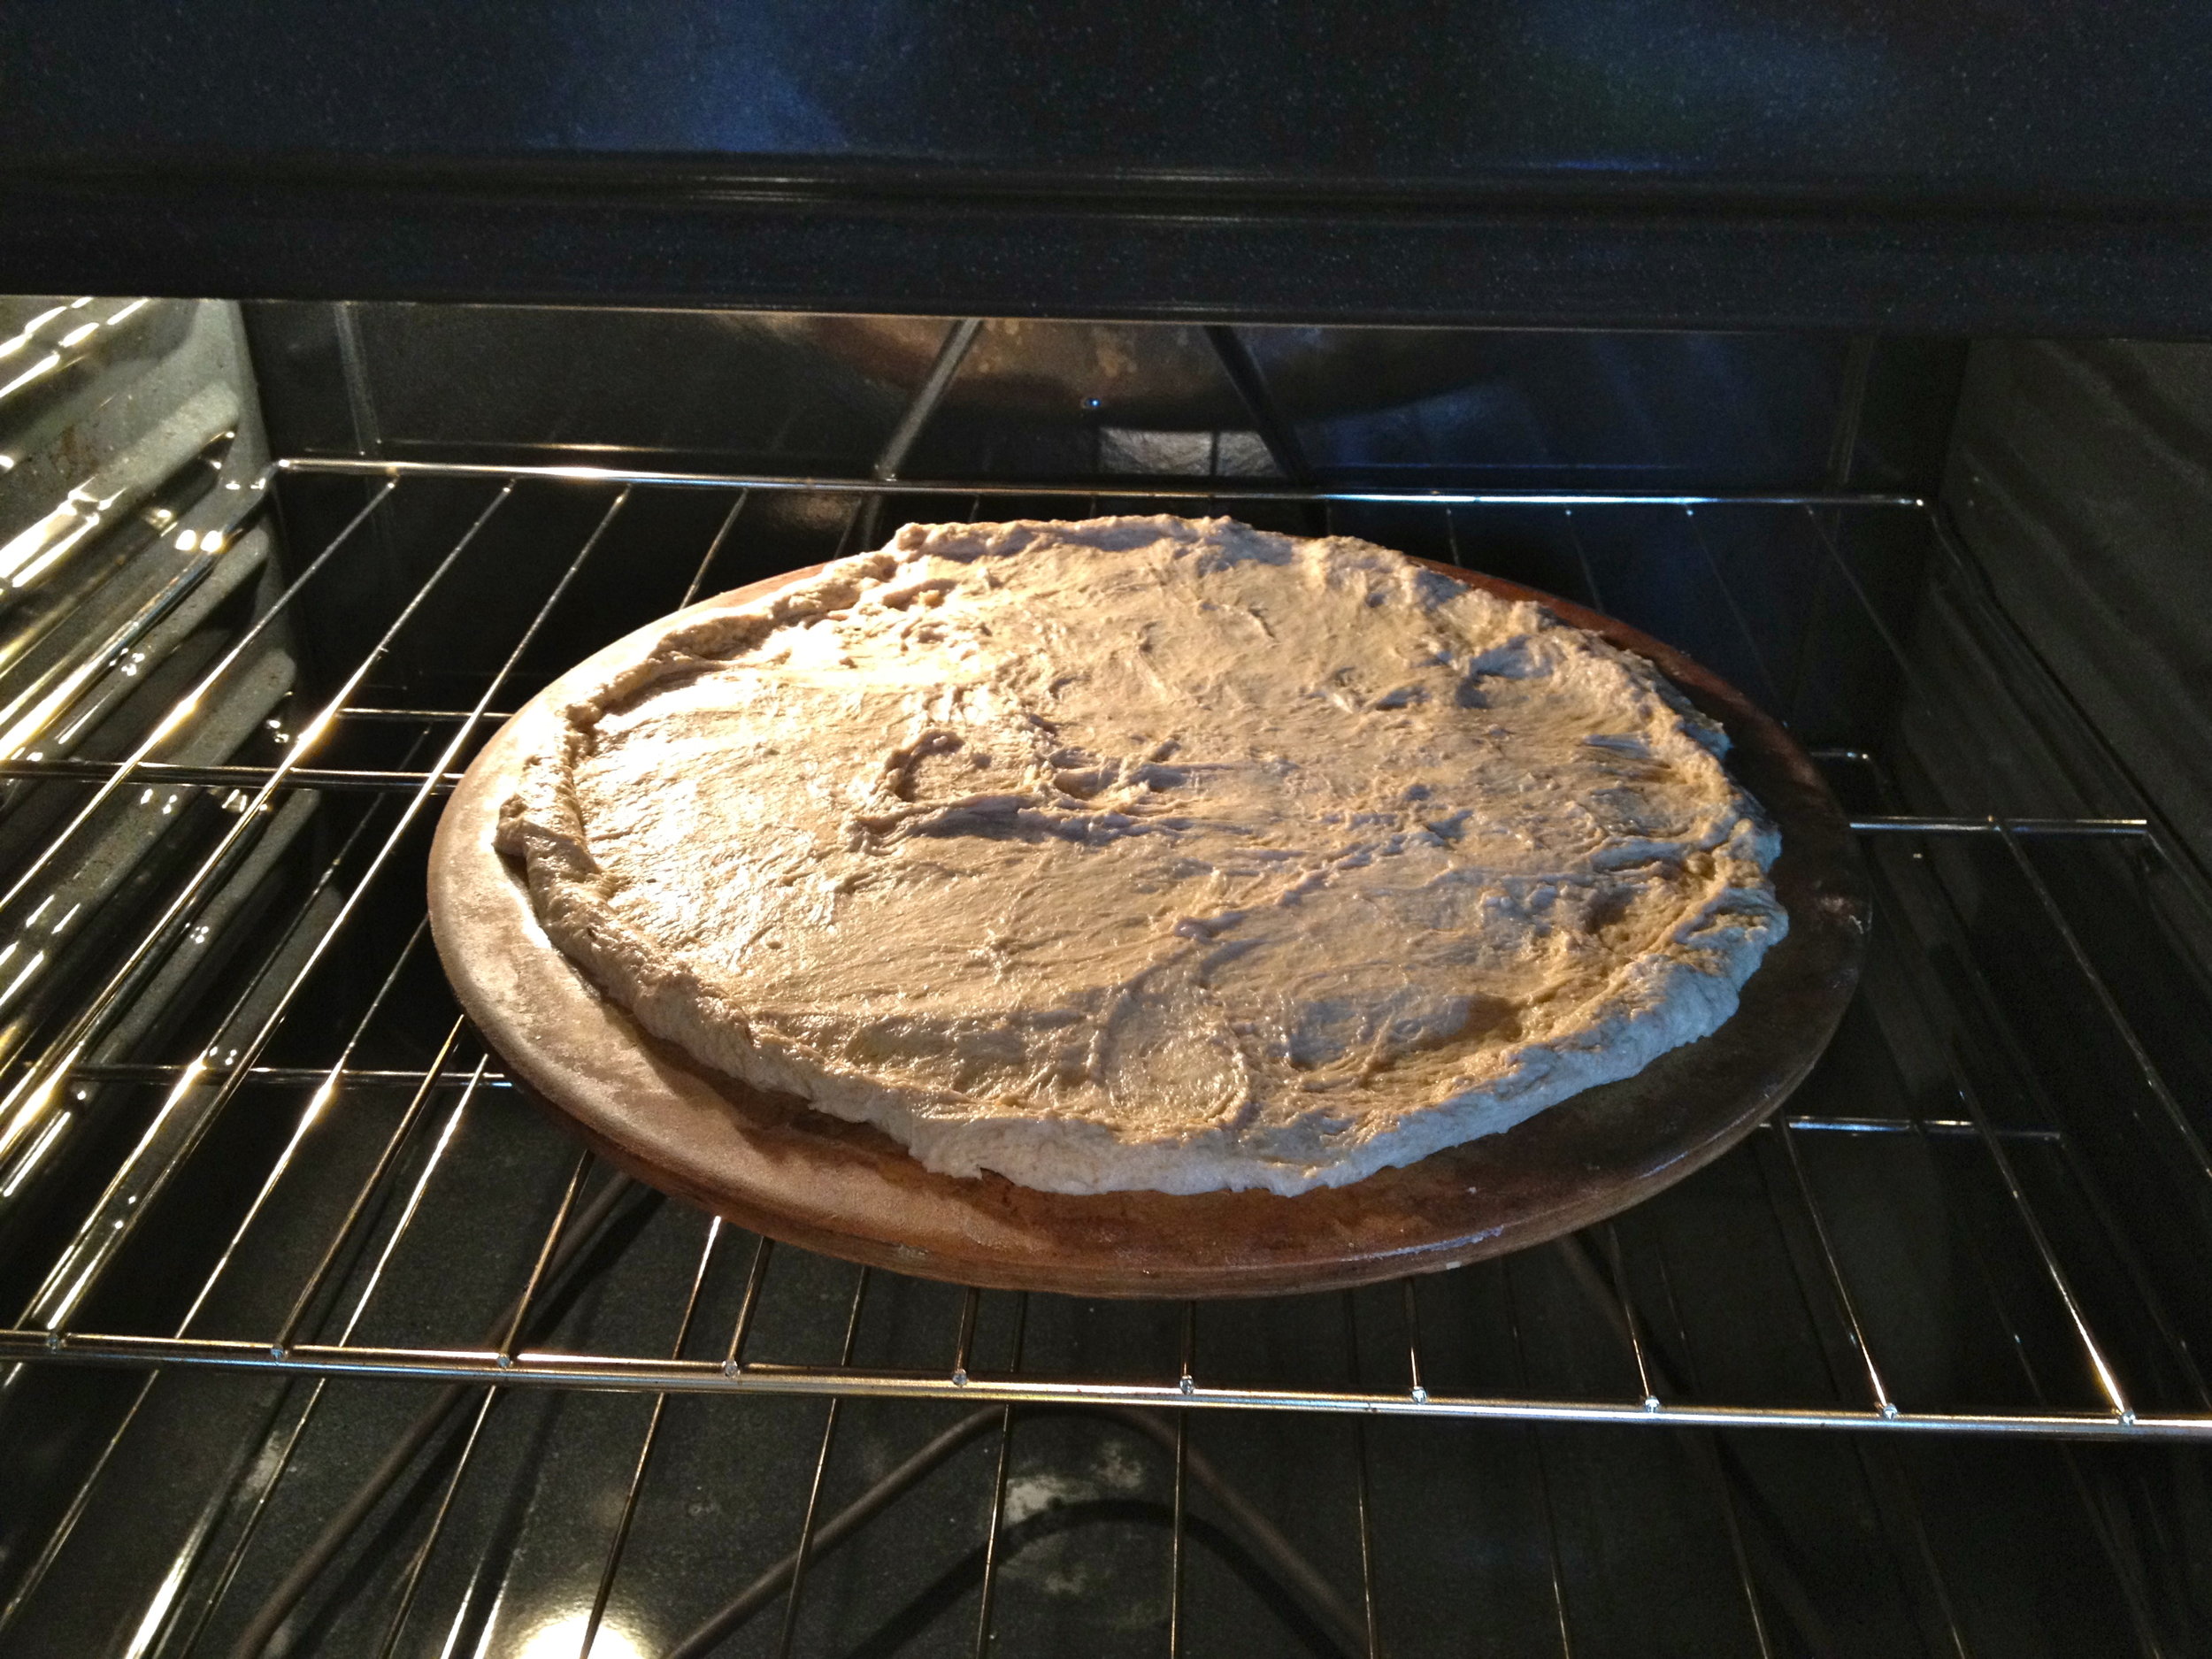
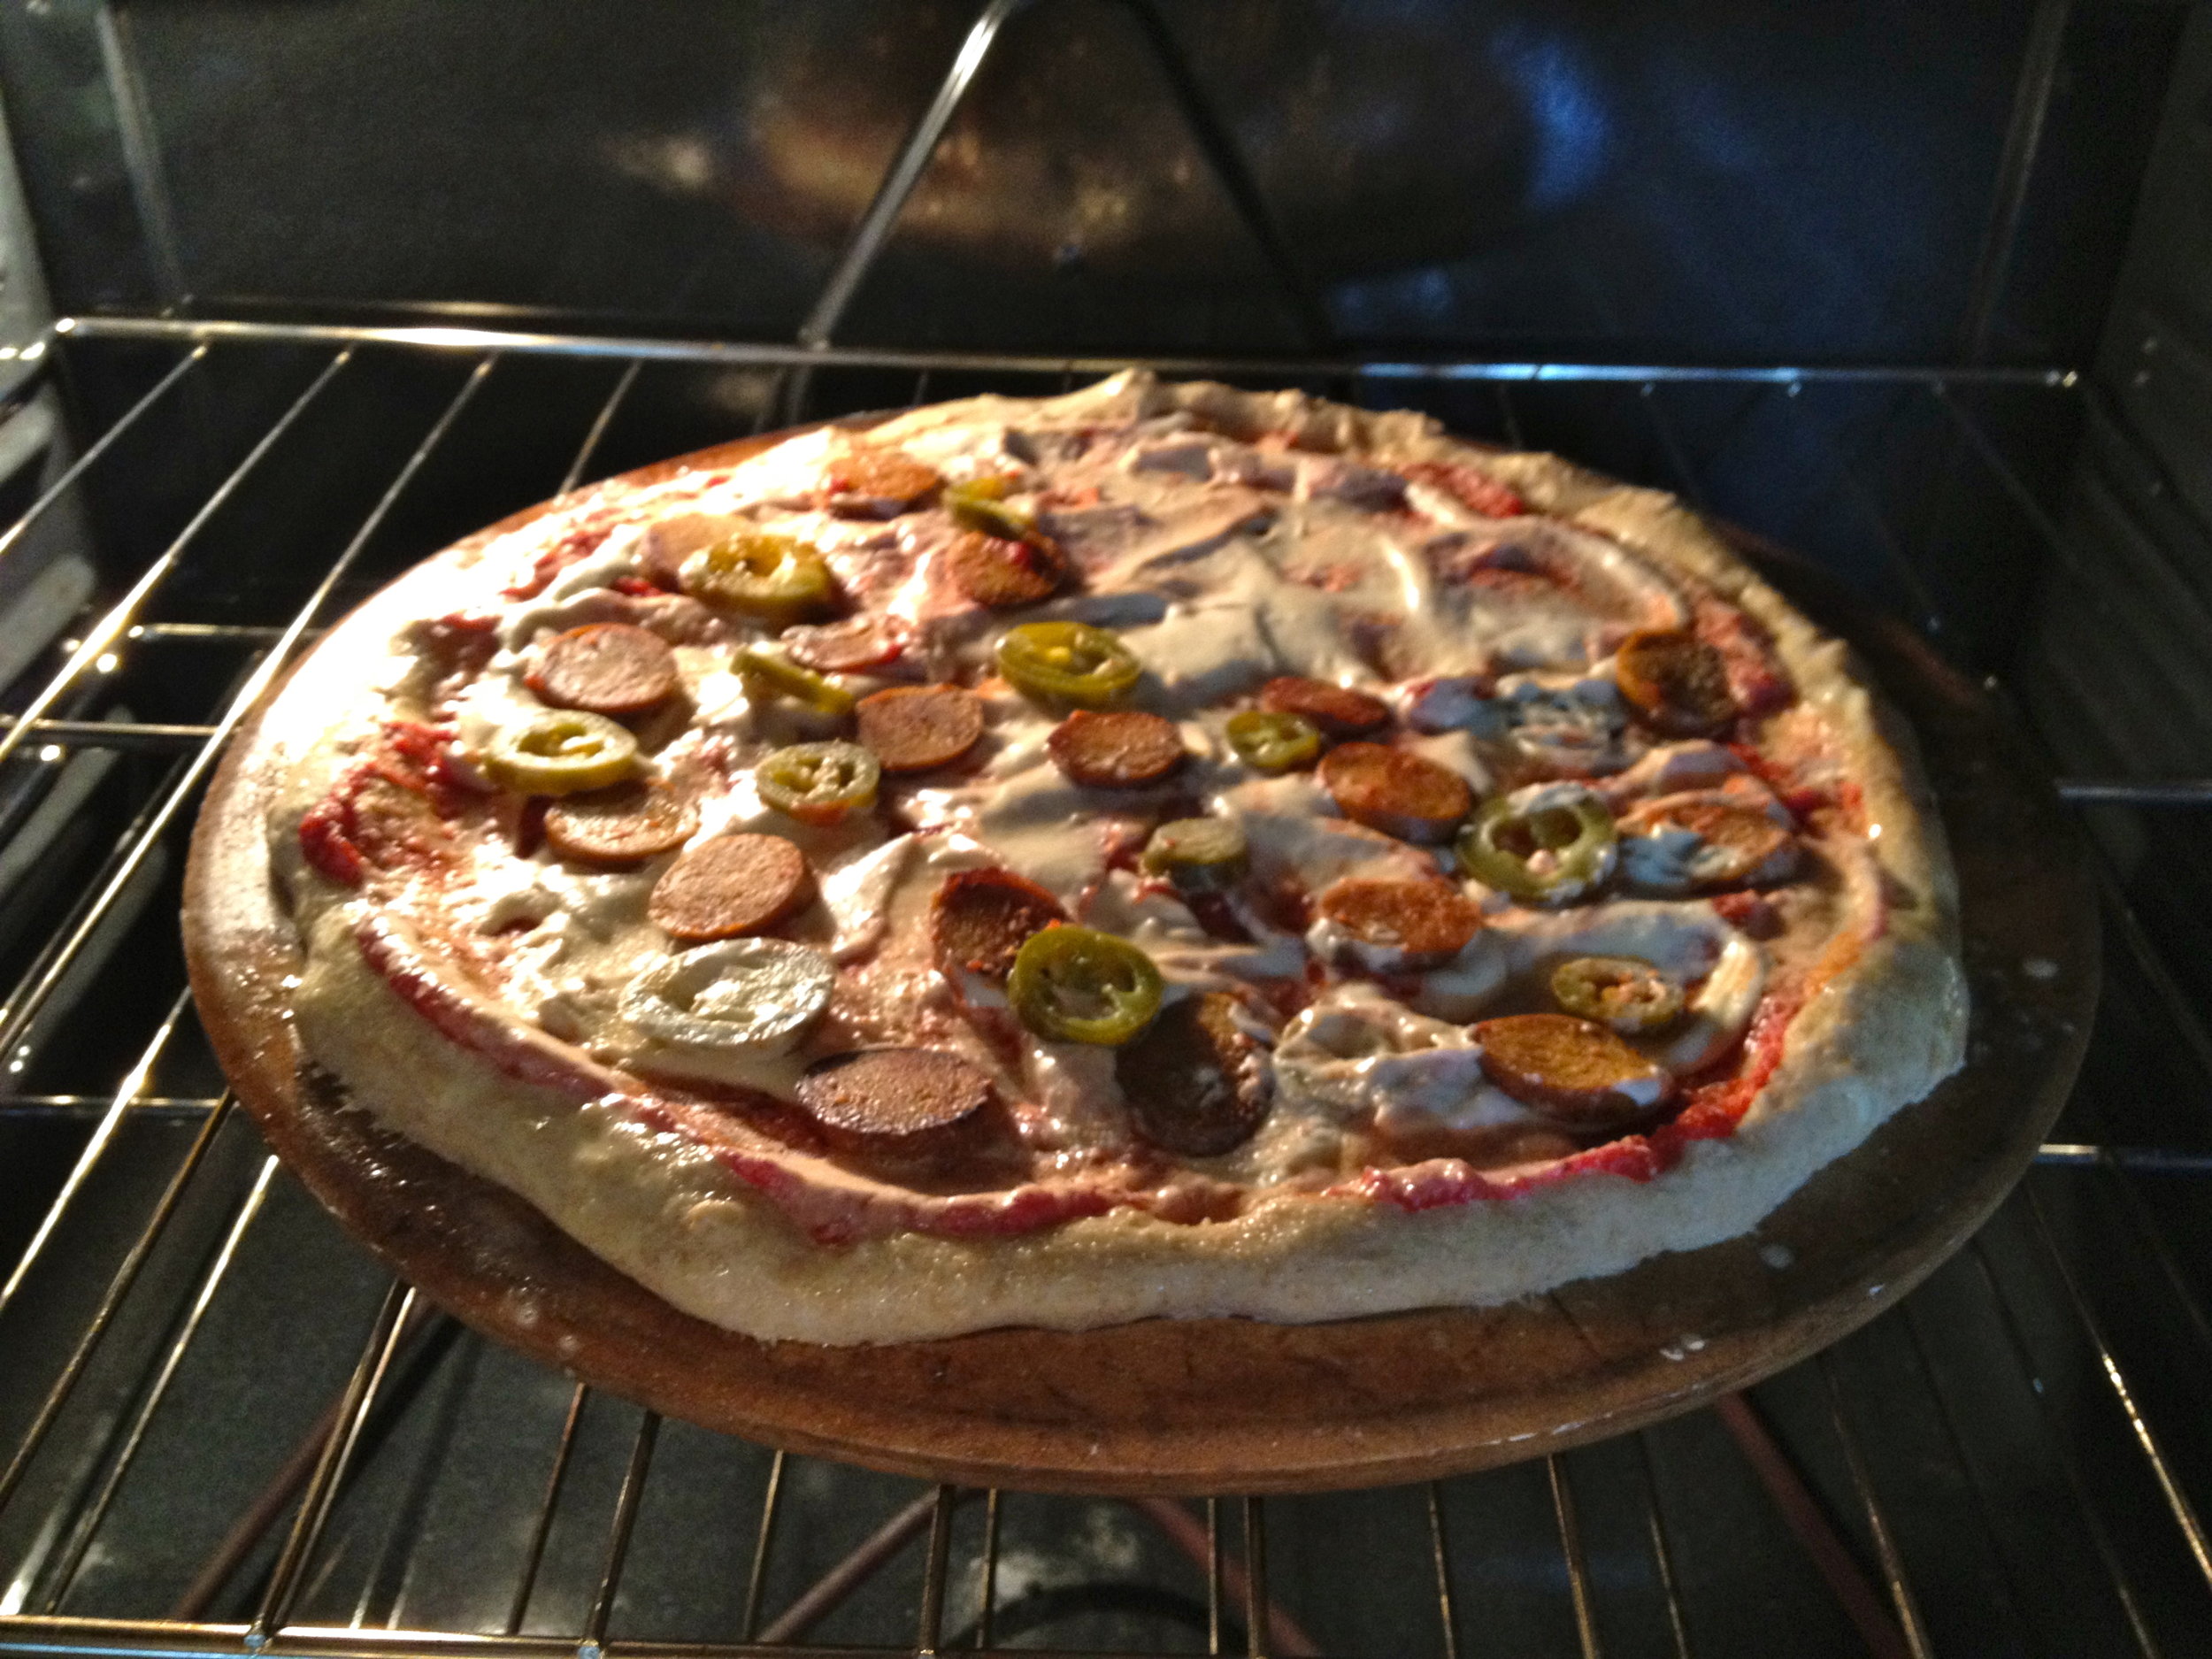
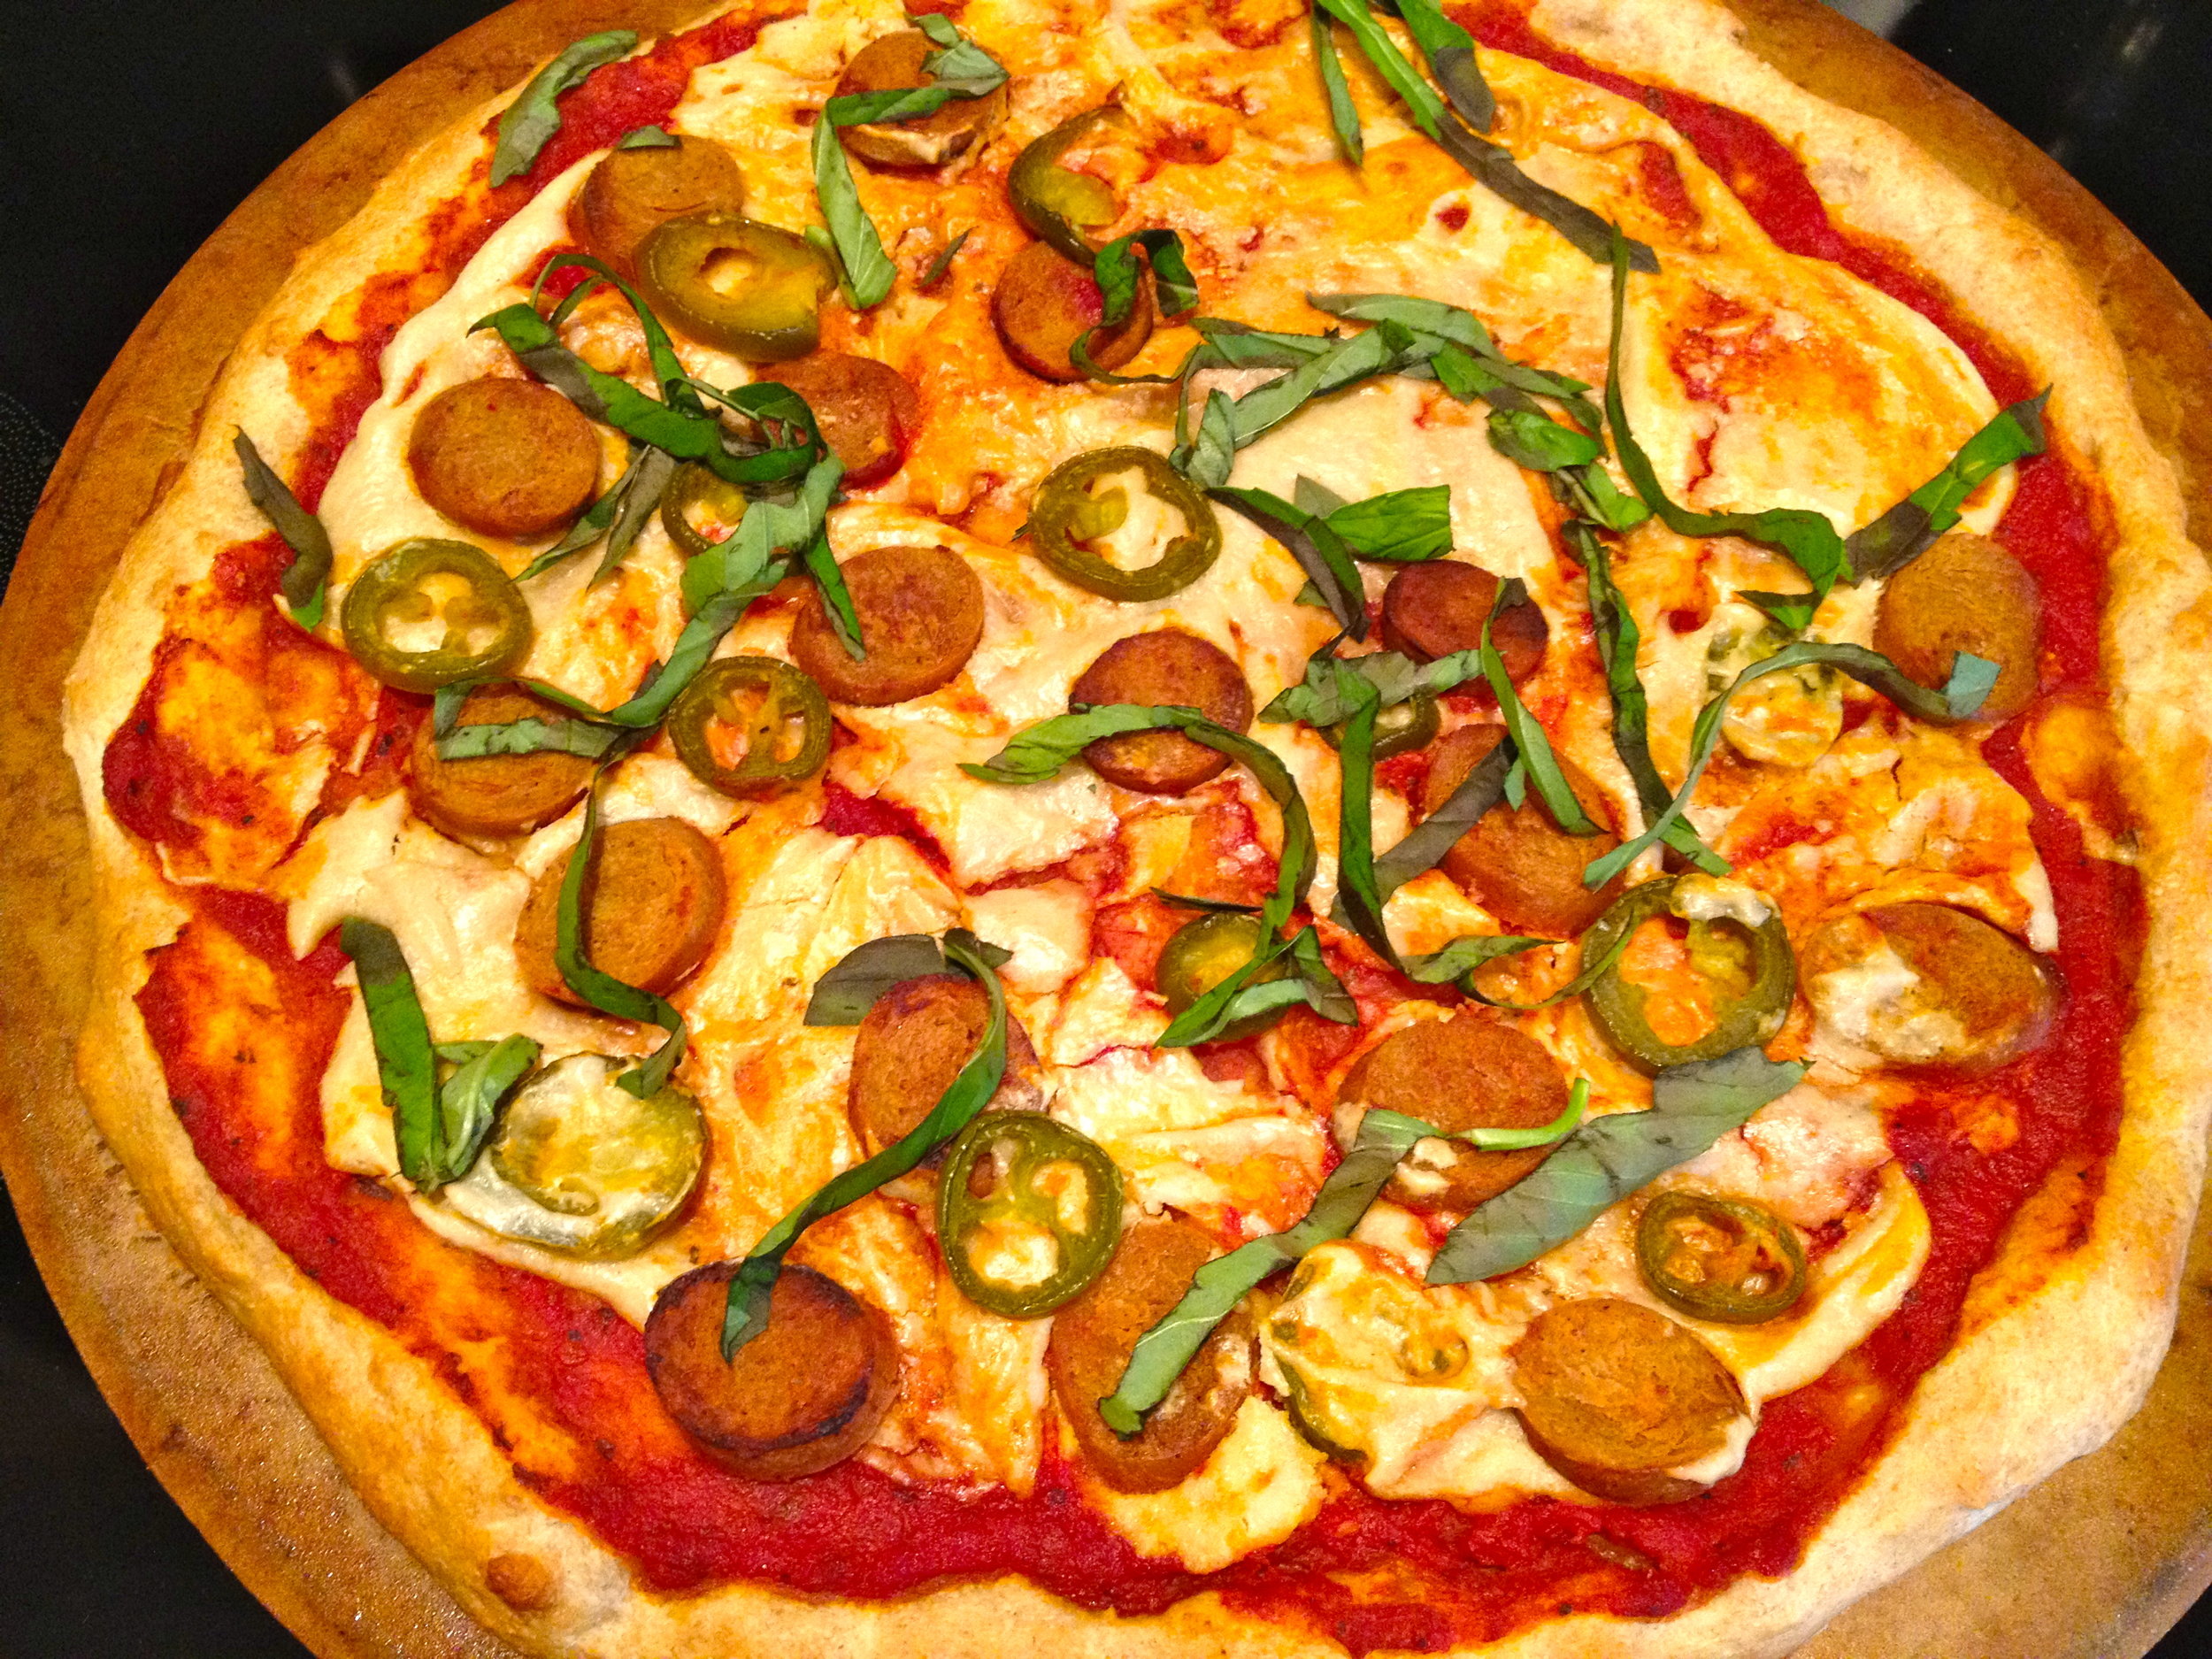
We used this on our pizza for dinner tonight and here is an example of how to use it:

Bake your crust for about 6 minutes before adding toppings.

Layer pizza sauce, then cashew cream, then any other toppings you like and bake for 15 more minutes or until crust begins to brown.

ENJOY!